
For the first half of my career as a lifter, I avoided deadlifts. Why? They were hard, and I just really didn't want to do them. Sound familiar?
Then I decided that my back needed to be brought up to the same level as the rest of my body, and consistently started incorporating deadlifts into my workout programs. When I did my first series of natural pro shows in 2010, the judges couldn't believe the changes I'd made to my back size and density.
I researched proper form and learned from some of the best people I know, including Ben Esgro, Mike Zourdos, Ph.D., and USAPL World Team head coach Matt Gary. I'll use those same lessons to teach you how to deadlift safely and efficiently using both the conventional and sumo stance.
Whether you're into powerlifting, bodybuilding, or are an all-around fitness enthusiast, the deadlift is powerful medicine for building muscle, and it's worth taking the time to master it.
Conventional style and sumo deadlifts require different techniques. How do you know which exercise is best for you as a lifter? Try both, stick with the one that feels stronger and safer, and have someone who knows their stuff look at your form.
Check out the video to see examples of how to do each exercise properly. There are plenty more deadlift variations out there, too—mix it up to make your workouts more well-rounded.
How To Deadlift (Conventional)
1. Plant Your Feet
How wide you plant your feet in a conventional deadlift is going to vary based on your unique body. But in general, it's best to stand in the position where you can generate the most power. That is typically the width where you would be able to jump the highest in a standing vertical leap.
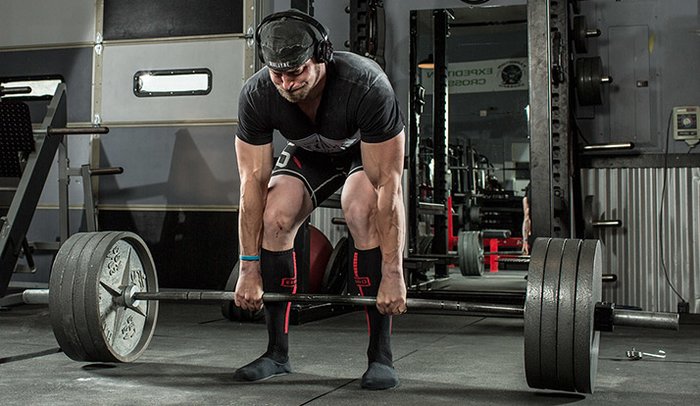
2. Get Set Up
Hinge at the hips to lower yourself and grip the barbell. Your hand position should be just outside of your shins. If you grip too wide, you'll have to pull the bar farther than necessary, and you can put excessive stress in places you don't want it. So keep your arms as close to your shins as you can.
Optimal starting position will be with your shins at 90 degrees to the ground and your shoulder blades over the bar. This will ensure that you pull the bar in a straight line and generate maximum force.
Before you begin the movement, take in a deep breath and brace your abdominal wall. This is going to protect your spine and enable you to generate more force.
3. Engage Your Lats
Before you start the movement, you also want to pull the slack out of the bar by engaging your lats. Many people jerk the barbell off the ground violently, but this is incorrect and unsafe. Doing this is likely to put whip into the bar, cause your lower back to round, and prevent you from keeping a straight bar path.
4. Pull
Initiate the pulling movement by thinking about trying to bend the bar toward you. That will further engage your lats. You should feel really, really tight and tense from head to toe at this point.
To get the weight moving, think about pushing the floor away. It's actually quite similar to how you perform a leg press, if that helps you imagine it. You've got your thighs close to your abdominal wall, and you're pressing the weight away from you. But instead of the leg sled, you're pressing the ground away from you, using your glutes and hamstrings (the muscle on the back of your thigh).
5. Squeeze Your Glutes
As soon as the weight leaves the ground, think about squeezing your glutes and driving your hips forward, not moving the weight up. This will enable you to keep a straight bar path and lock out more effectively.
6. Lock Out
As you lock out, stand erect, but don't hyperextend your lower back. Just stand straight up and solidify your lower back.
7. Lower
Once you're locked out, don't just drop the weight, but don't lower it too slowly, either. Many people injure their lower backs by trying to lower the barbell too slowly, which puts a lot of torque on the spine. The easiest way to lower the bar is to unlock your glutes and let your hips drive back. Then, while still holding the bar, let it lower to the ground in a controlled fall along the same path it came up.
How To Sumo Deadlift

1. Find Your Foot Position
Foot positioning on a sumo deadlift is more variable than on a conventional one, but you should set up so that your shins end up at 90 degrees when you begin to pull. An easy way to position your feet properly for this exercise is to look into a mirror, get into your starting position, then play around with different foot widths. Find the one where your shins are at 90 degrees to start the movement.
For the sumo deadlift, you also have to point your toes out. How much will vary depending on your hip mobility and stance width, among other factors. If you point your toes forward, your knees will be in the way, and it'll be much harder to complete the movement. Your hand position should be a straight line from your shoulder down to the bar.
2. Get Set Up
The rest of the setup points for sumo are very similar to conventional. You want your shins at 90 degrees to the ground and your shoulder blades over the bar. Then, you breathe and brace, engage your lats, and pull the slack out of the bar.
3. Engage Your Lats
As with the conventional deadlift, engage your lats to take out the slack and visualize bending the bar. This should automatically turn on your lat muscles—you'll feel it.
4. Initiate the Movement
Unlike in conventional deadlifting, where you want to initiate the movement by pushing the floor away from you, for the sumo deadlift you want to initiate the movement by thinking about spreading the floor apart.
5. Drive Your Hips
Once the barbell has left the ground, think about squeezing your glutes and driving your hips forward as you're pulling up, just as you would with a conventional deadlift. You should feel it in your glutes, hamstrings, and lats.
6. Lock Out
Stand straight with your shoulder blades drawn back but without hyperextending your spine, just like a conventional deadlift.
7. Lower the Bar
Lower the weight quickly but with control.
Deadlift Mistakes
The deadlift is one of the lifts most commonly performed incorrectly when strength training in the gym, and a lot of people have sore backs to show for their efforts. I don't want this to be the case for you. Exercise should make you feel better, not worse.
1. Rounding the Back
The biggest and most dangerous mistake I see is rounding the lower back, also known as spinal flexion. This creates uneven pressure on the discs, and is likely to lead to a back injury.
2. Separating From the Shins
Another common mistake is allowing the bar to drift away from the shins. The farther away from your body the bar gets, the longer the lever, and the greater the torque on your lower back. Keeping the bar as close to your shins as possible ensures that you can apply the maximum amount of force and move the barbell more effectively and safely.
3. Failing to Engage the Lats
People often fail to engage their lats and take the slack out of the bar. This increases the whip that goes into the bar, which then increases the likelihood that it will separate from your shins, and can make it difficult to lock out. It also prevents you from building lat strength with this move.
4. Locking the Knees Too Early
Here's one we've all been guilty of at one point or another: locking your knees too early, sending your hips up high. While locking your knees earlier will help you get the bar off the ground faster, it will make locking out much more difficult because the bar will have separated from your shin, increasing the torque. This is very common during max attempts, or when someone is trying to lift a weight that's too heavy for them.
5. Dropping the Hips Too Low
Another critical mistake I see is people dropping their hips too low and basically trying to squat the bar off the ground. Let's be clear: The deadlift is not a squat! The power comes primarily from your posterior chain—hamstrings, hips, and back—not the anterior chain like your quads, as in a squat. People who have longer legs won't be able to get a lot of quadriceps into the movement, especially on a conventional deadlift, and they'll find themselves hitting a ceiling pretty quickly.
But just as importantly, to exert the maximum amount of force, the shins have to be perpendicular and the shoulder blades have to be over the bar. If you drop your hips and lean too far back, your shoulder blades will be behind the bar. This means you will have to come forward to get them back in proper position. If you come forward as you start the movement, you are much more likely to have the barbell separate from your shin, lock your knees too early, and round your lower back.
Bar Speed
It's worth noting that conventional and sumo deadlifts won't feel the same in terms of speed. The conventional lift is typically going to be very fast off the floor and slower to lock out. On the other hand, a proper sumo deadlift is slower off the floor but fast to lock out.
This means the "sticking points" of the lifts are usually different. Once you start to lift heavier weights or think about competing, you may need to change which accessory exercises you use to solve those sticking points.
Touch-and-Go, Or Reset?
While many people like to perform these touch-and-go during a workout, I do not. I see too many people bouncing the barbell, and with each rep, they get less and less tight and get in a worse and worse position.
I recommend taking a split second to let the bar settle, make sure you're in a good position, and restart the movement.
Equipment
Just as I noted in my squat and bench press tutorials, equipment can make a big difference in deadlifting performance.
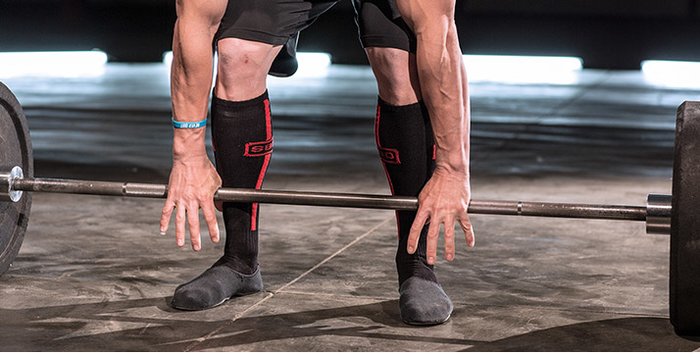
Footwear
Footwear is very important for deadlifting. You're looking for three things:
- A lot of grip
- A flat sole
- A build that's low to the ground
The lower to the ground you are, the shorter the distance you have to pull the bar, and the better your deadlifting form will be. If you use a shoe with a raised heel, you'll have to raise the bar farther.
For that reason, I definitely don't recommend squat shoes for this kind of strength training. A flat shoe also encourages a neutral spine.
I also don't recommend sneakers, running shoes, or other popular cushioned footwear. They're probably the worst things a lifter can wear. You want something with a hard sole. A sneaker sole is very soft, and you'll lose energy transfer when you deadlift.
The heavier the weight you're pulling, the more important it is to be rooted to the ground. This is why I recommend things like deadlift slippers, wrestling shoes, or Chuck Taylors.
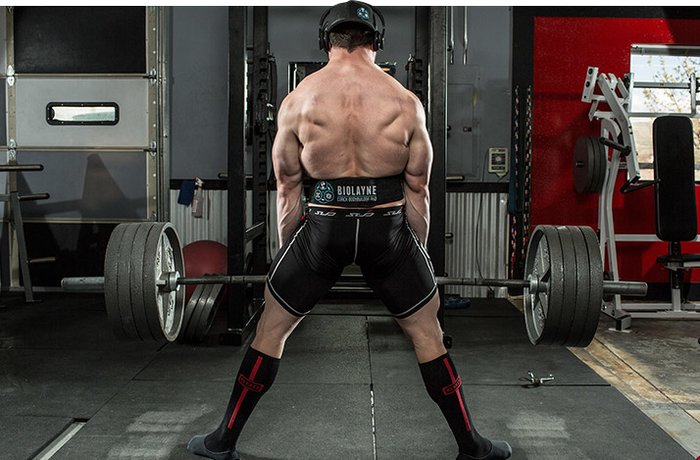
Belt
As with the squat, a sturdy weight belt can be helpful for your deadlift workout because it gives you something to brace your abdominal wall against and keeps you more upright as you complete the movement.
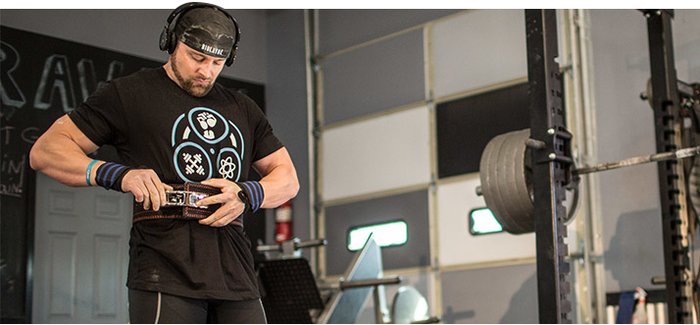
As I discussed in my guide to the squat, most people wear their belt too low. I recommend wearing your belt just under your ribs, right where your abdominal wall pushes out when you brace for a lift.
Belt tightness is up to you. I don't recommend setting it so tight that you can't brace effectively while deadlifting. But you also don't want it so loose that it doesn't provide support. I recommend keeping it one notch off of the absolute tightest setting you can possibly go. I recommend a good 10- to 13-millimeter powerlifting belt.
A high quality lifting belts can help you set a new PR on squats and deadlifts or add some extra weight to your dips.
Socks
Maintaining a straight bar path is very important while deadlifting. It is also important to keep the bar as close as possible to your body. This means that if you're not wearing long socks or tights, you're going to scrape your shins; in fact, it may leave you bruised and bloodied. I recommend wearing either knee-high socks, tights, or long pants—provided they don't restrict your mobility.
Straps or Chalk
Another piece of equipment that can be useful is straps. Now, if grip strength is a problem for you and you're doing competitive powerlifting, by all means train without straps. But if grip isn't a problem, or you're just a bodybuilder who is looking to maximize muscle mass and doesn't want to worry about your grip, there's nothing wrong with strapping up.
If you're not going to use straps, I recommend using chalk. It will enable you to get a better grip on the bar, making it easier to complete the lift.
Don't Just Do the Deadlift, Practice It!
Deadlifting is a skill. That means it takes practice. The more you do it, the better you'll get at it. That may sound daunting, but it doesn't have to be.
I recommend starting light, focusing on bar path and the cues we discussed, and getting comfortable with the movement before you really start lifting heavier weights.
Remember: The deadlift is a high-reward movement, but it's also high risk if it's not done properly. I realize this is a lot of information to process at one time, so I recommend watching the video several times to pick up more tips. Then go set up, get tight, and move some weight!