Bench Big: How To Increase Your Bench For Size And Strength

Stop hiding those embarrassing bench numbers! It's time to get serious. Here are the coaching cues, assistance lifts, and correct programming to get you on your way.
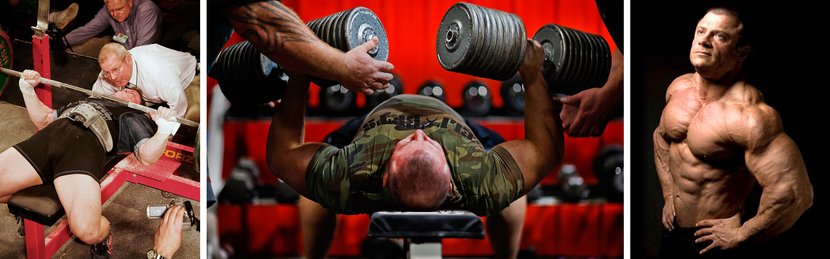
There is no denying that the bench press is the king of upper-body exercises. It is a matter of pride in the gym as well as the most common measure of your weightlifting acumen. We all want to bench big and most of us probably enjoy performing this exercise more than any other. The results we see from the bench press—slabs of beef on our pecs, shoulders, and triceps—can more than match our enthusiasm for the lift itself.
If the bench press is indeed all that and more, then why do so many people have tiny bird chests and a bench max that looks like an IQ score? Lying on a bench and heaving the weight around isn't enough.
Performing the lift correctly makes all the difference. And by "properly" I not only refer to using the correct form, but also proper weight selection, intelligent programming, appropriate assistance exercises, and the understanding of how technique changes affect the movement.
Are you ready to earn your master's degree in bench press? Here's everything you need to know. Study the techniques, apply the form, and you'll soon see vast improvements.
Form and Technique
The Setup
Because your setup is literally where you begin the lift, let's start there. Your setup will depend entirely on your primary goals.
If your goal is to lift as much weight as possible, then you'll use a powerlifting setup. To do it, lie down on the bench and grab the bar with an underhand grip. Slide backward along the bench and under the bar until your upper ab area is directly under the bar. Keep your upper body in this position and tuck your feet back under the bench directly underneath your hips. The balls of your feet should be in contact with the floor and your heels should be raised.

Your setup, or where you begin your lift, will depend entirely on your primary goals.
Maintain the foot position and slide your body back toward the bottom of the bench until your torso is in a comfortable position. As you pull yourself under the bar, tuck your shoulder blades and pinch them together. At this point your lower back should be arched quite high. Powerlifters want to maximize their arch because it not only decreases the range of motion but will also effectively increase leverage, allowing you to move more weight.
Ensure your hips are in contact with the bench and then dig your traps and upper shoulder blades into the bench. Pinching your shoulder blades back and together not only provides stability under heavy weight, it also helps to decrease the range of motion as it pushes your chest up and pulls your shoulders back. Maintain this position while you adjust your grip, unrack the bar, and perform your bench press.
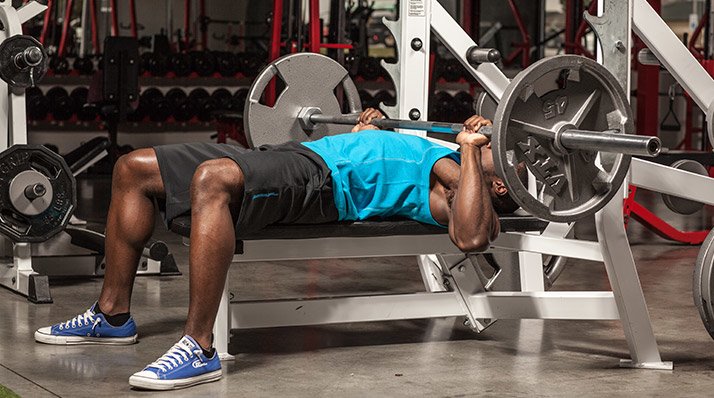
If your goals are hypertrophy and shape, you'll set up your bench differently. You'll set your feet first, but they can either be placed underneath your hips—as in the description above—or flat on the floor out in front of you. If you have difficulty keeping your hips on the bench while pressing, I suggest keeping your feet under your hips so you can still get a good degree of leg drive. Then simply lie back and dig your traps into the bench for stability.
As a bodybuilder, you want your muscles to go through a big range of motion, so there's no need for a big arch. Keep your torso on the bench and go for it.
Leg Drive
A lot of lifters are confused about what leg drive is and how to use it effectively. Fortunately, it is simple. Whether you lift for weight or hypertrophy, keep your feet firmly on the floor and maintain a moderate amount of tension in your legs as you bring the bar to your chest.
When the bar touches your chest, push hard with your legs to help drive the bar upward. Using your legs will help to pop the bar off your chest and the added momentum will assist you to move the bar through your sticking point and all the way to lockout.
Whether you lift for weight or hypertrophy, keep your feet firmly on the floor and maintain a moderate amount of tension in your legs.
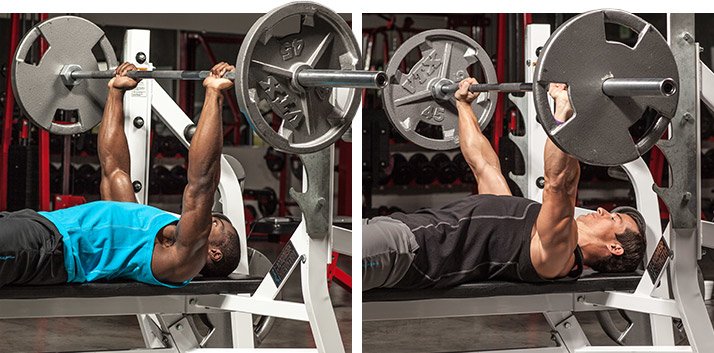
Bar Path
The most mechanically efficient bar path is a gradual arc from just below your nipple line at the bottom of the movement to roughly above the base of your neck at lockout. The exact points will vary slightly, depending on your individual leverages. This particular groove, though, will allow you to bench the greatest weight possible.
To begin, tuck your elbows in toward your sides as you lower the bar. Aim to touch the bar just below your nipple line. The lowering of the bar must be performed in the correct groove because your body will naturally want to follow that same path as you press upward. The concentric and eccentric portions of the bench press should appear as mirror images of each other.
As you begin to drive the bar from your chest, continue to keep your elbows tucked until the bar approaches the midpoint of the movement. Then gradually begin rotating your elbows out until they are fully flared at lockout.
As you learn the proper technique, perform the bench press carefully. Flaring too fast or too much too soon will send the bar back over your head and into the racks. Too much elbow flare can also put a lot of stress on the shoulder joint.
This technique can also be effectively employed when you hit your sticking point on a difficult lift. Flaring allows you to straighten your arms to a small degree without the bar actually having to move upward.
Elbow and Wrist Position
Tucking your elbows in at the bottom of the movement not only decreases shoulder rotation and stress from the shoulder joint, but it also takes pressure off of the pec tendon, decreasing the chance of a pec tear and allowing you to lift more weight by improving your leverage.
When the bar is at your chest, your elbows, wrists and the bar should all be in a perfectly straight vertical line. Do not allow the wrists to bend backward so the weight sits behind your forearms. This position places a lot of stress on your wrists and can negatively affect your leverage. In several cases, big benchers have actually broken their arms doing this.
Grip
Generally speaking, there are three different ways to grip the bar: full grip, with your thumb wrapped around the bar; false grip, with your thumb behind the bar; or you can grip the bar with your thumb held straight out along the bar. Regardless of which grip you use, you should always attempt to squeeze the bar as hard as possible and push out to the sides as if you're trying to pull the bar apart. Squeezing the bar will increase your ability to engage your triceps and allow you to bench more weight.
There are three different ways to grip the bar: full grip, with your thumb wrapped around the bar; false grip, with your thumb behind the bar; or you can grip the bar with your thumb held straight out along the bar.
While most lifters realize that a wider grip will focus more on the chest and that a close grip hits the triceps hard, few people realize that how you grip the bar affects muscle recruitment. Selecting the appropriate grip is critical to ensure you work with—and not against—your own strengths and leverages. Changing the position of your thumb affects the position of your elbows.
The full grip rotates your hand outward to a greater degree thus rotating your elbows out and therefore making you use your chest to push the weight. If you use the thumb-less grip, your hands are turned in more toward the body, making it easier to tuck the elbows on the descent. With this grip, you can also better recruit your triceps. Gripping with the thumb along the bar is a compromise of the two.
So a lifter with a comparatively stronger chest—or one looking to work the chest to the highest degree possible—would benefit most by employing a wide, full grip. On the other hand, a lifter with extremely strong triceps, would be able to lift the most weight with a relatively narrow, thumb-less grip.
Assistance Exercises
The proper selection of assistance exercises is determined by the lifter's strengths and weaknesses. Maintaining balance among your muscle groups is vital to preventing injury, and will allow you to lift more weight.
Identifying the weak parts of your bench press should be relatively easy, assuming the problems aren't technique-related. If you have difficulty locking out the weight at the top of the movement, it's probably because your triceps are relatively weak. If you struggle to move the weight at the bottom of the movement, your chest is weak.
If the bar is barely leaving the chest or you can't push it up at all, it's probably related to lat weakness—unless, of course, it's ego-related. If you unrack the bar and it staples you to the bench, odds are you aren't being realistic. Take some weight off.
Strengthening Your Lockout
For many bench pressers, the top portion of the lift can be the most difficult. You can get it off your chest and move the bar up, but finishing can be a huge problem. Here are things you can do to fix that stubborn lockout.
Reverse Band Presses
The exercise I prefer most for fixing a lockout weakness is reverse band presses. Even though the exercise focuses on your lockout, you can still work through an entire range of motion and press the bar in your normal groove.
This movement will also teach you to push the bar from your chest explosively. If you fail to be explosive, you'll lose the momentum from the bands and locking out will be damn near impossible.
To do this exercise, loop a pair of strong bands around either side of the top of a power cage and then hook them around the ends of the bar where you would normally place the collars.
This setup will typically take about 150 pounds off the bar when it is at your chest and will get heavier as you get toward lock out.
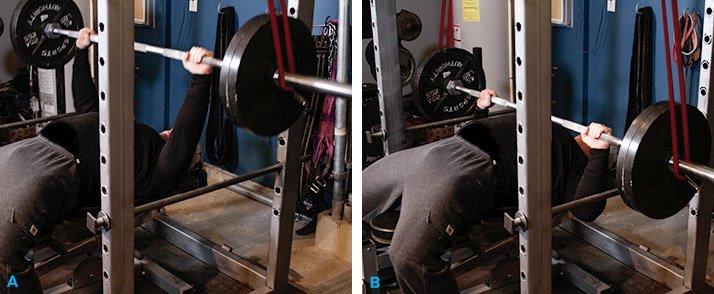
Reverse Band Presses
Board presses
Board presses are another effective tool for fixing your lockout. Depending on your arm length and where specifically the bar stalls when you press, you will use between two and five boards. Typically the "boards" are constructed from 2 x 6 pine boards usually nailed, screwed, or glued together to achieve the desired thickness.
Board Press
To perform this exercise, have a partner hold the boards on your chest while you bench. With the boards in place, you won't go through a whole range of motion and will instead focus on finishing the lockout.
If you don't have someone available to hold the board for you, I found that the boards can be easily held in place with a single knee wrap tied around you.
Strengthening the Bottom Portion of the Press
The lockout may not be your problem. Instead, you may struggle to lift the bar from the bottom portion of the movement. If that sounds familiar, try these techniques.
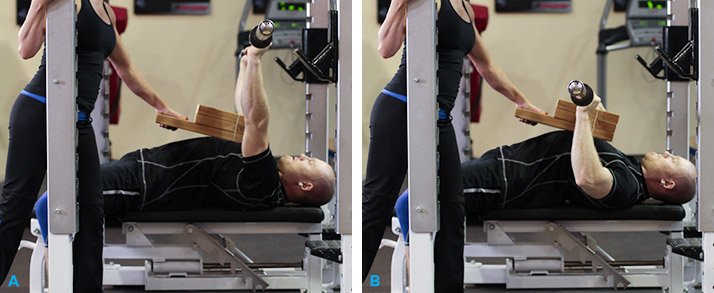
Dumbbell Bench
The ability to drive the bar off your chest largely comes from your pectoral muscles and lats. Any exercise that allows you to work through a greater range of motion will typically help improve the "pop" off your chest. I think doing dumbbell bench is a great way to address a relatively weak chest.
Dumbbell benching prevents the lifter from bouncing the bar off his or her chest and also allows us to work through a greater range of motion.
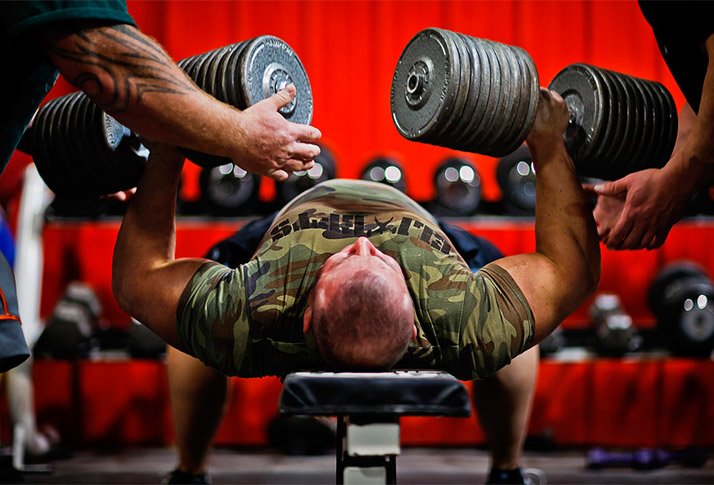
Dumbbell benching prevents the lifter from bouncing the bar off his or her chest and also allows us to work through a greater range of motion.
Cambered Bar
The cambered bar is also sometimes referred to as the "MacDonald Bar" in honor of legendary bencher Mike MacDonald, who often used this bar in his training. MacDonald once held every bench press world record from the 181-pound class all the way up to 242-pound class.
The MacDonald bar has a two-inch camber in it so you can lower the bar two inches below a standard bar. It's important to note here that because of the increased range of motion, you could easily injure yourself. So use caution!
You should also expect to start with significantly less than your normal bench, especially if your primary weakness in the bench is the bottom of the lift.
Programming
Effective programming for the bench press should include well-planned weight progression, sufficiently address and prevent overtraining, stimulate hypertrophy, and reinforce proper technique.
I frequently use the following program with clients who want to add pounds to their bench and mass to their pecs. I've seen lifters increase their bench by 20-50 pounds using this 16-week program.
The key to using this program effectively is starting with an accurate max. All too often, lifters overestimate their max or use a number they were able to do in high school, but can't manage now. It is essential to use a current, true max that you achieved using proper form.
Failure to find your current max will result in overtraining and a lack of progression. In plain English: You need to check your ego at the door if you want to get the most out of this program.
Example 16 Week Weekly Weight Progression

- Week One 5 sets of 10 reps at 60% of 1RM
- Week Two 5 sets of 8 reps at 65% of 1RM
- Week Three Five sets of 5 reps at 70% of 1RM
- Week Four 5 sets of 3 reps at 75% of 1RM
- Week Five 5 sets of 10 reps at 60% of 1RM
- Week Six 5 sets of 8 reps at 70% of 1RM
- Week Seven 5 sets of 5 reps at 75% of 1RM
- Week Eight 5 sets of 3 reps at 80% of 1RM
- Week Nine 5 sets of 10 reps at 60% of 1RM
- Week Ten 4 sets of 8 reps at 75% of 1RM
- Week Eleven 4 sets of 5 reps at 80% of 1RM
- Week Twelve 4 sets of 3 reps at 85% of 1RM
- Week Thirteen 5 sets of 10 reps at 60% of 1RM
- Week Fourteen 3 sets of 8 reps at 80% of 1RM
- Week Fifteen 3 sets of 5 reps at 85% of 1RM
- Week Sixteen 3 sets of 3 reps at 90% of 1RM