Well-developed, diamond-shaped traps look like pissed-off cobras, hoods up and ready to strike. You get them by hoisting a lot of pig iron and sweating your ass off. Abs are cool. Bis are impressive. But traps are a true strength status symbol.
So how do you take your traps from nice to nasty?
My Texas Trap-Saw Massacre program includes three workouts you'll do once a week for three weeks each. Each workout is dedicated to traps and nothing but traps, and assumes you're already squatting and doing deadlifts or training Olympic lifts that work your traps.
Each Texas Trap-Saw Massacre video tutorial includes former Dallas Cowboy linebacker, JJ Horne, and yours truly. Let's get started.
Texas Trap-Saw Massacre Workout, Phase 1

BodyFit
$6.99/month- 2,500+ expert-created single workouts
- 3,500+ how-to exercise videos
- Detailed workout instruction
- Step-by-step workout tips
- Training at gym or at home
- Access to Workout Plans
- Access to Bodyfit App
- Store Discounts
Already have a Bodybuilding.com account with BodyFit? Sign In

What comes with BodyFit?

- Instructional Videos
Don't risk doing a workout improperly! Avoid injury and keep your form in check with in-depth instructional videos.
- How-to Images
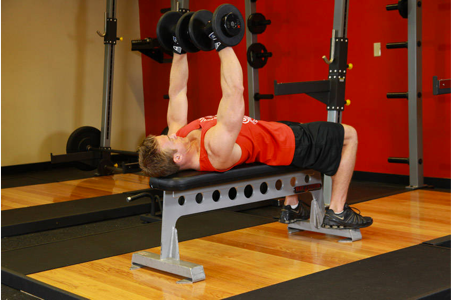
View our enormous library of workout photos and see exactly how each exercise should be done before you give it a shot.
- Step-by-Step Instructions
Quickly read through our step-by-step directions to ensure you're doing each workout correctly the first time, every time.
My Technique Keys
Farmer's Walk
From big leagues to bush leagues, the farmer's walk is a regular feature in strongman contests, which explains why professional strongmen have the most-developed traps in the world. The farmer's walk builds muscle quickly, decreases body fat, increases strength in core lifts, and improves conditioning—all in one simple but brutal exercise.
This exercise hammers all the muscles in the upper back, but the traps take the brunt. To carry this big of a load, your traps must work together to keep your shoulder blades together and down, and stabilize your shoulder girdle. Traps really thrive under heavy isometric tension, and the farmer's walk is the king of isometrics!
Training Tips: Use straps with this exercise. You never want to let grip strength limit your trap development. Perform your farmer's walks for 30 seconds, carrying as much weight as you can and covering as much distance as possible at a brisk pace. Total carrying time is more important than distance traveled.
Bonus Tip: If you don't have access to farmer's walk implements, use a trap bar, dumbbells, frame carry, or short barbell. Strap up whatever you have and carry that load!
Hise Shrug
J.C. Hise is considered by many physical culturists to be the father of U.S. weightlifting. Hise, the cruel genius who spawned the 20-rep squat program, also fathered one of the most effective trap-building exercises of all time, the "Hise shrug."
The Hise shrug is performed by putting a barbell across your shoulders like you're going to squat. But instead of squatting, you shrug the barbell up and down. Simple. Painful.
Training Tips: Immediately after finishing your farmer's walk, complete the superset by doing your Hise shrug on a standing calf raise machine. This approach offers a huge advantage over doing your Hise shrugs with a barbell because it allows you to rest your grip. You also don't have to engage stability muscles like you do during the farmer's walk, so you're able to focus on blasting your traps.
Position yourself in the standing calf-raise machine. Shrug your traps up by trying to touch your shoulders to your ears. Hold this top position for a count of three to increase time under tension. Let the weight come all the way down and hold the bottom position briefly. Repeat this sequence for 8 reps. Go as heavy as possible, reducing the weight as needed in the two subsequent sets.
Bonus Tip: If you don't have a standing calf raise machine, a hack squat machine or any other padded squat machine with neutral shoulder pads will do the trick.
Face Pull
In the last decade, face pulls have become one of the go-to "prehab" exercises elite strength athletes perform to keep their shoulders healthy. Properly performed, this exercise can do wonders for your posture. It also can keep the shoulders healthy and help build neglected mid-traps.
Training Tips: This isn't a power movement, so don't bother doing cheated face pulls with a shortened range of motion. That might build your ego, but it ain't gonna do diddly for your mid-traps.
Perform the face pulls on a pulley station with the rope at approximately neck level. Grab both ends of the rope with your palms facing each other. Step back so you're supporting the weight completely with your arms, which should be stretched out before you.
From this position, pull your shoulder blades together, then pull the center of the rope toward your face as you pull the ends of the rope apart. You should finish with your arms in what looks like a double biceps pose. Hold this position for one second. Repeat for 12 reps.
Bonus Tip: DO NOT shrug up your shoulders during your face pulls. This will negate your mid-trap and postural development.
Incline Dumbbell Shrug (Middle Back Shrug)
Most gym goers have tried dumbbell shrugs, but very few have done them on an incline. The incline dumbbell shrug is one of the simplest yet most effective mid-trap builders. I learned about it from the late Paul Kelso, legendary iron-game author of Kelso's Shrug Book; Powerlifting Basics, Texas Style; and other works.
At most gyms, incline benches are set at approximately 45 degrees. But if you do this exercise at that steep of an angle, you'll mostly work your upper traps. To target your neglected mid-traps, perform the shrugs on a 30-degree incline.
If you can't get an exact measurement of the incline, err on the lower side. Lay your chest down on the 30-degree incline bench and, using a neutral grip, shrug up and hold the movement at the top for a count of three. Repeat for 12 reps.
Bonus Tip: If dumbbells are not available, perform the shrugs with a barbell or cables.
Banded Y-Raise
I picked up this movement from Jim Stoppani's book Encyclopedia of Muscle & Strength. I've seen some of the biggest, strongest men in the world scream like babies when they performed it. The combination of people's typically disproportionate lower traps and the variable resistance caused by the band is enough to make a big man weep!
Training Tips: Wrap a resistance band around a stable structure so both ends of the band are right below your shoulder. Without flexing your arms, extend them straight up as high as possible so that at the end point they form a 30-degree angle with your head. Hold this position for a count of 2 and repeat for 12 repetitions.
Bonus Tip: Don't use your shoulder to shrug the weight up. This is not a power movement, it's a feel movement. Pay attention to what you're doing.
Next Step
Do this workout once a week for the next three weeks in addition to your normal routine.
Texas Trap-Saw Massacre Workout, Phase 2
You're going to be doing some of the same movements you did in Phase 1, we just brought it up a notch so you can keep building those traps.

BodyFit
$6.99/month- 2,500+ expert-created single workouts
- 3,500+ how-to exercise videos
- Detailed workout instruction
- Step-by-step workout tips
- Training at gym or at home
- Access to Workout Plans
- Access to Bodyfit App
- Store Discounts
Already have a Bodybuilding.com account with BodyFit? Sign In

What comes with BodyFit?

- Instructional Videos
Don't risk doing a workout improperly! Avoid injury and keep your form in check with in-depth instructional videos.

- How-to Images
View our enormous library of workout photos and see exactly how each exercise should be done before you give it a shot.

- Step-by-Step Instructions
Quickly read through our step-by-step directions to ensure you're doing each workout correctly the first time, every time.
My Technique Keys
Farmer's Walk
You're going to increase your time under load by 15 seconds, and start with the weight you finished with at the end of the third week of Phase 1. Keep your shoulder blades together and down and to stabilize your shoulder girdle. And don't be shy on the weights. Load up! Take small steps to stop the implements from swinging excessively. Strap up and go!
Hise Shrug
Your goal is to start with what you finished Phase 1 with, the kicker is you are performing four more reps this session. Reduce weight as needed in the second set. Make it your goal to add weight weekly. If you train in a bare-bones facility, you can always do these with a barbell!
Banded Y-Raise
Do this exercise just like you did it in Phase 1, except this time you will superset it with straight arm dip shrugs. Wrap a resistance band around a stable structure so both ends of the band are right below your shoulder. Without flexing your arms, extend them straight up as high as possible so that at the end point they form a 30-degree angle with your head. Hold this position for a count of two and repeat for 12 repetitions.
Never sacrifice technique, but as your strength improves you can move up to a stronger resistance band or tie a knot in the one you have been using for increased resistance.
Straight-Arm Dip Shrug
This new exercise is another Jim Stoppani, Ph.D., favorite and an excellent lower-trap strengthener. By strengthening your lower traps, you will insure complete trap development, help stabilize your scapula, and decrease the likelihood of shoulder pain from strength training.
Training Tips: Perform theses shrugs for 15 reps immediately after the banded Y-raises. Support your body on a parallel dip stand like you are going to perform traditional dips, with your elbows just shy of full extension. Without bending your elbows, let your body sink as low as you can. Intentionally use your lower traps to pull your shoulder blades down, which will raise your body up. Raise your body as high as possible, then lower and repeat.
Gittleson Shrugs
This upper-trap exercise comes from legendary strength and conditioning coach Mike Gittleson. Gittleson was brought in by the NFL to minimize concussions, and he used this and other exercises to strengthen players' necks and traps as a first line of defense against this brain injury.
Training Tips: Sit on a bench and grab the side just behind your hips with the hand you're not using to do the shrugs. This will help you stay tall with good posture. Grab a dumbbell with the other hand and allow that arm to drop as low as it can toward the floor to stretch your upper trap. Shrug up as hard as possible while bringing your ear to your shoulder.
Incline Dumbbell Shrug
In Phase 1, you finished with 12 reps. Start Phase 2 with the weight you finished with—but now do 3 sets of 15 reps and increase the weight each workout.
Half-Mile Carry
Keep track of your time as you do this finisher. Go heavy and use straps. Drop weight if necessary to finish the half mile.
Next Step
Do this workout once a week for the next three weeks in addition to your normal routine.
Texas Trap-Saw Massacre Workout, Phase 3
Okay, this is the final phase. Your traps might be hurting, but they should be getting swole too—enough to keep those bad asses in their places. I've got a few new tricks for you, but it still comes down to hoisting that pig iron and filling those buckets with pure sweat.

BodyFit
$6.99/month- 2,500+ expert-created single workouts
- 3,500+ how-to exercise videos
- Detailed workout instruction
- Step-by-step workout tips
- Training at gym or at home
- Access to Workout Plans
- Access to Bodyfit App
- Store Discounts
Already have a Bodybuilding.com account with BodyFit? Sign In

What comes with BodyFit?

- Instructional Videos
Don't risk doing a workout improperly! Avoid injury and keep your form in check with in-depth instructional videos.

- How-to Images
View our enormous library of workout photos and see exactly how each exercise should be done before you give it a shot.

- Step-by-Step Instructions
Quickly read through our step-by-step directions to ensure you're doing each workout correctly the first time, every time.
My Technique Keys
Farmer's Walk
This time, do it as a stand-alone exercise.
Training Tips: In Phase 2, you did the walk for 45 seconds as part of a superset. Now you'll bring it back down to 30 seconds and do it all by itself. You still get the same three-minute recovery, so take no prisoners! This is your license to go heavy. Your goal is to start this exercise with 10 percent more weight than you were using at the end of Phase 2, and to add weight weekly. As always, strap up so you're not limited by grip strength.
Bonus Tip: Sacrifice speed of movement before sacrificing weight used.
T3 Raise
This is a signature Charles Poliquin lower-trap developer.
Training Tips: This is not a power exercise. It's not about yanking iron up off the floor, it's about activating your traps—feeling them work. Pay close attention to your traps as you do this.
Lie face down on an incline bench with arms extended straight down toward the floor and with a dumbbell in each hand (it is not uncommon to use five pounds or less). Initiate the movement by retracting your scapula and raising the dumbbells up away from the floor at a 45-degree angle, as if you were spelling out the letter "Y" with your arms. Stop when the barbells are a bit higher than your head, and hold this position for three seconds to increase time under tension and for isometric overload. Do 3 sets of 8 reps.
Bonus Tip: If you don't have access to an incline bench or dumbbells, swap them out for banded Y-raises.
One-Arm Barbell Shrug
You read that correctly, "barbell" not "dumbbell." This is another trap-building all-star move I picked up from the legendary Poliquin.
Training Tips:> Perform this movement in a power rack. Wear straps if grip limits you. Stand to the side of the barbell and grab it in the middle with your right hand, while bracing your left hand on the power rack post for stability. Lift the barbell and shrug your right shoulder as high as possible. Hold the top position for three seconds. Repeat these for 3 sets of 6 reps. Never sacrifice range of motion for weight, but use as much weight as you can.
Bonus Tip: If you can do this movement without straps, it's a great way to increase your deadlift grip.
Suspended Isometric Kettlebell Shrugs
This movement may look a little goofy, but I assure you it works by overloading your traps concentrically, eccentrically, and isometrically. I learned it from strength coach Joe DeFranco.
Training Tips: Set up a barbell in a power rack at the same height you would normally use for barbell shrugs. Drape a doubled mini-band around the sleeves of the barbell and attach a kettlebell that's 10 percent of your deadlift max on each side. If you deadlift 400 pounds that is a 40-pound kettlebell on each side of the 45-pound barbell. The kettlebells should be suspended at least 6 inches off the ground.
Lift the barbell with a wider-than-normal grip that's as close to a snatch grip as you can comfortably execute. Lift up the barbell and stabilize it to settle the movement of the suspended kettlebells. Shrug the weight up as high and explosively as possible (concentric overload), then hold the weight at the top of the movement.
As you hold the bar in this position, the kettlebells will bounce, making it feel as if someone is pulling down on them. Fight this movement and hold the bar for three bounces (isometric overload), then in a controlled fashion, lower the weight to the starting point (eccentric overload). Do this for 3 sets of 6 reps.
Bonus Tip: Dumbbells will work if you don't have kettlebells, but kettlebells are best.
Face Pull
You learned about face pulls in Phase 1. Perform 3 sets of 12 reps.
Next Step
Do this workout once a week for the next three weeks in addition to your normal routine. Periodically introduce these three workouts into your normal routine.

