Having your own private gym is the dream of many lifters. And it's no mystery why: Nobody doing curls in the rack when you're waiting to squat. Nobody telling you that you need to be quiet while deadlifting. Nobody hogging the equipment you need. Not having to listen to whatever awful music is playing. What more could you want?
Unfortunately, not everyone has the cash or motivation to open a public gym. The good news is that there's an even better option: building your very own home gym! Take it from me: Having your own gym at home is an awesome, liberating thing to experience. It will motivate you. It will simplify your schedule. It will give you complete control over your training.
However, it's not without its tradeoffs. For example, unless you have a ton of money to spend, you will have fewer equipment options, and depending on your living situation, you might be short on room. There are ways around those issues, though.
Whether you're looking to make the training cave of a lifetime or just make the most efficient use of the equipment at your commercial gym, here's what you really need and how to put it to good use.
Ready to do more with less? Follow the full program, Maximum Results, Minimal Equipment, in BodyFit Elite. You can track your workouts in the BodyFit app, swap out lifts to match your equipment, and watch demonstration videos of every movement in every workout!
Building Your Cave
In a perfect world, you could buy all the best equipment and have every machine you ever wanted. Those who train at a home gym, however, quickly learn that that isn't going to happen. So you have to start off by deciding what is absolutely vital to your lifting success.
Bear in mind that your equipment needs will be based on your training style and preferences. A powerlifter will prioritize different equipment than an Olympic weightlifter or a CrossFitter. For now, I'll assume that you're just a strength minimalist who wants to lift heavy, look the part, and be ready for anything.
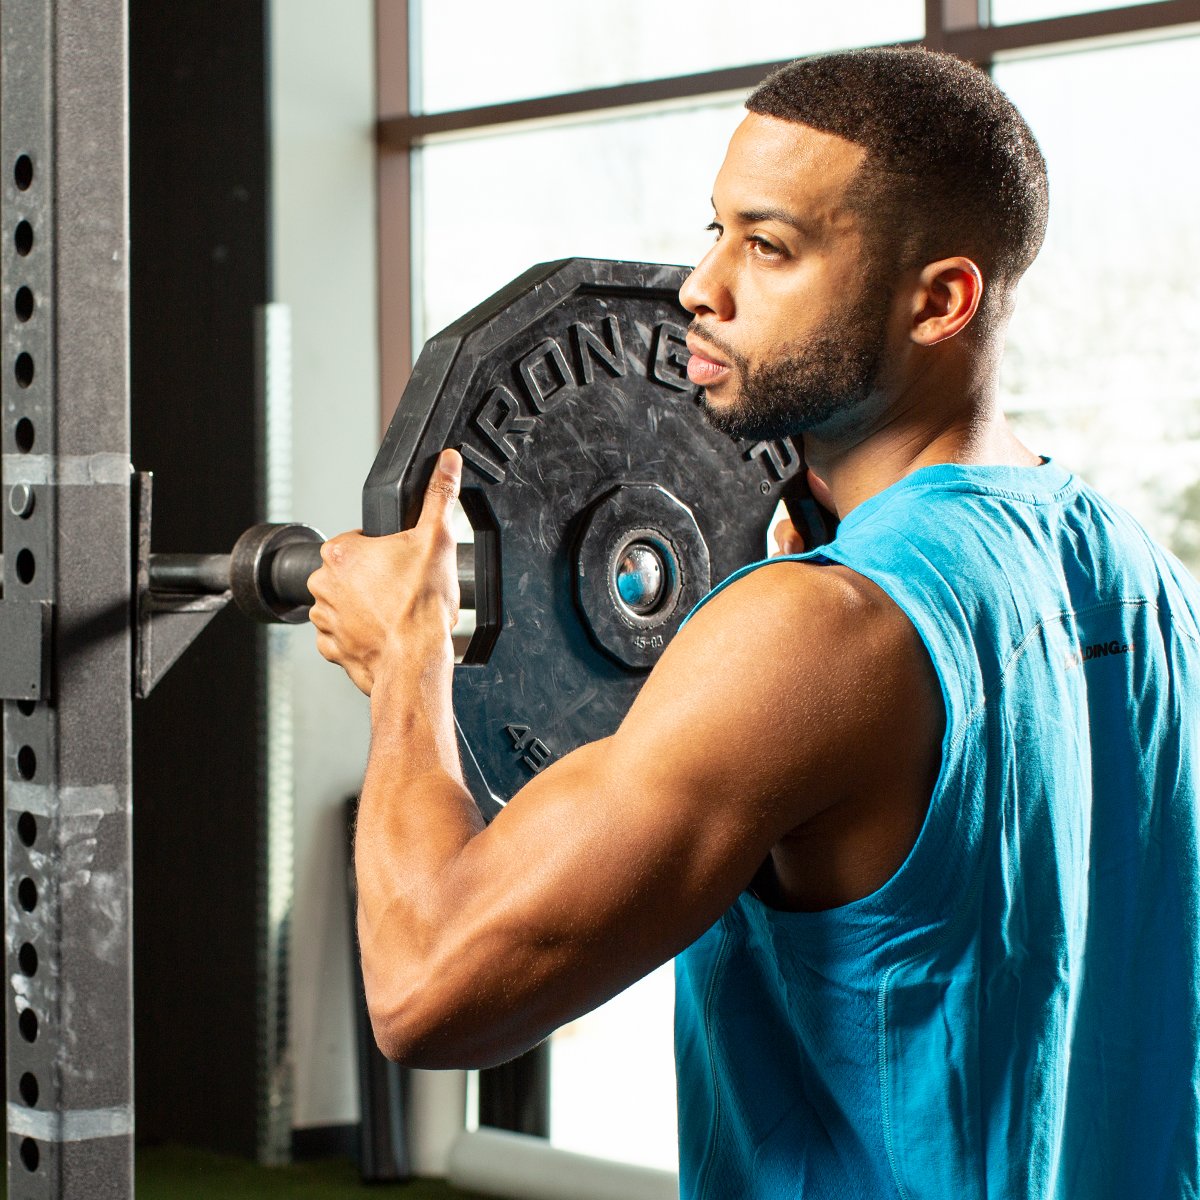
Priority 1: Barbell and Weights
How can you have a gym without a barbell and weights? If you buy nothing else, this is where you need to start. With only a barbell and weights, you can still perform a good number of basic strength movements, plus barbell complexes to build some crazy conditioning.
{{caption}}
Some people will tell you to spend the extra money on a "really good" barbell. Of course, there is nothing wrong with spending a little extra for a reliable bar, but I will say this: The bar you obtain needs to fit your needs.
If your heaviest lifts are less than 400-500 pounds and you don't do a lot of Olympic weightlifting or drop the bar much, you can probably get away with spending less. If you're routinely lifting 500-plus pounds or beat the hell out of bars by dropping them often, you should probably spend a little more. Be guided by your budget and your needs.
Priority 2: Squat/Power Rack
If you're a serious lifter, you need a rack. There is just no way around this. Want to do squats? You need a rack. Want to bench? You can do that in a rack. Standing or seated presses? Need a rack.
This is one area I wouldn't recommend skimping on too much. Obviously, what you buy will be dictated by your budget and available space, but remember that this is a piece of equipment that could damn well save your life. Opt for something that has safety pins and enough versatility to allow you to squat, bench, and everything in between.
If your ceiling is high enough, try to get one that has a pull-up bar built in. It will save you some space and the need to affix one elsewhere.
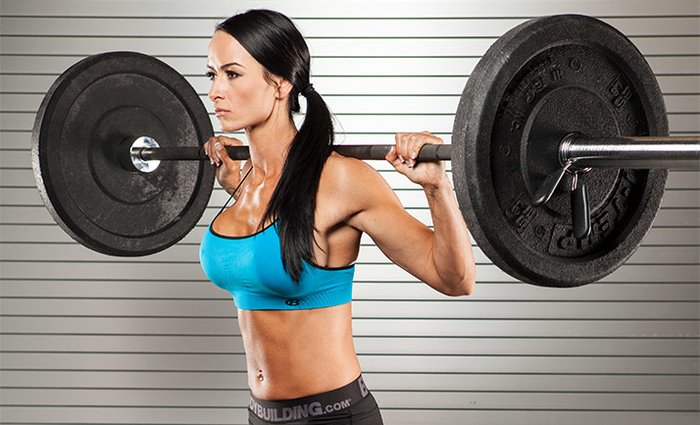
Priority 3: A Bench
A solid bench is next up on your list of necessities. It opens up your training options immensely. Look for something that has at least the ability to go from flat to 90 degrees, with some incline angles in between. Doing so will allow you to not only bench but also do various incline presses, shoulder presses, biceps and triceps movements, rows, and too many other options to list here.

{{caption}}
Again, be guided by your budget and your needs. If you are a smaller lifter who uses lower weights, you might be able to get away with a cheaper bench. Just remember that you will get bigger and stronger, and your bench needs to be able to handle that! If you are a bigger lifter who is throwing around 315 for reps on the bench, you should probably get a heavier-duty bench from the start. A really good option for a home-use bench will also allow for attachments like a leg developer, sit-up pad, or preacher curl-attachment.
Priority 4: Dumbbells
If you only got the items above, you could still have a great home gym that could yield good training results. But if you're looking to expand your arsenal in one area, I suggest dumbbells.
You have a few options. The first, and most expensive, is to buy individual fixed-weight dumbbells like those in a commercial gym. This can get really expensive, really fast, and also requires you to have a huge amount of storage space. So it's not for everyone.
You could also buy your dumbbells in 10-pound jumps and get magnetic incremental weights to fill the gaps, but that still requires a lot of money and space. An increasingly popular option is to use adjustable weight dumbbells. There are lots of reliable and sturdy brands out there, so give these a serious look.
Again, use your best judgment. Based on your strength level, experience, budget, and available space, find what works best for you.
Priority 5: "Great if You've Got 'em" Accessories
Primary accessories are the first tier of add-ons I recommend investing in. These are the things that you can do without, but which will add a definite benefit to your gym. Once you've got the essentials above taken care of, start thinking about adding these items to your repertoire over time.
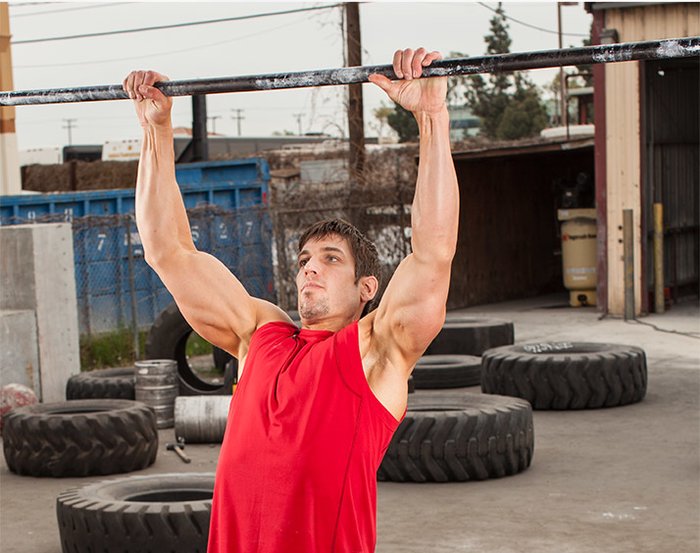
Pull-up/dip station: If you didn't get a rack that includes a pull-up bar, you can always do pull-ups off of your barbell with it set high in the rack. But you should absolutely get a pull-up bar as soon as possible.
Dips may seem like a luxury, but as I've previously written, this is the king of upper body mass-builders, so give it serious consideration! There are also solid dip stations that you can attach to power racks these days. Alternatively, you could do both pull-ups and dips from a set of rings hanging from your rack or bar.
Bands: Bands have exploded in popularity, and at this point, I consider them an invaluable addition. They're for warm-ups and adding banded exercises like pull-aparts, face-pulls, good mornings, and more.
Dip belt: If you can bust out pull-ups and dips for reps and you're not doing them with added weight, start now! After all, doing weighted pull-ups and dips is basically saying "I'm stronger than my own body." That's something good to aim for.
{{caption}}
Priority 6: "No Rush" Accessories
These are the "extras." If you feel like you've got a solid setup already, but want to get some fun add-ons or have a little more variety, these are the items you'll want to look into.
Ab wheel: A classic piece of equipment that really gets the job done, is cheap, and doesn't take up much space. Always a worthy addition.
Landmine: This is great addition that can open up options like landmine presses, as well as several great squat, hinge, and row options. You could just make due with a barbell in the corner, but if you do, make sure you protect your corner!
Pulley station: For most people, the biggest difference between training at home and in a gym will be the ability to use a pulley/cable station. Adding this to a home gym used to be completely impractical. The cost was exorbitant, the space requirements were ridiculous, and the utility of it just didn't add up. Recently, however, I was able to find an awesome home-gym option for this made by Spud, Inc. They have an inexpensive, reliable, high-low pulley that can easily be set up on a good power rack. Adding this to my gym gave me the option to do loads of different exercises including different rows, face-pulls, triceps extensions, leg curls—I could go on and on.
Grip tools (wrist roller, grippers, thick grips): Because grip strength = strength. And because nobody wants to shake hands with a dead fish.
The Cave Program
Ultimately the choice is yours as to what you do or don't need, and you'll be guided by your lifting style, preferences, budget, and available space. So now that we've covered equipment, how about a sample home-training program? Below is a block of training that can be done exclusively in a home gym with minimal equipment.
You could also make some strategic alterations to any of my other popular programs on Bodybuilding.com, such as "Build an Athletic Body in 8 Weeks" or "Strong in 8 Weeks."
You'll see plenty on here that could be substituted with a different piece of equipment. Make do with what you've got, and then do the work!