
Vital Stats
Name: Nick Tuminello
Occupation: Trainer, owner of Performance University, author of Strength Training for Fat Loss.
Location: Ft. Lauderdale, FL
I'm the sort of trainer who believes that proper technique is crucial—and that no technique is sacred. Sound contradictory? It isn't to me. Sure, we may have a perfectly adequate way of performing a movement, but that doesn't mean there isn't a better way to make it work for you, your body, and your goals.
I've found that some people are resistant to refining classic exercises; they assume these exercises are just fine the way they are, since old-school athletes and bodybuilders have been using them forever. But here's the thing: Those old-school athletes and bodybuilders were innovators, too. They built upon knowledge they gained from those who came before them, and then they forged their own path. This is the basis of all progress, in all parts of life.
In my article, "7 Gym Hacks You Need to Know," I showed you some novel ways to solve common equipment problems in the weight room. This time around, I'm focusing on refinements we've developed for specific exercises. We use these modifications in the Performance U approach to increase the safety, productivity, and efficiency of classic exercises.
Burpees
Most trainers and fitness enthusiasts—of all varieties, not just CrossFit athletes—perform the burpee exercise with less-than-optimal form. What do I mean by this? By going down with their feet together and back bent over, they make the movement both less safe and less metabolically demanding than it could be.
So what's the solution? Perform your squat thrusts—as burpees are alternately known—less like a squat and more like a sumo deadlift. This moves the stress from the back to the hips, which also enables you to work harder. Lucky you!
Burpee Exercise How to do Perfect Burpees
Watch The Video - 1:31
Of course, you can add a push-up at the bottom of each burpee, if you'd like. You can also add a jump at the top of each burpee if you're looking to make this exercise more dynamic, and want to further increase the metabolic demands.
Push-Ups
You already know that letting your head or hips sag toward the floor displays poor control during push-ups. But that's not all you need to know! Here are three ways to make your push-ups safer on the joints and more powerful, allowing you to crank out more reps and boost the intensity of your workout.
Push-Up Exercise How to do a Perfect Push Up
Watch The Video - 5:05
Arm Angle
In order to maximize your ability to create force and get better leverage on each rep, keep your elbows closer to your sides at roughly a 20- to 40-degree angle from your body instead of flaring them out at a 90-degree angle as most people do. This easy tweak shortens the lever arm, which gives you an immediate mechanical advantage. You'll be able to better incorporate your lats and upper-back muscles—after all, this is a total upper-body movement—but it will also make it a better chest movement as you crank out rep after solid rep.
Elbow Positioning
The push-up is a compound exercise that strengthens the chest, shoulders, and triceps. However, many people allow their elbows to wander past their wrists—either behind or out to the side—which reduces the chest and shoulder involvement and makes it more of a triceps-dominant movement. Unless you're trying to isolate your triceps, keep your elbows above your wrists through the entire push-up action. Your elbows should form a 90-degree angle at the bottom position of the movement.
Hand Positioning
This is a very common problem. If your hands are pointed slightly inward, toward your body's midline, it encourages you to make both of the mistakes I've already covered. Your arms will flare out away from your sides, and your elbows will wander beyond your wrists. Instead, when performing push-ups, turn your hands outward slightly, pointing your fingers out away from your body's middle at roughly a 45-degree angle.
One-Arm Push-Ups
I consider the one-arm push-up (let's call it the OAP for short) to be the king of upper-body pushing exercises. As I say in the video below, unless you're training the bench press for a specific competition like a football combine or powerlifting competition, the payoff for mastering the one-arm push-up is usually higher.
Whether you agree with me or not, you can't argue that the OAP is a great exercise for improving upper-body pushing strength and core stiffness—if you do it right. And when I peruse online OAP videos, I see plenty of examples you shouldn't be following.
One-Arm Push-Up How to do it the RIGHT Way
Watch The Video - 5:19
As I note in the video, some of the same cues that make a great push-up make a great single-armer. For instance, keep your wrist below your elbow and turn your hand out, rather than in. Likewise, you need to keep your elbow in—even more so than in the two-arm version.
Some people gauge the quality of their OAP by how level they keep their shoulders. Meanwhile, their spine bends and extends so much, they look like they're doing the cobra pose in yoga. Let's be clear: I think it's OK if your pressing shoulder rotates toward your hand on the descent, as long as your shoulders and hips rotate together. Rotating your shoulder slightly can help you corkscrew your working arm into the push-up, which is what makes for truly strong OAPs.
On the way up, try to push the floor down away from you, and don't lean upward. Get square at the top, and lower yourself back down for another go!
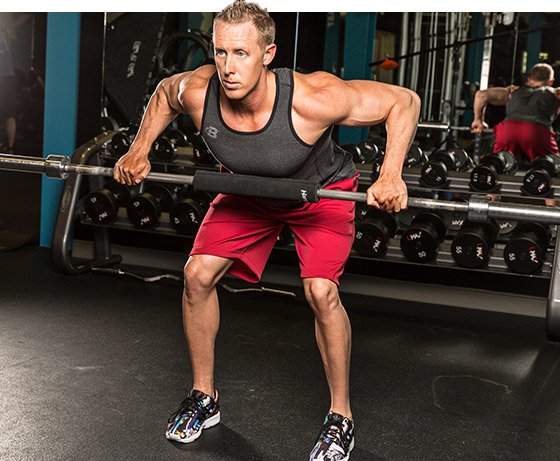
Bent-Over Rows And Inverted Rows
Wide-grip bent-over rows are a go-to move in the Performance U training approach when it comes to the mid-back musculature. However, while many people know the great cue of pulling the bar to—or "through"—the chest, few can do it without having to rotate their shoulders inward in the last couple of inches. This changes the training effect of the movement and takes the focus off of where it should be.
The answer to this common problem is simple: Just wander over to the squat rack and pick up that fat-bar pad someone left lying on the floor. Put it on the bar, and pull the pad—not the bar—up to your chest.
Barbell Bent Over Rows Wide Grip
Watch The Video - 2:24
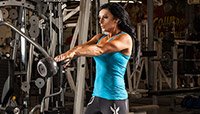
The same hack works wonders on the wide-grip inverted row, another movement where the last couple of inches become a sloppy struggle for far too many people. Use the pad as I direct in these videos, and you'll find yourself rubbing—or at least trying to rub— your middle back the next day, rather than your front delts or biceps.
Inverted Row Exercise Best Form Tips
Watch The Video - 1:49
Dumbbell Biceps Curls
Your biceps don't just flex your elbow, they also supinate your forearm, meaning they help you rotate it outward so your palm faces upward. It stands to reason that's it's a smart idea to perform biceps curls in a manner that involves both elbow flexion and forearm supination.
Here's how: Instead of gripping the dumbbell in the middle, as you might think makes the most sense, grip it with your hand as far to the thumb side as possible. Then, as you curl, keep rotating the dumbbell until you can touch the non-thumb side to the front of your shoulder at the top of the movement.
Biceps Curls A Better Way to do Dumbbell Biceps Exercise
Watch The Video - 1:28
This small change in hand position can make a huge difference, because this grip forces you to resist forearm pronation. All of a sudden, a weight that was easy for 10 reps might seem a whole lot harder.
Determining Chin-Up Grip Width
There are some exercises I have almost all athletes I work with perform, such as chin-ups, squats, deadlifts, and push-ups. But I definitely don't expect everyone to do them the same way. Why would you try to make your body fit into an exercise, when you could easily customize the movement to your anatomy?
In this video below, which is a clip taken from my "Secrets of Back Training" DVD, IFBB pro bodybuilder Alex Cambronero and I show you the Performance U approach for determining the chin-up grip width. It's as simple as doing an unweighted biceps curl, and in my experience, it's quite effective at helping athletes optimize their pulling strength.
Chin Ups Best Chin Up Grip Width
Watch The Video - 2:24
Now, your arms certainly won't explode if you decide to use a wider or narrower chin-up grip, or if you don't even think about grip width and just "grip and go." Consider this a simple way to help personalize the chin-up movement, feel a little stronger performing it, and maybe squeeze out a rep or two more than you would otherwise.
Sprinting Minimizing Hamstring Injuries
It no secret to any coach or trainer that athletes are most likely to injure a hamstring in the moments after they explode off the line. If you've watched much Olympic sprinting, football, or even baseball, you've no doubt seen someone "come up lame" after a quick start.
If you're one of those athletes, the risk is part of the game. It doesn't have to be that way for the rest of us, though. If you're someone who uses sprint training outside a competitive setting, you can minimize your risk of suffering a hamstring injury simply by skipping the quick start.
Here's how it works: Instead of starting from a still position and exploding off the line, simply jog to the line and begin sprinting once you cross it. Beginning with a preliminary jog means your body will simply be asked to go from a lower gear to a higher gear, rather than going from nothing straight to maximal contraction.
If you're an athlete training for an event that requires you to begin sprinting from a still position—such as a football combine— you'll need to train specifically for that event by using still starts. That said, there's no reason why you can't also integrate some jog-up starts. They'll help you build your speed while minimizing the risk of injury along the way.
Recommended For You
5 Ingredients For The Perfect Fat-Loss Circuit
Too often, metabolic circuits are little more than a mess of randomly paired movements. Here's the formula for a precise fat-loss workout that will test your limits while providing results!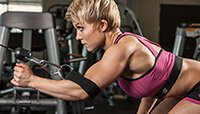
7 Gym Hacks You Need To Know
Think outside the box, and your reward will be a better, more efficient workout. Use these 'hacks' to your advantage to become the envy of the weight room!