
Turn Your Presses Upside Down And Master The Handstand!

Handstands are more than just a showpiece. They're a fantastic strength skill that pays off in increased strength, balance, and mobility. All you need to start is a wall!
Vital Stats
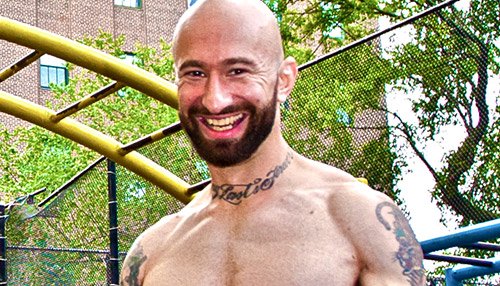
Name: Al Kavadlo, CSCS
Occupation: Trainer, author, PCC instructor
Website: www.alkavadlo.com
No matter where working out eventually leads us, many of us start at the same point: wanting to look better. This was certainly the case when I began lifting weights in high school. I was a skinny kid back then, and all that mattered to me was getting jacked. As for what came after that, I had no idea.
I don't think there's anything wrong with anyone choosing looks as the primary motivation to exercise, but ultimately it wasn't enough for me. Once I started to feel better about my appearance, I gradually found myself taking my workouts in entirely different directions. Ultimately, I found that striving for body mastery offers a more fun and interesting experience than simply gaining as much muscle as my frame can handle.
Anyone who takes action to improve their physical capabilities is worthy of my respect, but I'm most impressed by a great looking body that's also capable in a variety of contexts. The strongmen and bodybuilders of years past seemed to think this way, too. That's why guys like Steve Reeves, John Grimek and Jack LaLanne practiced hand-balancing. Arnold Schwarzenegger was also a great fan of the handstand push-up throughout his bodybuilding career.
Are handstands a challenge? You bet, because cheating is not an option once you back away from the wall. But when the rewards are increased shoulder mobility, strength, and body control, it's worth your time to give them a try, either on their own or alongside more conventional strength training.
Getting to the Handstand
Flip a photo of a handstand upside down, and you'll see it bears a decent resemblance to a shoulder press (albeit one where you press the entire world). This indicates that handstands emphasize the shoulders. However, the handstand poses unique challenges, because learning to do a handstand requires you to use your entire body to hold yourself up.
Though the eventual plan is to balance freestanding, first grow comfortable with simpler inversions like headstands and handstands against a wall. This will give you some time to get accustomed to kicking up, as well as to the strange feeling of spending 30 seconds or longer being inverted. To help give you practice at balancing on your hands, it's also worthwhile to integrate some freestanding hand balances like the frogstand, also known as the crow pose in yoga.
Once you can comfortably kick into a wall-supported handstand and hold it for 30 seconds or longer, you'll be ready to start trying it without relying on anything but your hands and the ground beneath you. Start out by doing this at the wall, gently trying to take your heels away one at a time until you can find the balance with your hands only. When you get the feel for this, come away from the wall entirely and start practicing in a large open space.
Learn to Do a Handstand
Watch The Video - 01:36
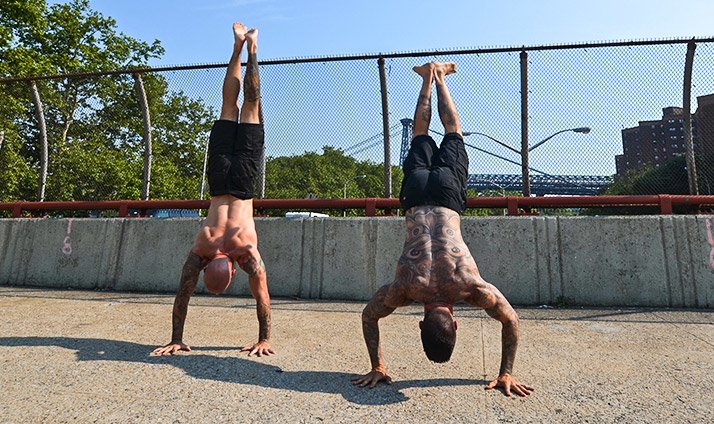
Freestanding at Last
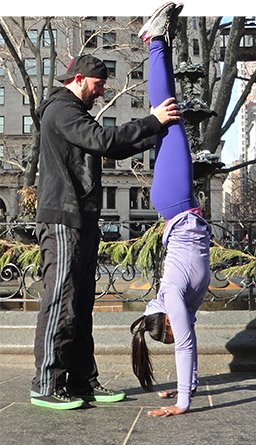
The freestanding handstand can be intimidating because there is nothing to catch you if you fall, but if you go in with confidence, your body will likely know what to do if you tip over. However, if you're having a hard time getting past your nerves, it can help to have a spotter. I also recommend practicing on a soft surface like grass or rubber.
A freestanding handstand can provide a challenging shoulder and arm workout when held for long enough. The balance is typically the most difficult part to learn. It takes a lot of time to find the "sweet spot" between over-balancing (tipping over) or under-balancing (falling back to your feet). The only way to develop this skill is through lots of practice.
Unlike your foot, which was made for standing, your hand doesn't have a true heel, so it's best to put slightly more weight on your fingers than your palms when balancing. If you are a tiny bit over-balanced, you can stay up by pressing your fingers into the ground. If you continue tipping, the smartest thing to do is to lift one hand from the ground and take a small step forward with it. Quickly turn your hips, and your body should float downward toward your toes somewhat naturally.
When you're under-balanced, there is less you can do to keep from coming down. Transitioning from a handstand against a wall to a freestanding handstand can be a slow and potentially discouraging process. Be patient.
Your Handstand vs. Their Handstand
In modern gymnastics, handstands are performed with a perfectly straight line from top to bottom. For this reason, a lot of people will tell you that arching your back during a handstand is bad form. In my experience, however, it is helpful—and in many cases necessary—while you learn to find the balance. Even most non-gymnasts have a hard time with the shoulder mobility required to hold a perfectly straight handstand.
When starting out, focus primarily on finding balance. Once you get your bearings, you can work on reaching your legs upward, opening your shoulders, and engaging your abs, lower back, and glutes to achieve a more aesthetic straight line from top to bottom. If you have a hard time with the alignment, practice your handstand facing a wall to help you assess your body position.
The Next Step
Handstands are a great goal on their own, but they also work as part of a progression toward more difficult strength movements such as the handstand push-up. Your time against the wall will help you here, because like handstands, handstand push-ups should be learned against a wall at first, but can eventually be performed freestanding.
I was terrible at hand balancing when I started out, but I've been practicing for a long time now. For me, the key has been consistency; I rarely miss a day of practice, even if it's just a couple of minutes at the end of a workout. Some days it comes harder than others, but when I fall, I just get up and try again.