
| Article Summary: |
|
Welcome to my series for the over 40 crew. There will be three articles in this series:
- Seven Factors For Staying Fit Over 40
- Lean Mass Workouts to Stay Strong and Fit Over 40
- Recommended Supplements for an Active, Over 40, Fitness Lifestyle
Workouts To Stay Strong And Fit Over 40
If you are reading this, you are probably over or approaching 40. You may be trying to get in shape "before it's too late." You may be looking to get back in shape. Or you may be in shape and looking to stay that way. I am writing this in hopes that it will make you think about what needs to be done, take action, and make it a lifestyle.
I was sitting here the other day realizing a couple of things about getting older:
- It is going to happen, regardless of how much we deny it.
- It is possible to fight it.
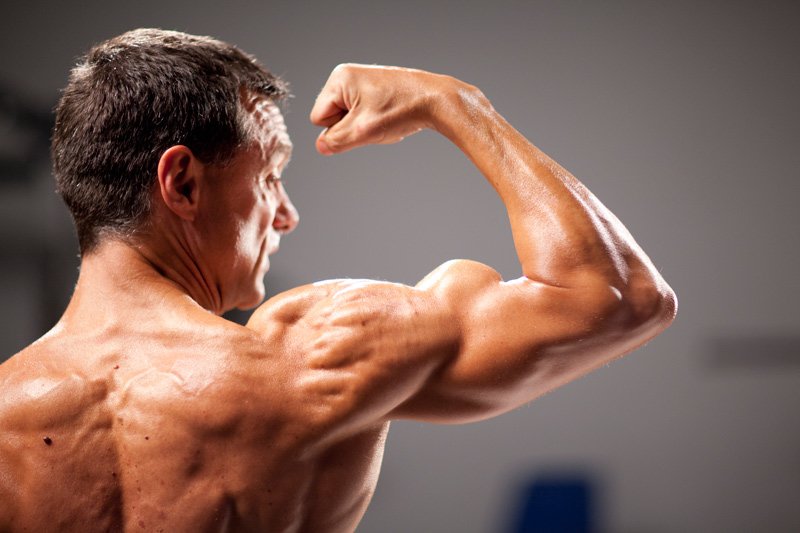
It's never too late to get in shape. Get it in gear, especially if you have people who love you and depend on you. If you cannot do it for yourself, do it for them.

 Click To Enlarge.
 It's Never Too Late To Get In Shape.
Since there are many things to consider in designing your workouts, I plan to cover the following points in this article:
Planning Your Workouts Around Your Goals
Why do I list this section first? Well, the reason is that, in my opinion, this is the most important factor in helping you to achieve YOUR fitness goals, not someone else's idea of what you should do. Some of the worst workout plans I have ever seen are in magazines, especially when they print the "Workouts of the Pros."
You may wonder why I feel this way. Volume, volume, volume. Many of these workouts have so many sets for each body part that there is no way that most of us over 40 could ever recover in time to work out again. How can the pros do it? Well, first, most are pros by nature. They were gifted by the genetics fairy, at birth, with great connective tissue, metabolic rates, and recovery times, plus the fact that their diets, supplementation, and workouts are their jobs, and you have someone who cannot relate to the average 'over 40' lifter.
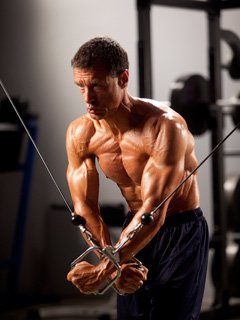
 Click To Enlarge.
 Planning Your Workouts Around Your Goals Is The Most Important
Factor In Achieving Your Fitness Goals.
Like many of you, I am a 'hard-gainer' of muscle but an 'easy-gainer' of fat. So I must manipulate my diet, cardio, and strength training to maximize my gains. But my goals may be different than yours. My assumption, when writing this article, is that most of my readers will be in one of 3 groups:
- Those who are trying to get in shape
- Those who are trying to get back in shape
- Those who are just trying to maintain or improve a decent condition (and not get fat or injured)
Based on this, I am gearing the workouts that follow to these goals rather than those of someone who may be looking to compete.
This article will focus on strength training. Cardio is not covered, except to suggest that 5-10 minutes of moderate cardio should be done before any strength training to warm up and minimize injury.
What is a split routine? A split routine is when you do not do "full body" workouts, but instead break up the body parts and cover them on different days or during different workouts. I am a big proponent of only working a muscle group directly once per week. This allows for maximum recovery and minimizes overtraining or injury. Again, this is not geared towards the 20 something hardcore wannabe pro.
Routine splits are, again, going to be determined by your goals and by the time you have available. For example, how many days can you get to the gym, and how long can you stay. The goal is to maximize the time in the gym for strength training that cannot be done at home. Besides actual workout time, you must also allow time for some warming up and cooling down.
With that said, there are too many different types of splits to list them all, so I will work on the assumption that 3-4 days a week is the most you can get to the gym and list a few splits based on this assumption. The splits I will cover are as follows:
- Upper Body - Lower Body - Core & flexibility
- Push - Pull - Core & Flexibility
- Legs - Chest/Traps/Shoulders - Back - Arms
Lower Body - Upper Body -Core Flexibility:
This is a good split for someone new to the gym or someone who has been out for a while. It is designed to hit all the muscles of a specific area in one day, so it's easy to remember what to do.
On The Lower Body Day, You Will Work:
Quads, hamstrings/glutes, and calves. Your leg muscles are a major portion of your overall skeletal muscle, so building and strengthening them will help your metabolic rate tremendously. I like this day first to get those dreaded quads done early in the week, before I have a chance to make excuses to miss them.
On The Upper Body Day, You Will Work:
Chest, back width, back isolation, shoulders, biceps, triceps, and forearms. I prefer to group them in this order so that the pushing muscles can rest during the pulling muscle exercises, so they are fresh for the next body part.
I Prefer To Group Upper Body In This Order So That The Pushing Muscles Can Rest During The Pulling Muscle Exercises.On The Core Flexibility Day, You Will Work:
Abdominals, spinal erectors, hip flexors, and stretching. A strong core and good flexibility are important to avoiding injuries and just feeling good.

Push - Pull - Core Flexibility:
This is another good split for someone new to the gym or someone who has been out for a while.
On Push Day, You Will Work:
Chest, shoulders, quads, triceps, and calves. Hitting all the pushing muscles in one workout will allow you to "go ahead and get it out of the way" for certain muscle groups. I put triceps after quads so they have a chance to rest after chest and shoulders. In addition, working your quads on the first day makes sure you do not skip them.
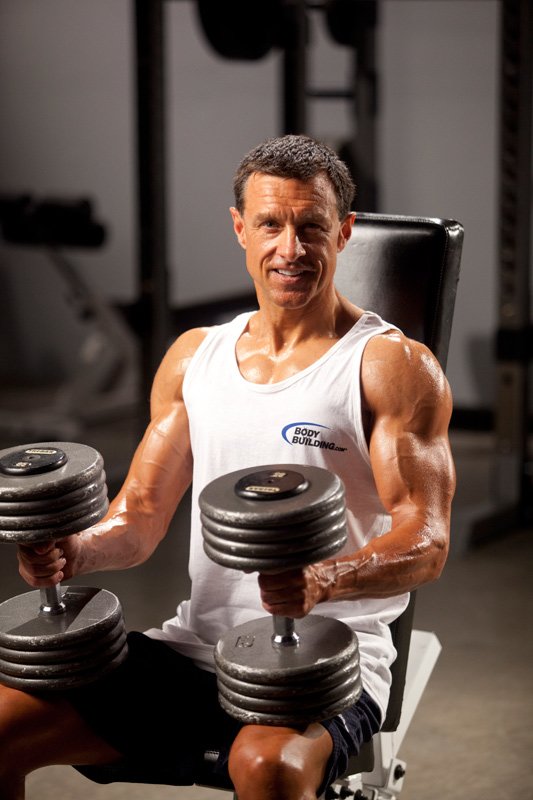 Click To Enlarge.
 Hitting All The Pushing Muscles In One Workout Will
Allow You To Get It Out Of The Way.
On Pull Day, You Will Work:Back width, back isolation, hamstrings/glutes, biceps, and forearms. Hitting all the pull muscles in one workout can let you "go ahead and get it out of the way" for certain muscle groups. I put this day in the middle of the week. I prefer to work the lats and middle back and let any deadlifting be done for hams and glutes, which will also hit the lower back. This order also rests the biceps after back, so the biceps are fresh to work on their own.
On Core Flexibility Day, You Will Work:
Abdominals, spinal erectors, hip flexors, and stretching. Remember a strong core and good flexibility will help you avoiding injuries and just feel better.
Legs - Chest/Traps/Shoulders - Back - Arms:
This is a more advanced split, designed for those of you who are trying to make improvements to body parts and gain a more muscular physique.
On Leg Day, You Will Work:
Quads, hamstrings/glutes, and calves. Monday is a good day for this for two reasons.
On Chest/Traps/Shoulders Day, You Will Work:
Chest pressing, chest isolation, traps, shoulder pressing, shoulder isolation. I put traps in the middle to let the triceps rest a little so you can hit shoulder presses with some force.
On Back Day, You Will Work:
Back width, back thickness, some back isolation moves. You notice I have this separated from legs by a few day, I find that I recover better if I do not put the two largest muscle groups on consecutive days.
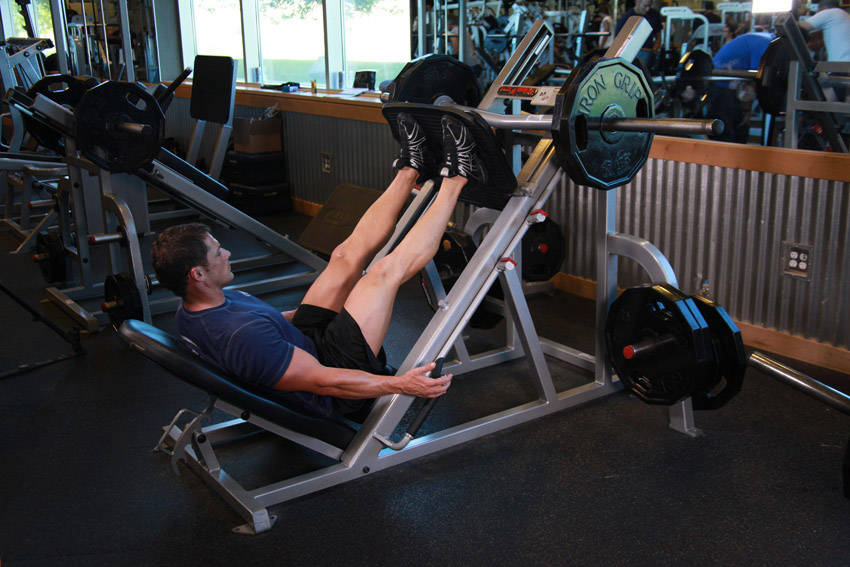
 Click To Enlarge.
 I Find That I Recover Better If I Do Not Put The Two
Largest Muscle Groups On Consecutive Days.
On Arm Day, You Will Work:Triceps pressing, heavy bicep curls, triceps isolation, bicep isolation curls, forearms. I will list several of each exercise, but I will also explain how I have to modify what I do because of a triceps tendonitis problem I have.
On each of these days, you will be doing body part specific stretching. This is similar to the DC style "extreme stretching" and this is done to stretch the muscle fascia once it has been worked. Please note that this does not take the place of flexibility training.
It is always a good idea, if your heart rate is increased, to have some kind of cool down session on the treadmill. Just 5-10 minutes can help you bring your core temperature down slowly, so you don't shock your system.
Without a dedicated core and flexibility day, you need to be doing these core and flexibility exercises at home, which is a fine environment for this type of workout.
Individual Workouts For Each Muscle Group
This is not meant to be an encyclopedia of bodybuilding exercises. Remember, this article is not meant for competitive bodybuilders. I am going to list some basic exercises for beginners and intermediate lifters. This list can be used as a menu and you can choose different exercises for each body part at different times if you feel the need to freshen up the routine.
I prefer to do 4-5 sets for each exercise. I use a pyramid rep count, 15, 12, 10, 8, 6-8. I start with 15 reps and 12 reps for my warm up sets. This progression forces me to use a lighter weight when starting so I will not injure myself before the muscle group has had a chance to warm up and fill with blood.
I am not a big proponent of high volume workouts (a lot of sets and a lot of reps) for each body part. My opinion, and that of many, is that if you can finish 15-20 sets for a body part, how hard was each set. I contend that each set was not very difficult as high volume always makes a person 'hold back' because they have xx sets to do. Contrary to popular belief, you do not have to be really sore to have had a successful workout. Light soreness is okay, but extreme soreness means you overdid it and are just prolonging recovery, if you fully recover at all.
The goal of strength training is to make slow but steady increases in weight used and/or reps completed per working set each week. Achieving this goal means you are getting stronger, which means you are adding muscle. Muscle goes on slow, so take your time and make your goal small increases each week. More muscle = a greater metabolic rate = a greater ability for the body to burn fat while at work or at rest.
Quads:
- Leg Press: 4-5 pyramid sets of 15,12,10,8,6-8 reps
- Smith Machine Squats: 4-5 pyramid sets of 15,12,10,8,6-8 reps
- Barbell Back Squats: 4-5 pyramid sets of 15,12,10,8,6-8 reps
- Dumbbell Squats: 4-5 pyramid sets of 15,12,10,8,6-8 reps
- Leg Extensions: 4-5 pyramid sets of 15,12,10,8,6-8 reps
Hamstrings/Glutes:
- Stiff Leg Deadlifts: 4-5 pyramid sets of 15,12,10,8,6-8 reps
- Reverse Lunges: 4-5 pyramid sets of 15,12,10,8,6-8 reps
- Walking Lunges: 4-5 pyramid sets of 15,12,10,8,6-8 reps
- Smith Machine Lunges: 4-5 pyramid sets of 15,12,10,8,6-8 reps
- Lying Hamstring Curl: 4-5 pyramid sets of 15,12,10,8,6-8 reps
- Standing Hamstring Curl: 4-5 pyramid sets of 15,12,10,8,6-8 reps
Chest:
- Smith Machine Presses: 4-5 pyramid sets of 15,12,10,8,6-8 reps
- Barbell Presses: 4-5 pyramid sets of 15,12,10,8,6-8 reps
- Dumbbell Presses: 4-5 pyramid sets of 15,12,10,8,6-8 reps
- Machine Presses: 4-5 pyramid sets of 15,12,10,8,6-8 reps
- Dumbbell Flyes: 4-5 pyramid sets of 15,12,10,8,6-8 reps
- Cable Crossover: 4-5 pyramid sets of 15,12,10,8,6-8 reps
- Butterfly: 4-5 pyramid sets of 15,12,10,8,6-8 reps
Traps:
- Barbell Front Shrugs: 4-5 pyramid sets of 15,12,10,8,6-8 reps
- Barbell Rear Shrugs: 4-5 pyramid sets of 15,12,10,8,6-8 reps
- Dumbbell Shrugs: 4-5 pyramid sets of 15,12,10,8,6-8 reps
Shoulders:
- Smith Machine/Machine Military Presses: 4-5 pyramid sets of 15,12,10,8,6-8 reps
- Seated Dumbbell Military Presses: 4-5 pyramid sets of 15,12,10,8,6-8 reps
- Overhead Presses: 4-5 pyramid sets of 15,12,10,8,6-8 reps
- Front Dumbbell Raises: 4-5 pyramid sets of 15,12,10,8,6-8 reps
- Side Dumbbell Laterals: 4-5 pyramid sets of 15,12,10,8,6-8 reps
- One Arm Side Lateral: 4-5 pyramid sets of 15,12,10,8,6-8 reps
- Wide Grip Barbell Raises: 4-5 pyramid sets of 15,12,10,8,6-8 reps
- Bent Over Laterals: 4-5 pyramid sets of 15,12,10,8,6-8 reps
Back:
- Chin ups: 4-5 pyramid sets of 15,12,10,8,6-8 reps
- Pulldowns to Upper Chest: 4-5 pyramid sets of 15,12,10,8,6-8 reps
- Deadlifts: 4-5 pyramid sets of 15,12,10,8,6-8 reps
- Bent Barbell Rows: 4-5 pyramid sets of 15,12,10,8,6-8 reps
- Seated Rows: 4-5 pyramid sets of 15,12,10,8,6-8 reps
- Single Arm Dumbbell Rows: 4-5 pyramid sets of 15,12,10,8,6-8 reps
- Single Arm Cable Rows: 4-5 pyramid sets of 15,12,10,8,6-8 reps
- Back Hyperextensions: 4-5 pyramid sets of 15,12,10,8,6-8 reps
Triceps:
- Dips: 4-5 pyramid sets of 15,12,10,8,6-8 reps
- Dip Machine: 4-5 pyramid sets of 15,12,10,8,6-8 reps
- Close Grip Bench Presses: 4-5 pyramid sets of 15,12,10,8,6-8 reps
- Triceps Pushdowns: 4-5 pyramid sets of 15,12,10,8,6-8 reps
- Overhead Barbell Extensions: 4-5 pyramid sets of 15,12,10,8,6-8 reps
- Lying Triceps Barbell Extensions: 4-5 pyramid sets of 15,12,10,8,6-8 reps
- Overhead Single Arm Dumbbell Extensions: 4-5 pyramid sets of 15,12,10,8,6-8 reps
Biceps:
- Standing Barbell/EZ-Bar Curls: 4-5 pyramid sets of 15,12,10,8,6-8 reps
- Preacher Curls: 4-5 pyramid sets of 15,12,10,8,6-8 reps
- Preacher Curl Machine: 4-5 pyramid sets of 15,12,10,8,6-8 reps
- Bent Over Concentration Dumbbell Curls: 4-5 pyramid sets of 15,12,10,8,6-8 reps
- Seated Dumbbell Curls: 4-5 pyramid sets of 15,12,10,8,6-8 reps
- Incline Bench Dumbbell Curls: 4-5 pyramid sets of 15,12,10,8,6-8 reps
Forearms:
- EZ Bar Curls: 4-5 pyramid sets of 15,12,10,8,6-8 reps
- Dumbell Hammer Curls: 4-5 pyramid sets of 15,12,10,8,6-8 reps
- Palms Down Wrist Curls: 4-5 pyramid sets of 15,12,10,8,6-8 reps
- Palms Up Wrist Curls: 4-5 pyramid sets of 15,12,10,8,6-8 reps
Note: Forearms should ALWAYS be trained last in the day; training them too early wears them out and limits your grip for other exercises.
Core:
- Crunches: 4-5 pyramid sets of 15,12,10,8,6-8 reps
- Cable Crunches: 4-5 pyramid sets of 15,12,10,8,6-8 reps
- Reverse Crunches: 4-5 pyramid sets of 15,12,10,8,6-8 reps
Spinal Erectors:
- Back Hyperextensions: 4-5 pyramid sets of 15,12,10,8,6-8 reps
- Sit-Ups: 4-5 pyramid sets of 15,12,10,8,6-8 reps
- Leg Lifts: 4-5 pyramid sets of 15,12,10,8,6-8 reps
Tips On Form For Difficult Exercises
I could never cover all of the exercises listed above, but I feel the need to provide some explanation of proper form for the ones where I constantly see people doing them wrong. These tips will make the exercise more effective and can also keep you from injuring yourself.
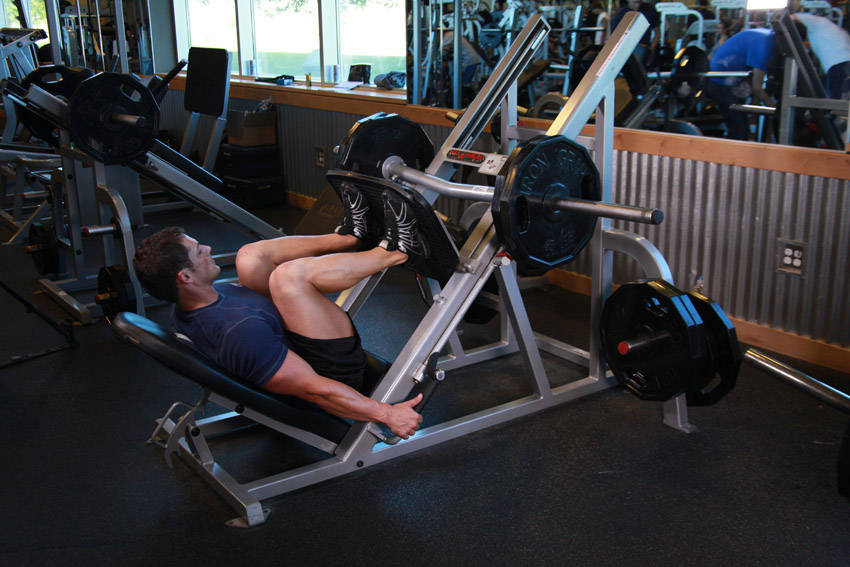
Leg Press:
Your feet should be shoulder width or wider, toes in the plane of travel that the knees will be in. At the bottom of the movement, your knees should have a 90° bend or greater and your knees should not travel past your toes. You should go as low as you can without allowing your butt to come off the seat.
During ANY leg pressing movement, you should never let your knees travel past your toes; you should feel like you are pushing through your heels.
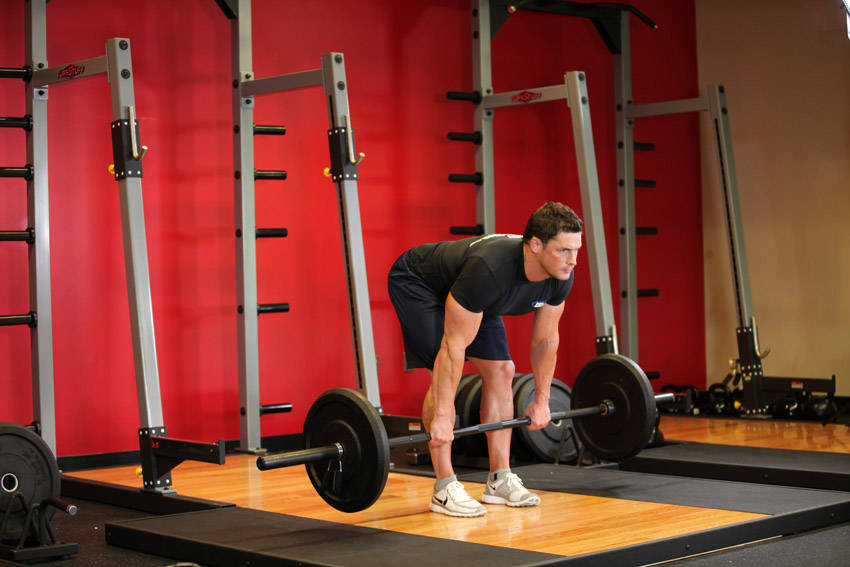
Stiff Leg Deadlifts:
These are called stiff leg, not straight leg, do not lock the knees. Always lock a slight arch in your back and NEVER let that arch round towards the floor. If you are using a weight that is taxing, your hamstrings and glutes will normally lock out somewhere in the high to mid shin location. If you can go to the floor you're are either rounding your back or are not using enough weight to develop muscle, for example, you're just stretching.
 |
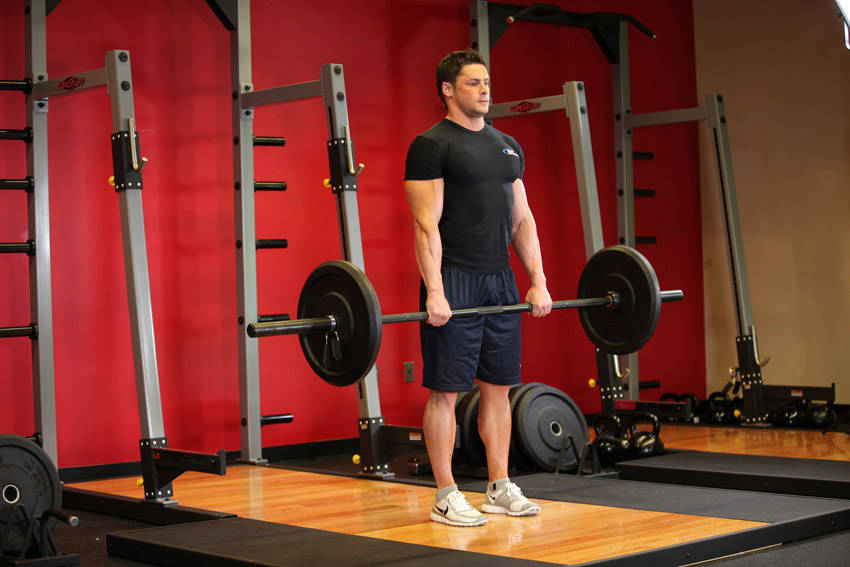 |
Click Image To Enlarge. Stiff-Legged Barbell Deadlift
Click Here For A Video Demonstration Of Stiff-Legged Barbell Deadlift.
Smith Machine Military Presses:
I prefer an angled smith. The bar should start over your head and your face should be forward. The bottom of the movement will force you to tilt your head back slightly to keep from hitting your nose. If you lean your head back you have now turned this into an incline bench press, keep the face forward until absolutely necessary. Your elbows should dip just below the shoulders, but do not go too far down.
 |
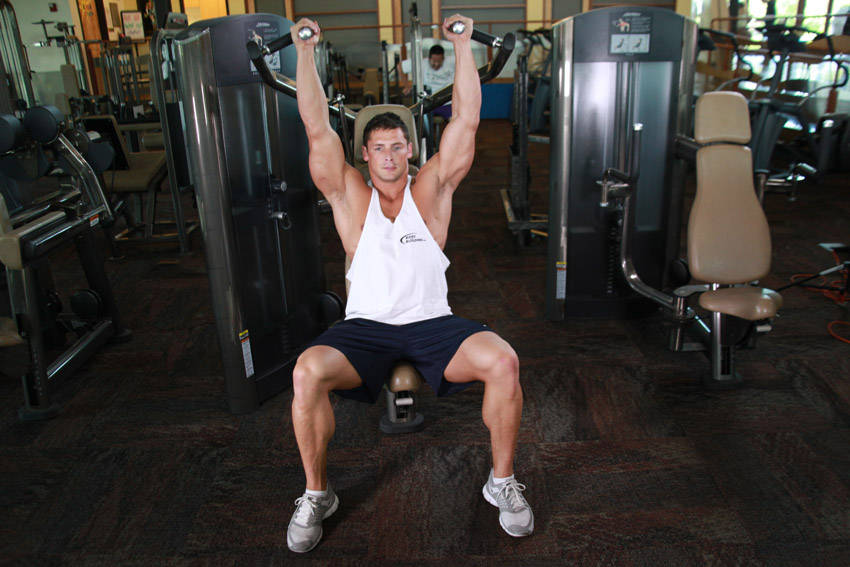 |
Click Image To Enlarge. Machine Shoulder (Military) Press
Click Here For A Video Demonstration Of Machine Shoulder (Military) Press.
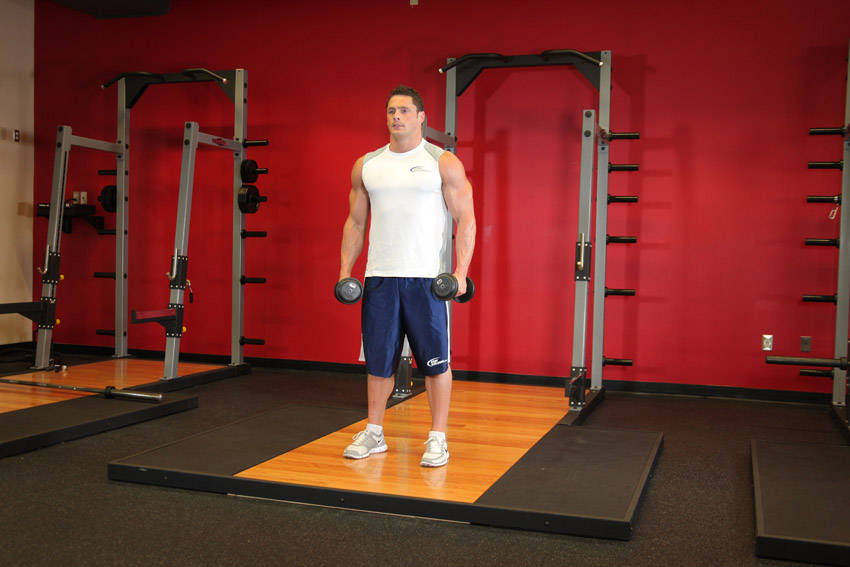
Side Laterals (Aka The Pterodactyl):
Dumbbells in hands, palms facing thighs, elbows in line through the shoulders. As you raise the dumbbells, imagine your hands as hooks and lift with the shoulders. Your hands should not go much above shoulder height and your thumbs should be flat or angled slightly downward.
I tell people to "Act as if you are pouring tea out of a pitcher." As soon as the thumbs go up, the front delts take over and you lose the focus on the side delts. If you look like a big bird flapping (like that guy over there) just stop and fix your form.
 |
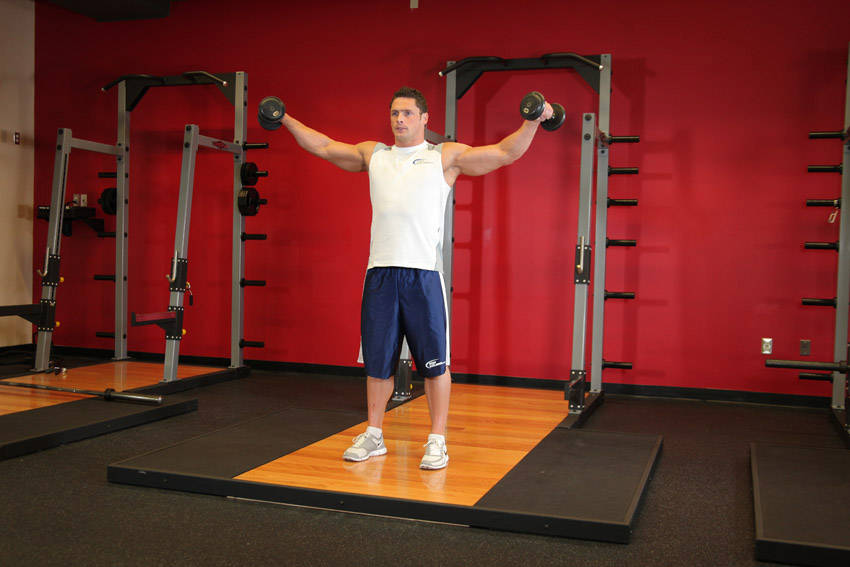 |
Click Image To Enlarge. Side Lateral Raise
Click Here For A Video Demonstration Of Side Lateral Raise.
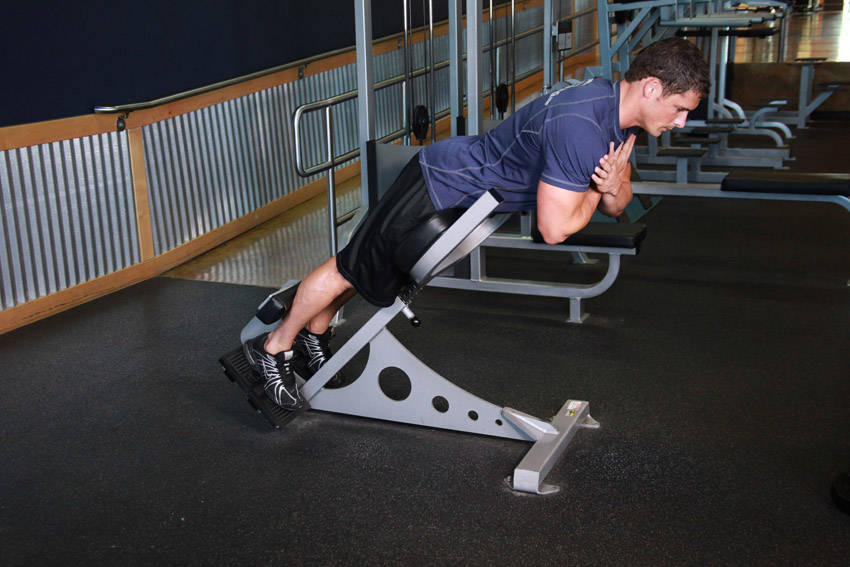
Back Hyperextensions:
This is the exercise where you round your lower back. This is the area you are trying to strengthen. Take these slow and deliberate, no fast movements and do not add weight until your lower back is very strong.
 |
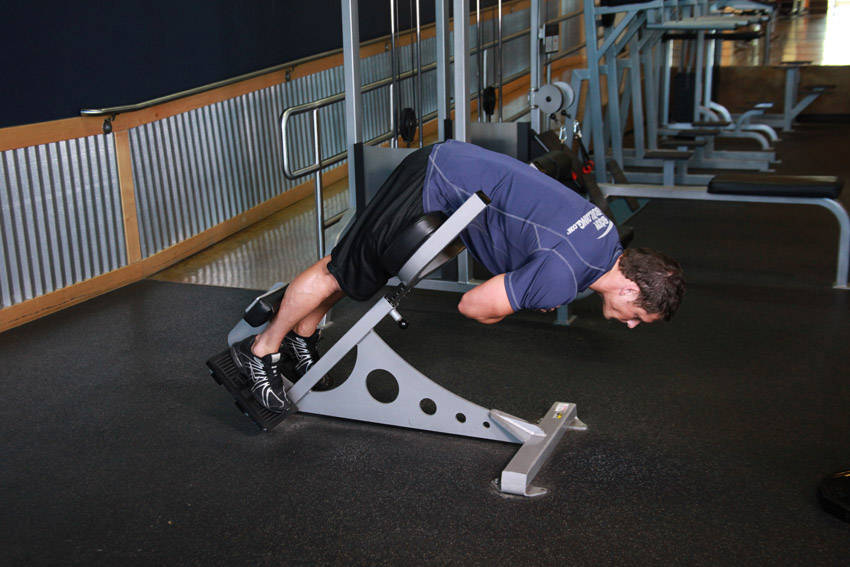 |
Click Image To Enlarge. Hyperextensions (Back Extensions)
Click Here For A Video Demonstration Of Hyperextensions (Back Extensions).
Back Exercises:
On any rowing or deadlift exercise, you need to lock that arch in your back and keep it there. If you cannot hold it, lighten the weight or use a machine or bench to support your chest. DO NOT blow out your back. It sucks, I know!
If in doubt, ask a qualified trainer, NOT the 'big guy over there'. If you look around, chances are, in my experience, that more than half the people doing these exercises are doing them wrong. Most of them are guys, who think that the male DNA somehow makes them an expert in weightlifting. Err on the side of caution. The most dangerous thing at the gym is your ego! Leave your ego in the car. Just because you think you can lift it, doesn't mean you should lift it.
Many times you may go to the gym and realize that a specific muscle group is sore, maybe from yard work or other weekend activities. In cases like this, do not hesitate to change your workout for the day and do one of the others. This also would be the plan if a particular exercise is causing you discomfort: change the exercise.
Now, there's the old saying about "working through the pain." There's also the saying, for those of us over 40, of "don't be an idiot, it could be an injury." A little soreness and stiffness and slight pain are part of being physically active. Knowing what is just pain and what is a potential injury takes experience. So when starting out, play it safe. If it hurts, do something else. Better safe than out of the gym for a month.
Doing a 5 minute warm-up on the treadmill or elliptical and some light stretching before you lift can help your workout and recovery tremendously. Never do aggressive stretching with cold muscles! This is an easy way to pull or even tear a muscle. Stretch AFTER you workout, this decreases the risk of injury and can help with recovery.
Items Of Assistance - Accessories
What do I mean by "accessories?" Well, I mean: Any item that you might use, or need to use, in the gym to assist with workouts. This encompasses numerous items, but we will cover just a few. Belts, wraps, lifting straps, shoes, and some other cool items I have tried.
Belts:
Belts are the number one most misused accessory in the gym. Why? Contrary to popular belief, most people do not need a belt. In fact, most people would be better off if they never bought one and instead relied on core work to develop their natural belt instead. Belts are not to be used as a substitute for proper technique! Also, belts do not support your back!
A lifting belt is designed to support the core abdominal muscles so you can use your abs and other core muscles to increase intra-abdominal pressure thus helping to provide more support to your back and taking some of the strain off the spinal erectors.
Belts are supposed to be worn tight enough that they are almost uncomfortable, so they should only be used during the actual lift. If you see, or if you are that guy wandering around the gym with a belt on all the time, it is not being worn properly, especially if you see it worn up around the navel. All this does is give the wearer a false sense of security on their way to a hernia or back injury.
If a belt is to be worn, it should be worn low, around the hips (or just above) and lower abs, as tight as it can be adjusted. You lock it on, drive the abs into the belt, locking the core, and perform the lift. Then you take it off or at least loosen it up.
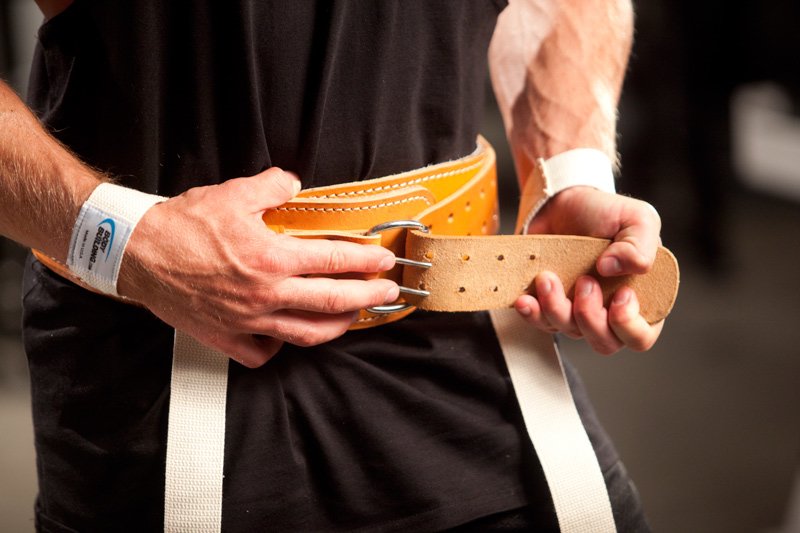 Click To Enlarge.
 If A Belt Is To Be Worn, It Should Be Worn Low, Around The Hips
And Lower Abs, As Tight As It Can Be Adjusted.
If you need a belt...Most people will never need a heavy leather power belt. If they do, we have an equipment section on the forum with names like APT, Inzer, and more in there. These belts are for lifting extremely heavy weight (twice body weight squats, deadlifts, etc.) which is not this target audience.Most of you are looking for a belt to help with stabilization of the core. Again, remember that working the core comes first. You must have a strong core to move heavy weight. If you do not, you should not need a belt as you should be using lighter weight.
You are also probably looking for a belt that, unlike a power belt, does not bruise your hips and require help to get tight enough. These belts are the padded Velcro secured kind for the most part.
What I look for is the width of the reinforcing strap (the heavy nylon outer strap) as this is the only part of the belt that actually gives support. It should be at least 3" in width in order to properly support the core muscles. In my opinion, these 2" wide super padded belts are the 'newbie belts' that are worn around the gym so the wearers can 'look hardcore'. There are a few of these around, but two of the best, that I have used, are the Harbinger 5" Firmfit Belt and Harbinger 4" Pro Nylon Lifting Belt.
Why do I like these the best? They are very comfortable, and in addition to the wide strap, they have an almost full length Velcro attachment area. (More contact area = greater strength in the grip) The last thing I want is for the Velcro to come loose when I am lifting heavy. Do not get caught up in contours and fancy adjustments. What good is 6" of foam if there is only 2" of actual support? No good.
Support Wraps:
These should only be used to support an injured area or to prevent a serious injury when performing maximum effort lifts. They should not be used as a constant crutch for an underdeveloped weak area. Strengthen the weakness or you WILL become injured. Again, competition wraps are generally not needed, but names like APT and Inzer are again at the top of that list. APT also makes some great "mid heavy wraps" which is what I use.
The main thing I must stress, when choosing a wrap, is that it needs to be able to lock down to the point that it is almost too uncomfortable to wear. This is the point at which it actually provides stability. If you just "want a little support" get wrist wraps gloves. However, if you need support, get real wraps. I prefer a 20" wrap or longer to actually get the wrist covered as it should be. I prefer a 72" or longer knee wrap when maximum support is the goal.
A general rule of thumb is that, if you can "slip them on" they are not supportive enough. The exception to this rule are some of the better elbow and knee "sleeves" which are hell to get on, but do offer good support and heat retention.The main thing to learn about using a wrap is HOW to wrap it properly. Most good power-lifting supply sites have a video or guide to this. There are also a few accurate ones here on Bodybuilding.com, like this one:
Lifting Straps:
Lifting straps are straps used to assist in performing a lift when the lifter's grip is the limiting factor to muscular development. Like belts, they should be used only when really needed. If you use them as a crutch for a poorly developed grip you will have a consistent weak link that will never go away.
Like many people, I had a grip that compromised my lifts, so I relied on straps too often. I also made the mistake of wearing gloves. Gloves make the gripped area larger in diameter, thus lowering the grip strength of your hands. If you feel like you always need straps, and you wear gloves, stop wearing gloves on the heavy sets. I dropped the straps except for the heavy sets and focused on working the grip. I never went back to gloves. Now my wife wears gloves because, as she puts it, "calluses on girls are not sexy."
I absolutely prefer straps over hooks or items with a built in 'stop' that do not force you to rely on some grip strength. Straps are an aid; hooks are a crutch. Hooks do not force you to use ANY grip strength; straps do. So even while you are using straps, you are still developing some grip strength.
 Click To Enlarge.
 I Absolutely Prefer Straps Over Hooks Or Items With A Built In 'Stop'
That Do Not Force You To Rely On Some Grip Strength.
For most people, the standard cotton straps are all they will ever need. The Bodybuilding.com store has a plethora of choices, so shop away.For those of you who are pulling some heavier weights, you need something more. You know who you are: those little cotton straps are leaving marks in the wrist and having your wife question whether you were really "at the gym." While you have a few choices of padded straps, I would still point you to the APT line of 2" wide, double thick, padded straps. Why? They work, and they work well, without the skin tearing effects of the narrower straps.
Since I see most people use these wrong starting out, I will answer the question, "How do you use lifting straps?" There are differing opinions, but I, and most of the heavy lifters I know, prefer to use them this way. This is for an overhand grip on shrugs, dead-lifts, or rows. Make a loop as shown below.
| RELATED PRODUCT | ||
|

This loop will go on my right hand. I slide my right hand in there from the top, palm facing away. So now the strap comes out between my thumb and index finger. Why this direction? Why would I want to point it the other way, out towards the pinky, which is the weakest finger in the hand?So now it is around my hand/wrist. I tighten it around the wrist and then I grip the bar overhand. The strap is now hanging down towards the floor. I wrap the strap UNDER the bar and then under my palm, trying to get it to exit inside the outer wrap of the strap and under the middle two fingers. I always want to leave at least the index finger free.
Remember, we are lifting the bar, not the strap. Having the index finger around the bar increases friction so the bar won't want to roll as much. Crank it down, usually one good wrap is enough (again, we are lifting the bar not the strap) to let the strap provide ample assistance and not try to make the strap do it all.
Repeat this for the opposite side, make sure they are both very tight, and lift the bar. You will need to work on this a few times to be able to get it tight on both hands without having to use your teeth to pull the second one (bad thing to do).
You should still wear out your forearms a bit as this wrap will force you to continue to develop grip. Again, don't use these as a crutch; pull them out when you absolutely need them. I also recommend them for exercises like power cleans, where the bar is moving at a good velocity, with the potential to come out of your hands.
Shoes:
Choosing the right shoe is, as many items are, goal dependent. I have always felt that if you are serious about your fitness goals, you need to be serious about your shoes. This absolutely does not mean spending the most you can; it means getting a professional to help you pick the right shoe for you.
Anyone who asks what the "best shoe is", on the forum, will get a hundred different opinions. We all know what opinions are like, and everyone has one. I suggest, for cardio or running shoes, that you go to a legitimate running store, staffed by actual competitive runners. These stores should have someone who will want to watch you walk or run (I don't run, unless it's away from something stinky) and give you feedback on your gait and recommend several different shoes and brands that can help correct any problems you might have.
 Click To Enlarge.
 I Have Always Felt That If You Are Serious About Your Fitness Goals,
You Need To Be Serious About Your Shoes.
I am a heel striker who over-pronates, so I wear Brooks, New Balance 700+ series, and some of the Mizuno or Saucony shoes. Why these shoes? These have the outer heel support that will correct my strike and keep me from rolling the foot so much. Did this work? I went from shin splints that kept me up at night, to no pain in two weeks or less. So it was worth the time. And many stores have a 'last season' sale area where most of these can be found for under $50 a pair.I suggest you do the same. Then, if you want cross trainers, guess what, the brand you use for running is probably good for cross trainers too.
Men's and Women's shoes made specifically for lifting are sold here on Bodybuilding.com. I have a set of the Power Trainers that I love. For squats, it is critical to have a relatively low sole, ankle support, and good shoe/sole connection. You do not want to be able to "roll" the shoe when performing a heavy squat while 'spreading the floor'.
Cool Items I Have Used:
There are a couple of items I have purchased from the Bodybuilding.com store that I really like. They are: The Motion Transfer Equipment Motion Transfer Cable Attachment and the Polar Fusion Tiger Tail Rolling Muscle Massager.
The Motion Transfer Equipment Motion Transfer Cable Attachment is a serious piece of equipment that allows you to get rid of numerous cable attachments for back, bi's, and tri's. I am always skeptical when a company makes claims about how "heavy duty" the construction of their equipment is. This not only meets, but in my opinion, exceeds the manufacturer's claims.
It has numerous adjustments, is built like a tank, easy to use, and looks good. I could go on and on, but here is my thorough review in the equipment section. We use it at home and I often take it to the gym when doing a cable workout.
The Polar Fusion Tiger Tail Rolling Muscle Massager is a great recovery tool. How can this little thing work that well? That was my question too. The foam cover is over a good solid core that really gets into the muscle fibers and helps break down the knots and scar tissue and increase blood flow. They offer 2 sizes: an 18" that will fit in your travel suitcase (oh yea baby, massage on the road) and a 22" which is perfect for home. I have a review on the site as well.
| RELATED PRODUCT | ||
|

Please remember, accessories are for assistance. They are not designed to compensate for bad technique or laziness. If used properly, they can improve your workouts. If used improperly, they can be worthless or even damaging.
Our bodies don't grow while we are in the gym, they grow when we rest. As over 40 lifters, most of us need a longer recovery time that we did in our 20's. The older we get the more diligent we must become regarding our nutrition and recovery programs.
Part of recovery is also keeping up cardiovascular health. How you do that can vary greatly from person to person, but you need to choose exercises you can do, and do them on a regular basis. The increased blood flow, oxygen use, and metabolic benefits of cardiovascular training should not be ignored. The better your cardiovascular fitness, the better your body will respond to strength training and to life in general.
Do not forget to mix up your strength training exercises on a regular basis. Since your body can adapt to a certain routing in a relatively short period of time, changing or substituting one exercise for another can be extremely helpful in making consistent progress, especially if that progress has stalled.
Like I stated above, err on the side of caution. If in doubt, ask for advice from qualified personnel. Stay safe, stay healthy, stay strong.
Good luck with it. As always, if you have any questions, feel free to email me. I attempt to respond to everyone if possible.
Until next time, Lift Big 2 Get Big.
- CTGBLUE
Please keep an eye out for the rest of the series coming out over the next month or two.
PS: Let me know if there's a certain topic You would like to see me address.