Handstand Push-Ups: The Press You Need To Learn!

In search of the perfect press to go along with your pull-up practice? Look no further than the handstand push-up! It'll take time to master, but the benefits are undeniable!

Vital Stats
Name: Grace Kavadlo
Two of my favorite exercises are the push-up and the handstand. When you combine them, you get an exercise that increases your upper-body pressing strength like no other—the handstand push-up!
Wait, wait. I know the handstand push-up can sound like an intimidating exercise, and you're probably thinking you can't even do a handstand yet, so you should skip this tutorial. Stick with me! Just like when you're building up to doing pull-ups for reps, the progression up to a handstand push-up has lots of value on its own. And just like pull-ups, this is a goal that often requires lots of practice to achieve. But even if it takes awhile to get there, trust me when I say this is a goal worth setting!
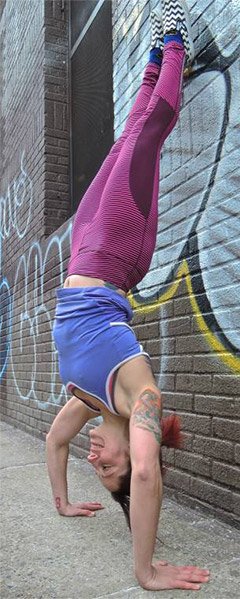
Performing a handstand push-up is almost the equivalent of overhead pressing your weight. That's a significant load! I prefer this exercise to the overhead press, however, because it requires practically no equipment. No weights? No problem! All you need is a wall!
Of course, practicing this move regularly will improve your barbell or kettlebell press, but they have plenty to offer on their own, too. Handstand push-ups strengthen your entire upper body, including your delts, pecs, lats, triceps, and definitely your abdominals! You get a lot of bang for your buck, plus it's a gravity-defying exercise that's a ton of fun to practice and use to impress your friends!
I can teach you how to get your first rep by simply changing the incline and gradually advancing the move using the help of progressive calisthenics. Let's get started!
Performing a handstand push-up is almost the equivalent of overhead pressing your weight.
Step 1 Pike push-up
The pike push-up is like a dynamic downward-facing dog pose from yoga. Start in a push-up position with your feet about hip-width apart and your hands beneath your shoulders. Begin to walk your feet toward your hands while keeping your legs straight. At the top position your body should resemble an inverted V, in a hinge position, bent at the hips.
If you have the flexibility to keep your heels planted, go ahead and do so. Otherwise, staying on the balls of the feet is perfectly acceptable. From here, bend your elbows in toward your body as you descend, until the top of your head touches the ground. Press yourself back up to the top position and repeat.
Build up to 2 sets of 10 reps before trying the next step.
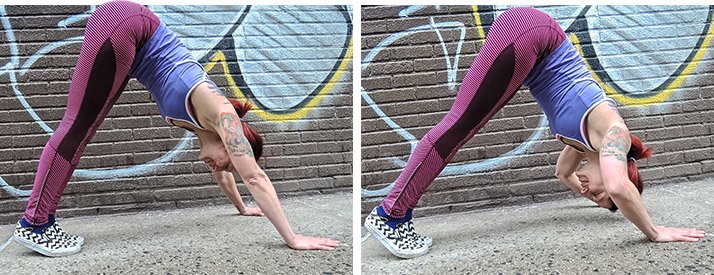
The pike push-up is like a dynamic downward-facing dog pose from yoga.
Step 2 Kick-up
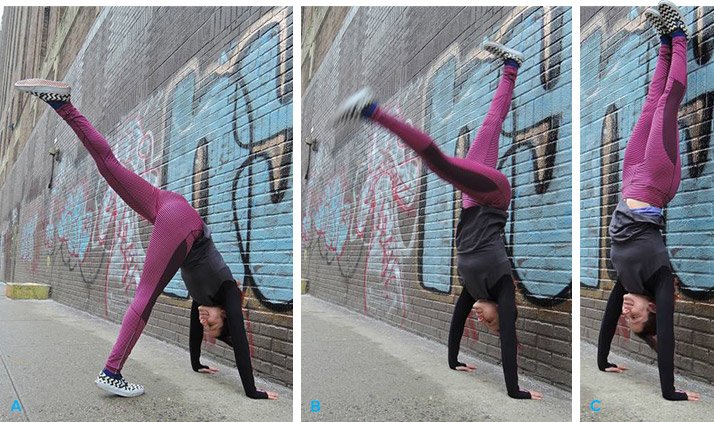
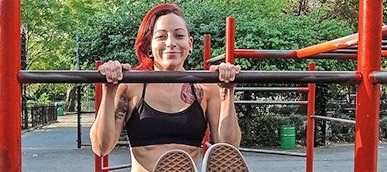
Kicking up may sound like a strange exercise, but a huge part of conquering the handstand push-up is getting accustomed to being upside-down. It takes time to master, which is why kicking up against the wall is the next step in this progression.
Place your hands a few inches from the wall, and walk your feet into the pike position. Extend one leg upward and jump off the standing leg as you propel your feet toward the wall. It may take a few kicks to stick. Don't be afraid to overshoot it at first. The wall is there to catch you. Eventually, when you get comfortable with this exercise, you will want to work toward more controlled attempts where you don't crash into the wall.
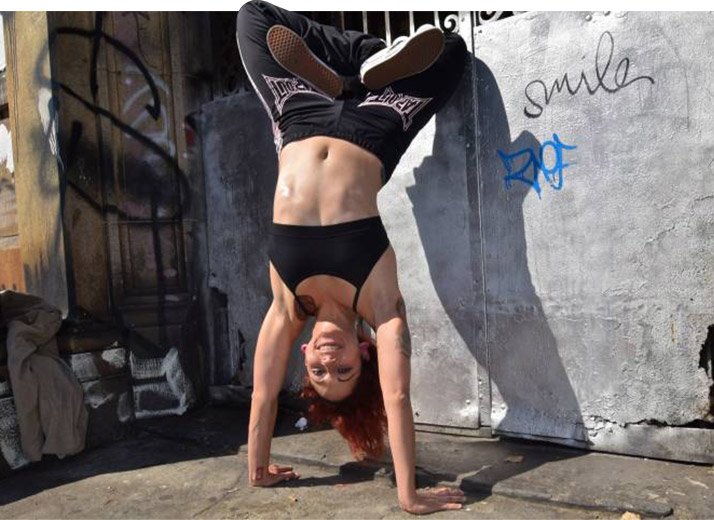
Once you're up, point your toes and press through your fingers and palms to maintain tension throughout your body. Though you should be engaging your core, it's natural to have an arch in your back. Your focus here is to try and hold the position for as long as you feel comfortable. Then, lower down relatively gently, one leg at a time, just like you did during your kick-up.
A good initial goal for this move is to be able to hold it confidently for 30 seconds. Then, build up to a minute before moving to the next stage. Also, make sure your elbows are locked the entire time during your kick-up. If you suddenly put all of your weight on bent arms, you can definitely wind up falling on your head!
A huge part of conquering the handstand push-up is getting accustomed to being upside-down.
Step 3 Elevated Pike Pushup
When you get comfortable with pike push-ups and wall kick-ups, you'll be well on your way. Now it's time to add even more upper-body strength to get you on the home stretch!
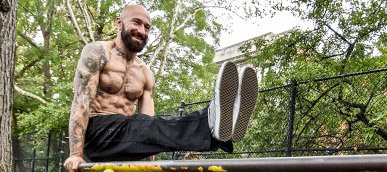
The way you'll get it is by working on the incline pike push-up, with your feet elevated. A chair, ledge, bench, or step is all you'll need for this progression. Place your feet on your elevated surface and begin to walk your hands in, attempting to stack your hips above your shoulders with your head hanging between your arms. Your body should resemble more of a right angle than a V-shape.
Lower yourself slowly so your head touches the ground, then push back up. I suggest practicing on grass, or with a mat or pillow beneath your head in case you lose control. Elevating your feet increases the difficulty of the pike push-up by changing the leverage and placing more of your weight onto your hands. This forces you to use the strength of your upper body to perform a rep.
Again, aim for at least 2 sets of 10 reps here.
Step 4 HSPU Negatives
Once you're comfortable kicking up to the wall, it's time to conquer the negative (lowering) phase of the handstand push-up. Just as pull-up negatives are one of the most effective ways to develop the strength you need to finally nail that first full rep, this will get you over the final hurdles between you and the HSPU.
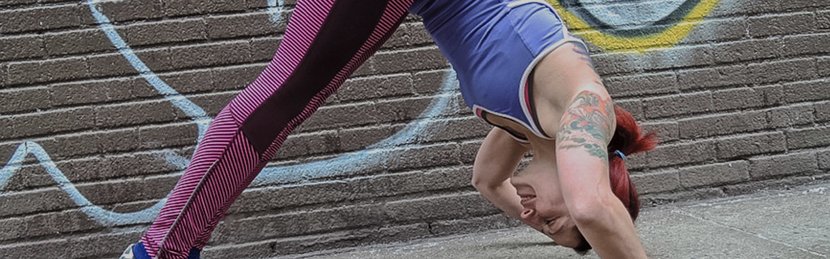
When you're starting off, place a pillow or mat on the ground where your head will be touching. Kick up to the wall, squeeze your legs together, and begin to bend your elbows as you lower your head towards the mat. You want to work towards lowering for a count of 5 seconds. Pause at the bottom position and slowly come out by lowering your legs back down to the ground. When you're ready for your next rep, kick back up to the wall and begin again.
Performing the negative phase of the handstand push-up gives you a feel for the full movement without having to press back up. As you practice, try to control the descent more and more by lowering yourself as slowly as possible. This will ensure that you are using pure strength and not momentum, and will keep you safe from face-planting.
Full Handstand Push-up
Once you can comfortably perform negatives, you're definitely ready to try pressing yourself back up. If you are unable to, try using a partial range of motion with something like a yoga block under your head until you can perform the full rep.
You may be disappointed that you can't knock out big-time reps by now, but be patient! It takes time—especially for us ladies—to build up to full handstand push-ups. The more you own the earlier progressions, the better prepared you will be to perform the handstand push-up.
Handstand Push-ups
Congratulations—you're now inducted into the world of inversions! My initial introduction came through my yoga practice, but through calisthenics strength training it has blossomed into much more. You have a lot to gain by integrating handstand push-ups into your routine, and not just in terms of aesthetics.
Flipping upside-down regularly helps to encourage venous return—or blood flow back to the heart—which tends to slow down as we age. You are essentially giving your heart a well-deserved break by helping blood flow from the lower extremities and back for fresh oxygenation. Some people also believe that inversions can improve immunity by reversing the flow of toxins into the digestive system for elimination.
But most importantly, inversions just feel good! If you work at a desk or similar job during the day, taking a kick-up break is definitely one of the best ways to clear the head. Just try it!
How many more reasons do you need to take your workout routine to the next level? It's time to turn everything you thought you knew about exercise upside-down!
Recommended Articles
Ladies: Bring Pull-ups To The Forefront Of Your Training!
Many women crank away at pull-downs and assistance tricks for years and never see it translate into strict pull-ups. Achieve your big breakthrough with this fool-proof bodyweight progression!
Bodyweight Supersets For Super Strength!
Supersets aren't just for burning out your arms with dumbbells. You can use them to get the most out of big-bang calisthenics classics, too! Al Kavadlo is here to show you how.

A Push-up For Every Occasion
If you only know a couple of push-up varieties and can keep repping them forever, you need a new challenge. Al Kavadlo has one—and then seven more!