Ladies: Bring Pull-ups To The Forefront Of Your Training!

Many women crank away at pull-downs and assistance tricks for years and never see it translate into strict pull-ups. Achieve your big breakthrough with this fool-proof bodyweight progression!

Vital Stats
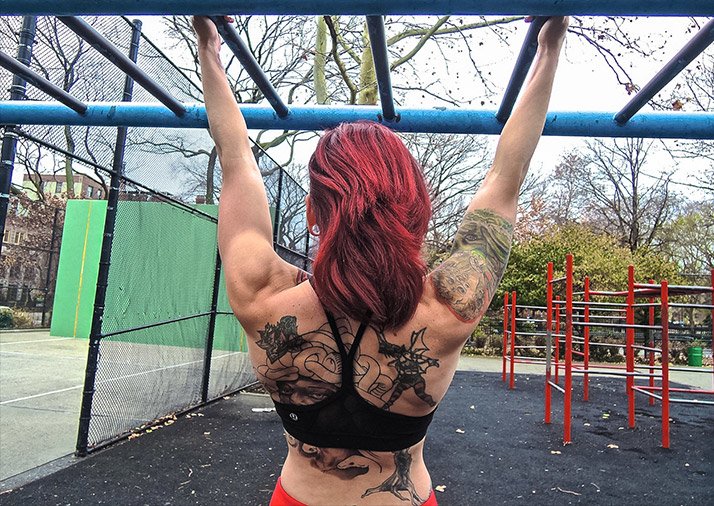
Name: Grace Kavadlo
Occupation: Trainer, calisthenics specialist, yoga teacher
Website: www.dieselgrace.com
One of the greatest fitness breakthroughs in my life was my first pull-up. It was just one, but as soon as my chin got over that bar I was over the moon! Prior to that time, I had been solely dedicated to my yoga practice. Then one day I bought a doorway pull-up bar and it changed everything. I thought I was already in shape, so I was surprised when I couldn't even do one rep. I decided that day I was going to conquer the bar!
Soon after, I enrolled in a cross-training class where they had me practice kipping and resistance band pull-ups. Unfortunately, after about a year of training this way, I still couldn't even manage a strict pull-up. At this point, I could have given up, but that didn't sit well with me. I knew I could do a pull-up—and that it was a goal worth working toward.
After injuring my back, I got turned on to bodyweight training and strength-based calisthenics as a way to both rehabilitate and to complement my yoga practice. A few months later, my back was healed, and I finally achieved a full pull-up!
It was a journey, but in hindsight, I can say that the distance from no pull-ups to one clean rep is a lot longer than the distance from one rep to multiple reps. In fact, I can perform 10 strict pull-ups in a row, and I'm working on more advanced variations.
Now I'm here to save you all the extra time and struggle I went through. Get on the road to your first pull-up today!
There's no replacement for pull-ups
For most women—even women who train hard—the pull-up is a fringe move. Why? One easy answer is that, compared to men, women usually have a stronger lower body then upper body. But this isn't an excuse to neglect our upper-body pulls, ladies! On the contrary, it's a reason to focus on them.
"But I do push-ups and lat pull-downs," you say. Push-ups are great, of course. But those machine pull-downs just can't hold a candle to pull-ups—or all the progressions that help you get to pull-ups. Even just hanging from the bar can have powerful benefits for your posture. Pull-up training develops your lats, upper back, shoulders, and arms, but they also light up your abs to a really surprising degree. Those are all great benefits for both men and women, but having a strong upper back is especially important for women to help support the weight of our breasts.
Want to talk about physique? Let's do it. Well-developed lats have as much to do with emphasizing the hourglass shape most women desire as the obliques do. Focus on pull-ups, and you might finally see what you've been wishing side bends would give you.
Bodyweight training means, of course, that you're using your body as a weight, so you may hesitate to consider pull-ups if you've got more body weight than you wish. I get it! But don't avoid resistance training just because you're carrying extra weight. Balance your pull-up training with a healthy diet, and you'll get where you want to be far faster than if you do one or the other alone.
On board yet? Here's a series of progressions that will help prepare you for getting your first pull-up. There's nothing more empowering than putting to rest the stereotype that women aren't strong enough to do pull-ups. Let's get started!
Step 1 Australian Pull-up
This is basically a horizontal pull-up where your feet remain on the ground or an elevated surface. It's less difficult than a full pull-up because the leverage and angle are more favorable, but that doesn't mean it's easy.
Find a bar that's about waist-high, and position yourself underneath with your hands just wider than shoulder-width apart. If you go to a gym, you can use the Smith machine or a barbell on pins in a power-rack to dial in the exact height. Practice with either an overhand or underhand grip—whatever feels more natural. If necessary, alternate between two variations: one where your knees are bent, and the second with straight legs. Bending your knees will make it less difficult, because you can push slightly with your feet for assistance when needed.
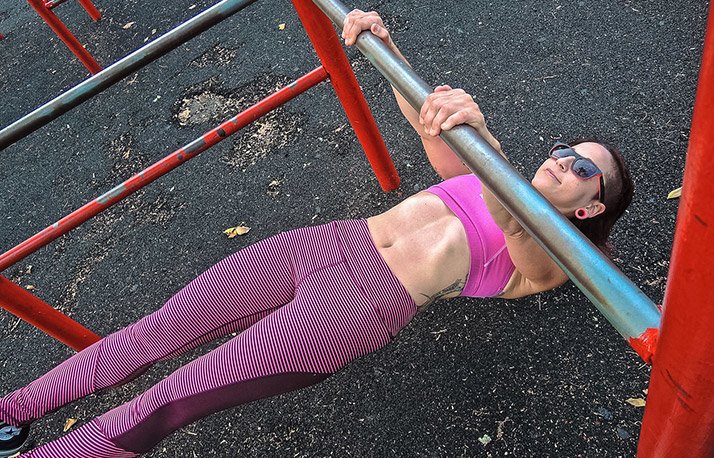
Australian Pull-up
Attempt to pull your chest within an inch of the bar on every repetition, then lower slowly, avoiding the use of momentum. Keep your back ramrod-straight while going up and down, and avoid the urge to droop as the set wears on.
I recommend starting off with 2-3 sets of 10 clean reps as part of your regular exercise routine. When you can do 3 comfortable sets of 10 Aussies, mix in some sets where you elevate your feet on another bar or a box or platform. This will change the leverage, making the movement more challenging.
Step 2 Bar Hang
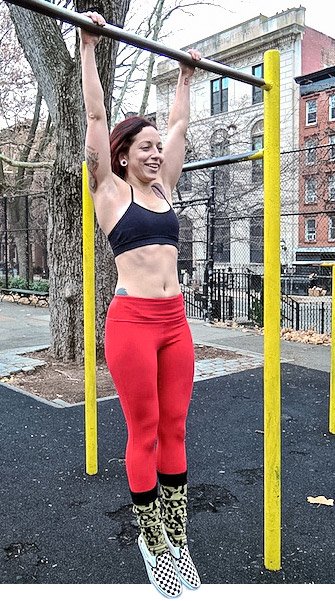
When you first start out, just hanging from a bar can be tough. Don't feel hopeless if this is the case for you. Start with just a few seconds if you have to, and take it slowly from there.
The more you resist swinging and learn to tense your entire body, the better you'll be able to use your nervous system to recruit muscles when the time comes for your first pull-up. Whereas Aussie pull-ups are a natural fit as part of your workout, you can sprinkle bar hangs in any time during the day if you have access to a doorway pull-up bar. This move can also be part of your warm-up when you work out.
Play around with squeezing the bar harder or relaxing your grip, which will help strengthen the muscles of your arm and hands. Feel free to experiment with different grips: over, under, and mixed. Know your bar! While it may not look as impressive as a pull-up, this is a powerful exercise on its own.
Once you feel comfortable hanging for about 15-30 seconds, start practicing reverse shrugs. These teach you how to pack your shoulders, which will help you learn to use the bigger muscles of the back, like the lats and traps. Being able to tap into these is crucial to eventually performing a pull-up.
To perform a reverse shrug, grasp the bar firmly and pull your shoulder blades down and back by lifting your chest slightly and pushing your shoulders away from your ears. You can practice these for repetitions, and eventually they'll be a great mobility drill to include in your warm-up routine. Just like the bar hang, alternate between different grips.
Step 3 Flexed-Arm Hang
Once you get comfortable hanging below the bar, the next step is to start hanging with your arms flexed and your chin above the bar. This is known as a flexed arm hang or just a "flex hang."
On your first attempt, I suggest using an elevated platform to help get yourself in position with your chin above the bar. It's also helpful to start out by using an underhand grip for this one.
Flexed-Arm Hang
Jump to the top position, squeeze the bar, and hold it for as long as you can. Your entire body may start shaking from trying to keep yourself in position. This is good! Try not to hold your breath.
Time your hang and challenge yourself to eventually achieve 30 seconds. Then raise it to a minute.
Step 4 Slow Negatives
The concept behind slow negatives is to work the eccentric (lowering phase) in order to build the strength for the concentric rep. It's like doing a reverse pull-up—and many women find it's the magic ingredient that finally makes their first pull-up happen.
Start in a flexed hang position. Tense your entire body and lower yourself slowly, without any momentum. Aim to make your negative last for at least 10 seconds. You should end at the bottom position with your arms extended and shoulders packed. Start off doing just one at a time, resting a minute or two between efforts.
Once you're well-acquainted with slow negatives, you're pretty close to doing pull-ups.
Once you're well-acquainted with slow negatives, you're pretty close to doing pull-ups. But I still like to add in one last drill, in the form of partial range-of-motion pull-ups, to really focus in on the difficult top half of the movement. With these, you can use a platform or jump up about halfway to the bar, and then pull yourself up the rest of the way.
Eventually, you'll need to rely less and less on the momentum you gain from jumping. Then do a slow negative on the way down.
You're almost there!
When you're finally ready to attempt your first pull-up, I usually suggest trying the underhand grip, also known as the chin-up. Chin-ups tend to be more approachable for beginners because they heavily recruit the biceps in addition to the back and lats, making the movement slightly easier.
Chin-up
Start from a dead-hang position with arms extended. Pack your shoulders, tense your body, and pull the bar to your chin. You may only get one rep the first time. If that's the case, congratulate yourself! That's one more than you could do before, and it's a major accomplishment. Then take a much-deserved rest.
In traditional strength training, this would be considered your one-rep max, and it should be followed by a long rest of about two minutes before restarting. Try for 3-5 sets of just one rep to start, but don't beat yourself up if one is all you've got for now.
If your attempt didn't result in a rep, no worries! You may not be there yet, but you're still close. Give yourself another week with a training plan like the one below.
Putting it all together
If you don't have an extensive strength training background, training pull-ups every day might be too much for you. Remember, your joints may need time to catch up with your muscle growth and adjust to the stress that you place on them.
For this reason, I suggest training toward your pull-up every other day, or only when you feel fresh and not too sore. This will help you avoid overexerting your joints, and can prevent injuries like tendinitis. Supplementing your practice with other upper-body strengthening calisthenics like push-ups can also help you progress even faster!
I suggest training toward your pull-up every other day, or only when you feel fresh and not too sore. This will help you avoid overexerting your joints, and can prevent injuries like tendinitis.
Once you've got a solid grasp on Australian pull-ups, here's a progression that you can use to finally get your head over the bar. Add these exercises into your workout routine on the following days and you'll be on your way!
What comes next?
Remember to be patient with your progress while working toward increasing your pull-up numbers. If it were easy, you would see just as many women at the gym busting out sets of pull-ups as you do on the elliptical trainer. Don't give up on yourself. Just as importantly, don't give up on what got you to your first pull-up!
Consistency in your pull-up practice is what will help increase your numbers. When you're strong enough to do each of the above steps and get your first pull-up, continue practicing the other foundational movements that got you there. Every one of them has unique benefits beyond simply helping you get where you are now.