
When I was a kid, I remember seeing my dad do a headstand and thinking it looked like a lot of fun. So naturally, I wanted to try, too, and I discovered that I loved the sensation of being upside down. Of course, I didn't know I was "exercising"—if I had, that might have made it less fun.
Years later I encountered the headstand again in a yoga class, and I was surprised by how much harder it had become now that I was a full-sized adult. Nonetheless, I embraced the challenge and found that I still liked it enough to want to get better at it. As my training progressed, I came to learn about lots of other ways of turning myself upside down. I also found out that inversions have a slew of benefits that I hadn't even considered.
There's a lot to gain from practicing these exercises besides just showing off in front of your friends: Inversions are great for building body awareness, balance, and core strength. In fact, newcomers are often surprised how much core engagement these exercises require. Plus, any time you temporarily reverse your blood flow by turning upside down, it gives an invigorating boost in circulation for the rest of the body.
Still, in addition to the physical challenge, inversions can often be psychologically overwhelming for beginners. It's scary to turn yourself upside down at first! Tackling this fear can be very empowering, however.
I recommend doing the following moves at the beginning of your training after a quick warm-up, or saving them for the end as part of your cool-down. Either way, take your time progressing through these variations and pay attention to your body.
Shoulder Stand
The shoulder stand is typically the easiest inversion to learn. Begin by lying on your back, then pull your legs to your chest and raise your hips in the air above your shoulders. From there, grab your lower back and gradually wiggle your body into an upright position. Move slowly and breathe deeply.
To get the most out of your shoulder stand, think of lengthening your entire body while tightening your abs and extending your legs. You may feel a deep stretch on the back of your neck, but don't push it if you feel pain. You may not be able to achieve a perfectly straight shoulder stand at first, but with practice, it should eventually become a relatively easy move.
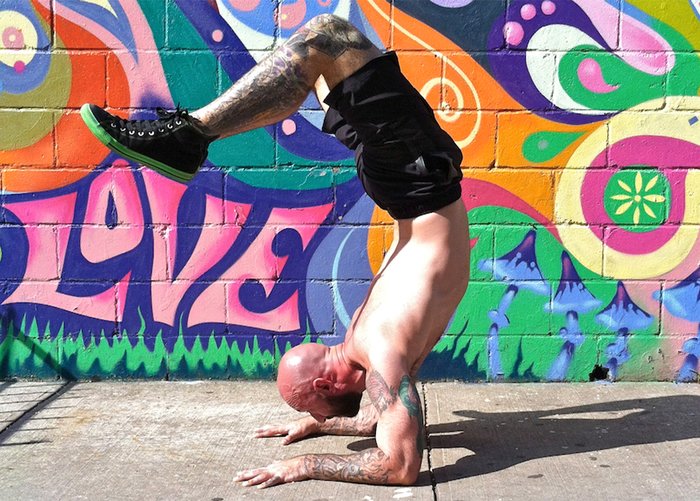
Head Stand
Start in a deep squat position, then fold forward and place the top of your head on the ground. From there you can either interlace your fingers behind your head with your forearms and elbows resting on the ground, or you can place both palms flat on the ground a few inches in front of your face.
Regardless of which arm position you feel more comfortable with, keep your toes on the ground as you lift your hips as high in the air as you can, stacking them above your shoulders. Once your hips are overhead, aim to float your feet up and bring your body into a straight line. I encourage you to start out with a wall or spotter behind you in order to help balance. In time, you can learn to do the exercise without any assistance.
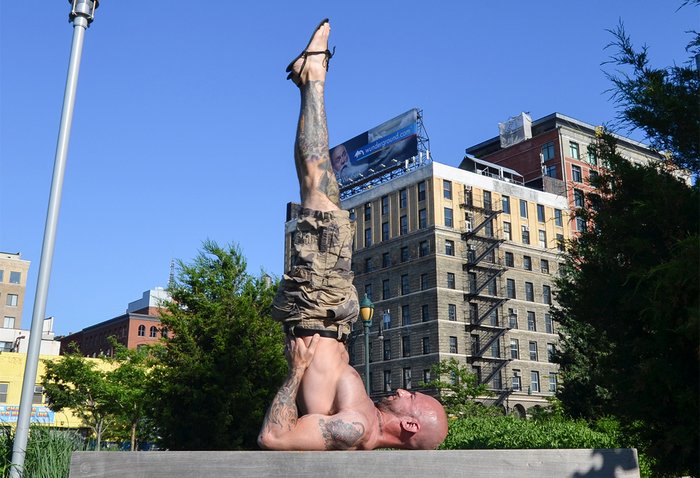
Forearm Stand
As the name implies, you will now be inverting your body with only your forearms on the ground. Though still a difficult move in its own right, the forearm stand is more accessible than a handstand because you have larger points of contact to assist in balancing. In fact, it can be a helpful transitional step for someone who is comfortable with the headstand but not yet ready to try a freestanding handstand.
Some people will find the forearm stand easier to hold with an arched spine. This is sometimes known as a "Scorpion Pose." If you are having difficulty balancing in a regular forearm stand and want to try the scorpion variation, be forewarned that it can be an intense back bend. It might be a good idea to warm up your spine with some preparatory bridge work.
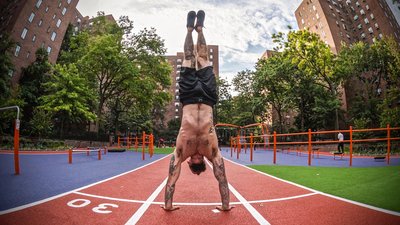
Handstand
Handstands are a fantastic exercise for the entire upper body, particularly the shoulders and traps. They are also great for your hands, forearms, and wrists.
The gold standard is the freestanding handstand, though you can still get the same benefits from using a wall to help with your balance. When using a wall for assistance, there are basically two ways that you can get into position: You can kick up with your back to the wall, or you can walk yourself up into a handstand while facing the wall. Each method poses its own unique challenges and provides specific benefits. The back-to-the-wall method will help you practice how to kick up and come down from your handstand with greater control, while the chest-to-the-wall method will help you find the best alignment.
Depending on individual factors, some people may find one method more or less difficult than the other. Regardless of which is more accessible at first, I recommend practicing both ways.
Feet Hang
In a list of already esoteric exercises, this is the most unusual, and perhaps the most difficult. It's also a bit different because you will no longer be in contact with the ground, instead using your feet—yes, your feet—to support your body while inverted. No, you don't need one of those "inversion tables" to do this. You can do it on any pull-up bar or monkey bars, and you'll still get the circulatory benefits while working your quads, feet, and ankles in a way you never have before.
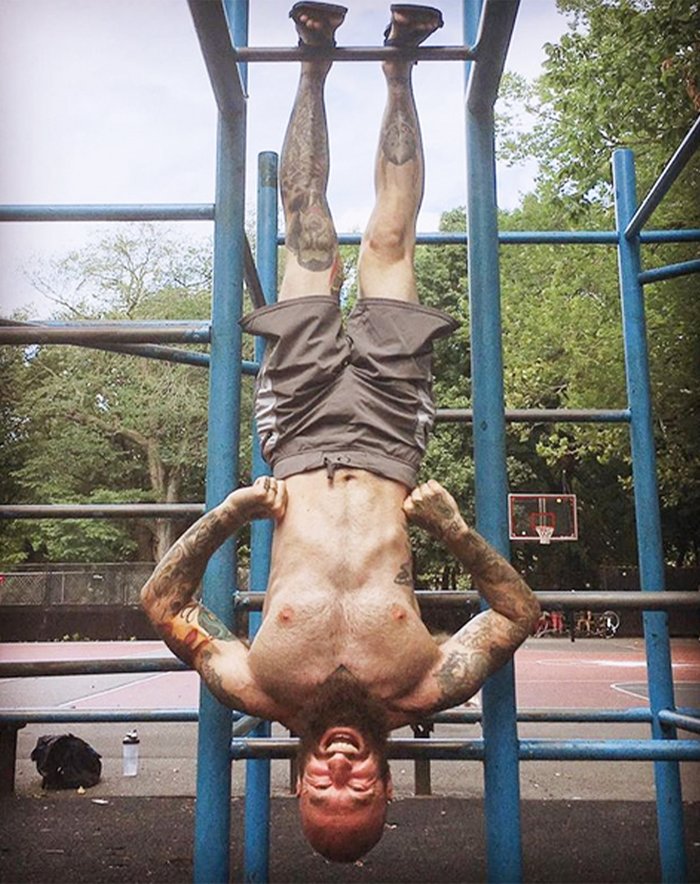
Start by hanging from a bar. Then, lift your legs all the way up and hook your feet over the top. From there, slowly begin loosening your grip as you actively flex your toes toward your shins and squeeze your quads, shifting weight onto the tops of your feet. If you feel ready, try moving your hands from the pull-up bar onto the side posts which support the bar. From here you can progressively put less weight in your hands over time until you feel ready to remove them completely.
Make sure you are actively maintaining tension throughout your body the entire time, especially in your abs. In fact, you may find it easier to hang in a partial sit-up position with your torso flexed forward at first. If you feel like you're starting to lose your footing, be ready to grab the side posts and lower yourself down carefully before you fall. However, I recommend making sure there is something soft beneath you, just in case you slip.
What a Rush!
Some people may experience lightheadedness at first when they are new to inversions, so remember to ease in slowly. As with any new exercise, you don't want to attempt too much, too soon.
Also, be careful to avoid holding your breath when practicing any of the aforementioned exercises. There's a lot to think about when you are upside down, but breathing should still be near the top of the list!
Want to turn the normal way of training upside down? Then try Total Fitness with Andy Speer, only in Bodybuilding.com BodyFit Elite. Across nine weeks, you'll combine the best that body weight and bars have to offer to redefine your athletic potential!