Vital Stats
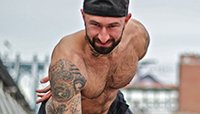
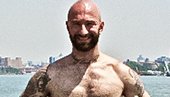
Name: Al Kavadlo, CSCS
Occupation: Trainer, author, PCC instructor
Website: www.alkavadlo.com
Bodyweight strength training has been getting a lot of exposure lately. Moves like the human flag, which were once only seen in circus acts, are now popping up in primetime TV commercials for deodorant. Not surprisingly, the growing popularity of some of these formerly esoteric exercises has created a polarizing effect in the strength training community.
While many gym-goers are excited by the beauty and simplicity of using nothing but one's own body weight—and clever manipulation of leverage—to create challenging new exercises, others are critical of the calisthenics community. One of the biggest gripes many conventional lifters have with bodyweight training is that advanced calisthenics exercises serve no purpose other than showing off. There is some merit to these claims in certain cases, but don't dismiss all advanced calisthenics as parlor tricks.
Bodybuilders and calisthenics folk have a lot more in common than they realize, so there's no need for petty bickering. We all want to develop an eye-catching body and perform better physically, and what one person finds useless in this quest another may find invaluable. Besides, one could easily make the argument that bodybuilding is equally about showing off. Is there really any practical purpose to having 20-inch arms?
No matter your athletic or aesthetic goals, these five cool-looking calisthenics moves can give you the best of both worlds. Use them to impress your friends and build serious strength along the way!
1
The Full Back Bridge
More than just an impressive visual, the full back bridge is a timeless functional movement that can build total-body strength and improve your flexibility dramatically. If you've never tried bridging, get ready for a humbling experience. I'd be willing to bet that the biggest, strongest-looking dude in your gym would struggle to hold a full back bridge for even a few seconds. Also known as the "wheel" pose, this move demands strength and harmony throughout the entire body.
To perform the full back bridge: Lie on your back with your knees bent and feet flat on the floor. Place your hands next to your head, palms down, with your fingers pointed toward your shoulders. Press into the floor with your hands and feet, arching your back to lift your chest forward and push your hips into the air. Keep your thighs, glutes and back muscles active to avoid putting excessive pressure on your spine.
Initially, aim to hold this position for 30 seconds. Then come down, rest, and repeat. In time, you can go up and down for reps in "bridge push-ups," which can help you work toward another movement on this list, the kip-up.
Like all exercises, there are many variations on the back bridge, and the fun doesn't stop with the full bridge. You can keep progressing into single-leg or dynamic versions that will continue to challenge both your strength and flexibility. Whichever way you do them, full back bridges will work wonders for the posterior chain, particularly the spinal erectors, hamstrings, and glutes, which is why I've nominated them in the past as the best bodyweight alternative to the deadlift. They also serve as an excellent stretch for the entire front of the body, especially the hip flexors, abdominals, and pecs.
2
The L-sit
The L-sit is a classic isometric exercise that works your entire body, particularly emphasizing the abdominal muscles. In order to perform an L-sit, you need a strong core, strong arms, and better than average flexibility in your hamstrings. If you don't have those traits yet, well, practice and work up to this move to help build functional strength in all of those areas. I dare you to find a weak individual who can hold this pose for a full minute!
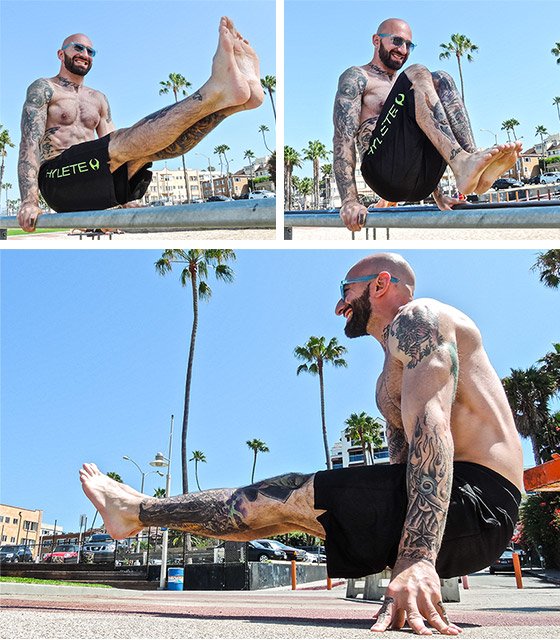
I recommend learning the L-sit by practicing on parallel bars or another elevated surface. Begin by holding yourself upright, like you would at the top of a parallel bar dip. Then raise your legs straight out in front of you until they're parallel to the ground. Your body will wind up looking sort of like the letter "L" (hence "L-sit").
If you can't get to this position right away, practice with one or both knees bent to work your way up to the full position. If you don't have bars or handles, try doing an L-sit on the ground. Bear in mind that this is more challenging; you have less leeway to lift into the hold.
If you're having a hard time transitioning from an elevated L-sit to one performed on the ground, try holding yourself up on your fingertips instead of your palms to create more space to lift your legs. This will also provide an additional challenge for your hands and fingers, two important areas that often don't get worked enough. It's win-win!
3
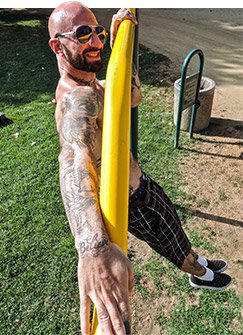
The Elbow Lever
Performing an elbow lever requires grace, flexibility, and major mental focus. It's one of the rare exercises which helps develop strength and balance throughout your whole body. Practicing this move will also help teach you how to create total body tension and build serious core strength to boot.
An elbow lever is performed by leveraging your hip bones against your elbows while balancing on your hands with your outstretched body hovering over the ground. Place your palms on the floor with your fingers facing back toward your legs and bend your elbows so you can rest your hips on them. Slowly shift your weight forward and away from your feet until they float up off the floor.
Keep your whole body engaged as you hold this position isometrically for time. Like the L-sit, practicing elbow levers on an elevated object can be a helpful way to ease your body into the full expression of the exercise.
Once you get a feel for this move, you can raise the stakes by attempting the single-arm version. Now that's a feat worth sharing at the family picnic!
4
The Archer Pull-up
One common misconception in strength training is that once you can bust out a certain number of pull-ups, your only option is to progress the exercise is to add weight. Anyone who has done archer pull-ups knows this isn't the case!
The archer pull-up is a great way to use just your bodyweight and still add a significant degree of resistance to the traditional pull-up. Begin like you're performing a normal wide-grip pull-up, but bend only one of your arms as you pull your chin over the bar. This means your torso will shift toward that side while the opposite arm stays straight. You also need to reach your legs slightly to the side to counterbalance.
You may find it helpful to open your grip on the extended arm at the top of the rep, allowing your hand to roll over the bar. Practice this move alternating sides on each rep. You'll be surprised how quickly they add up!
The archer pull-up can also be a helpful lead-up to the one arm pull-up, one of the most challenging and elusive moves in all of bar calisthenics. There's always a way to keep your bodyweight training regimen fresh and challenging!
5
The Kip-up
The kip-up is a visually impressive bodyweight exercise that shows up in many disciplines including calisthenics, martial arts, and parkour. It's a great way to work on explosive power, hip drive, and total body coordination, plus it's a useful skill for getting back to your feet quickly. If you ever fall on your butt during your training, returning to your feet via kip-up is the best way to redeem yourself!
To perform a kip-up, begin by lying on your back with your palms flat on the ground on either side of your head, similar to the starting position for the back bridge. From there, roll your thighs up toward your shoulders and get ready to explode from your hips. To land a successful kip-up, you'll have to kick your legs up and out as hard as you can and push off with your hands a split second later. The timing is crucial and will take some practice to master. When landing, try to get your feet under your center of gravity in order to avoid falling backward. Think about whipping your legs around in a circle so you land toward your toes. Be patient; performing a smooth kip-up can take a lot of trial and error.
Recommended For You

STRETCHING FOR STRENGTH
Reports of stretching's demise have been greatly exaggerated. In this excerpt from Al Kavadlo's new book, the bodyweight training chief helps you build an effective, personalized practice!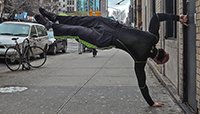
BODYWEIGHT BUST! FOUR BODYWEIGHT TRAINING MYTHS DEBUNKED
Don't believe that high-level calisthenics are only for athletes who look a certain way. Everyone can benefit from the unique challenges that come with bodyweight training!