
Don't waste another rep! Get 10 powerful tips for squeezing more results out of every single rep of every exercise you do. These tips will have you eager to get back into the gym for your next workout!
Day in and day out, you do exercises such as pulldowns, bench press, deadlifts, and squats. But are you getting everything you can out of every single rep you do to achieve maximum muscle growth and strength? Work out smarter, not harder, to achieve maximum results!
The following tips and tricks are going to take the exercises you know and love and show you how to make them even MORE effective! Some you may be familiar with but many will be completely new.
Note: there will be a link to pictures of these techniques at the end of the article.

1. Flat Barbell Bench Press
![]() Overcoming Deceleration Inhibition
Overcoming Deceleration Inhibition
What Is Deceleration Inhibition?
When you do an exercise, your body (without your conscious thought) will slow down your limbs as they get closer to the end of their ranges of motion. In the bench press, this happens as you get closer to the top of the movement. Your body has this reaction in order to prevent injury but it also limits the amount of power you can apply to an exercise.
If your body is actively working to slow down the weight as you come to the top, you simply won't be able to lift as much!
Now look at the bench press... One of the limiting factors in the bench press is that part of the force from the muscles is used to decelerate the bar to keep it from throwing your shoulders out of the socket as you go through the movement. Your body does this by firing the back muscles.


 Click Here To Enlarge.
 Bench Press.
When you're lifting around 80% of your maximum weight, when you get to the halfway point of the movement, your body starts to fire the back muscles to try to slow your limbs down. This means during half of the bench press movement, your body is actually trying to slow down the bar!
When you're using near maximum weights, since the weights are heavier and push down on you more, your body now starts to slow the bar down at about the 3/4 point in the rep, leaving you with a quarter of the movement where your body is trying to slow the bar down. This is still a very significant portion of the rep where your body is working against you!
This slowing can be a cause of sticking points. Quite often, people have trouble locking out the top few inches of the movement when using heavier weight. This can be because their body is actively slowing the bar down as they come to the top. It can also contribute to sticking points about halfway through the movement when using more moderate weight.
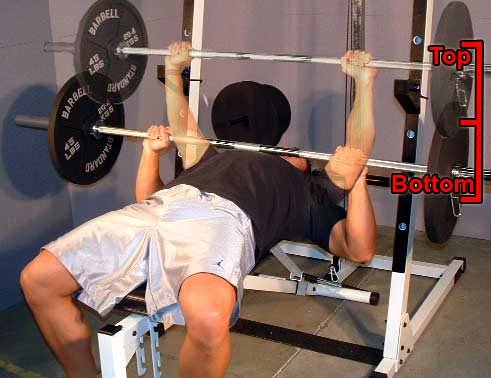 Click To Enlarge.
 The Body Slows The Bar As It Reaches The Top.
Naturally, there are many more factors involved with where sticking points happen, but the nervous system can certainly contribute. Overcoming this deceleration inhibition can help you overcome sticking points.
Overcoming Nervous System Holdbacks:
- You can overcome nervous system holdback with plyometric (explosive or rebound) training like medicine ball throws (they aren't heavy enough, though).
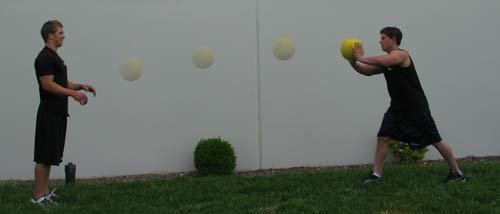 Click Here To Enlarge.
 Medicine Ball Throws.
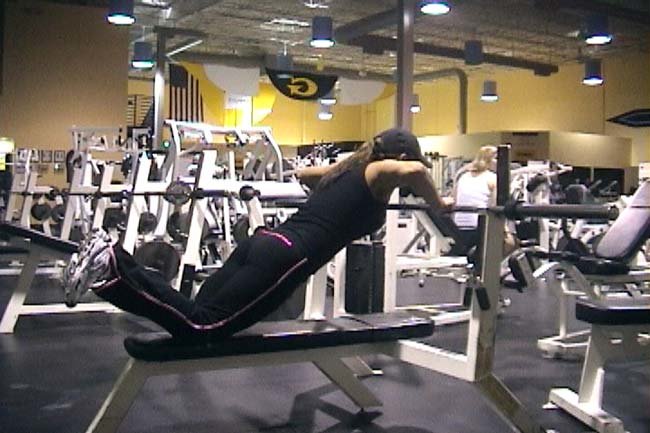
- However, a good option is to do pop-up push-ups on the bench press itself, done right before you start your bench workout as a warm-up. Start by kneeling on the end of the bench, facing the bar.
Fall forward, catching yourself on the bar in the bench press position then explosively pushing yourself right back up to the start position (letting your hands leave the bar), as though you're popping back up.
Another technique for overcoming deceleration inhibition is to attach large chains to the bar. When you start the rep, most of the length of chain is on the floor.
As you lift up and pull more and more links off the floor, the increasing weight of the chains helps to decelerate the weight without requiring muscular involvement. You can push as hard and explosively as you want without your body having to slow the bar down.
You see, what your body doesn't realize is that you don't generally need your limbs to be slowed down in the heavy bench press - if the resistance is heavy enough, that'll slow your limbs down for you!
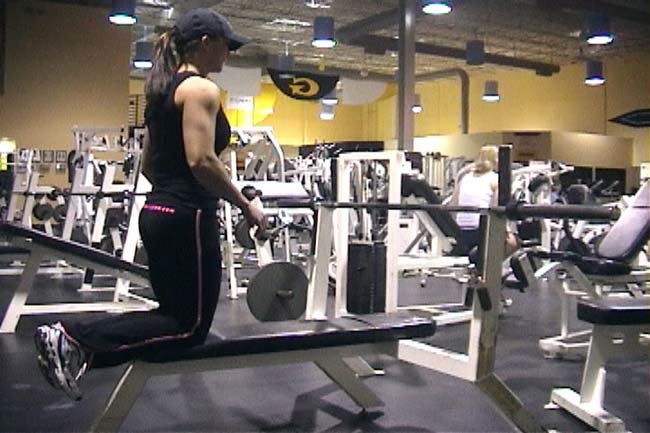
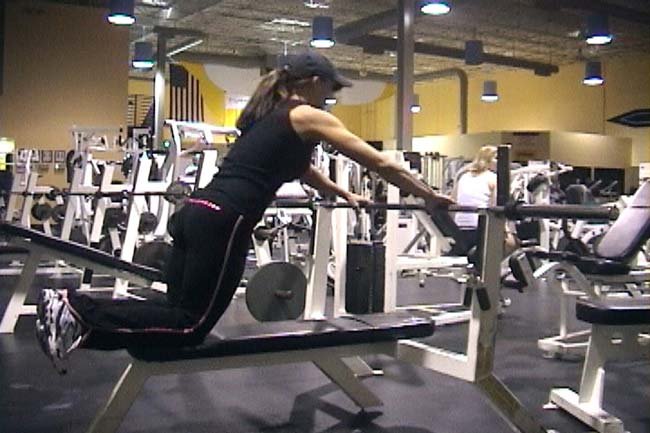
 Click Image To Enlarge.
 Pop-Up Push-Ups.
All the inhibition does is make it harder to lift the weight. Doing a set or two of 6 to 8 reps of this pop-up warm-up detailed above (where you explode up and away from the bar) sends your body the signal that it doesn't need to decelerate the limbs in this movement.
The Result:
- You'll be able to lift more weight.
2. Pulldowns & Chin-ups
![]() Puff Out & Lean Back
Puff Out & Lean Back
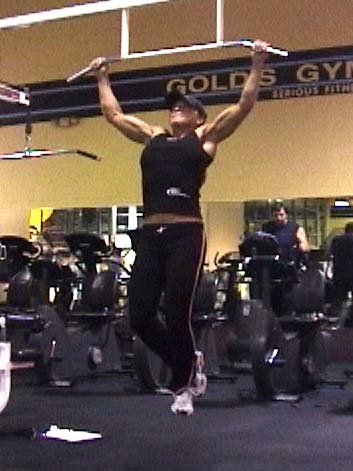
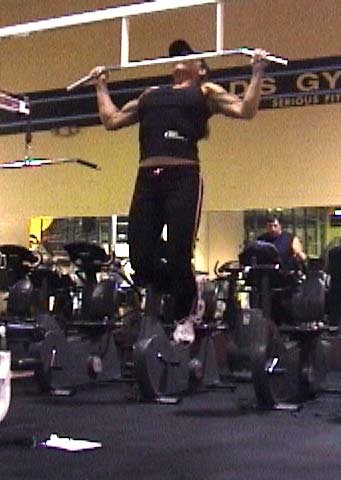
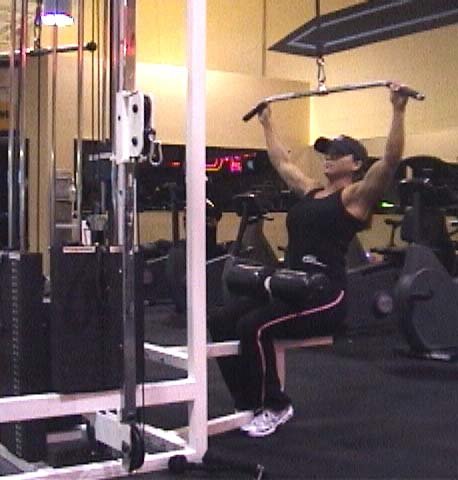
- When doing both pulldowns and chin-ups, it's important to puff out the chest and lean slightly back. The lats cannot fire efficiently when the chest and lower back are flat/vertical, i.e. straight up and down, the way most people do pulldowns and chins. This results in the biceps getting more work.
 Click Image To Enlarge.
 Chin-Ups.
 Click Image To Enlarge.
 Pulldowns.
Leaning back and puffing the chest out to meet the bar as you do the exercise forces the arch into your lower back and dramatically increases lat activation.
3. Barbell Bicep Curls
![]() Take A Narrow Grip
Take A Narrow Grip
- Taking a narrow grip on the bar (shoulder-width or a little inside of that) will more strongly activate the biceps during the movement. This happens because the narrow grip forces the biceps into a more supinated position than wider grips (supination is the movement where the hands rotate to a palms-up/forward position).
 Click To Enlarge.
 Grip Is Slightly Inside Shoulder Width.
Supination is the other primary function of the biceps and forcing maximal supination increases tension and muscle activation in the biceps.
4. Dumbbell Shoulder Press
![]() Pour Water On Your Head
Pour Water On Your Head
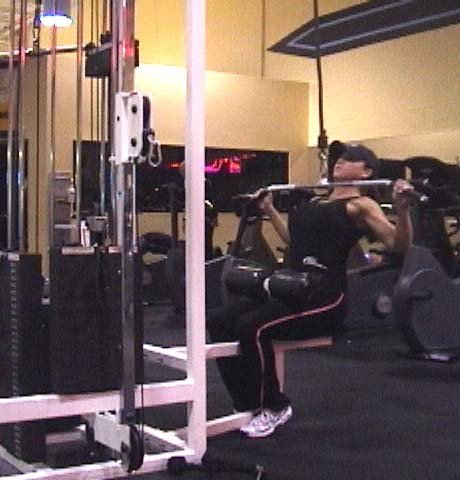
- When doing dumbbell shoulders presses, tilt the dumbbells in towards your head throughout the movement as though you're pouring water on your head with a pitcher. This dramatically increases the tension on the delts throughout the entire exercise - they'll get no break at all!
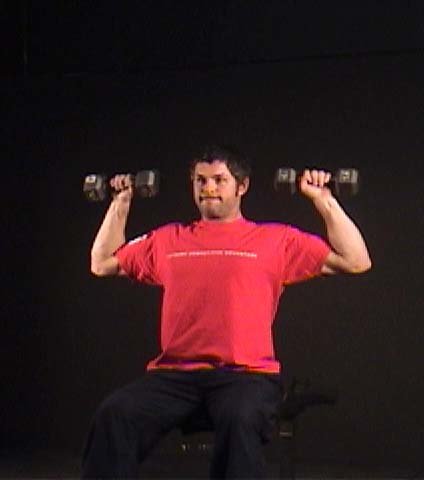
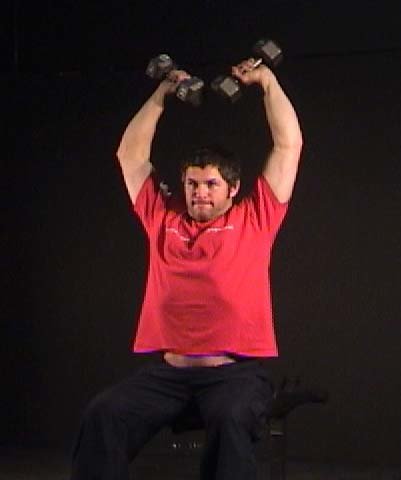 Click Image To Enlarge.
 Dumbbell Shoulder Press.
5. Standing Calf Raises
![]() Two-Part Movement
Two-Part Movement
- Try using a two-step lift to get a full range of motion. When you start the exercise, come up about halfway, pause, shift your ankles around a little, then finish up to the top.

 Click Image To Enlarge.
 Standing Calf Raises.
 Click Image To Enlarge.
 Standing Calf Raises Close-Up.
There is a sort of realignment of the ankle joint partway up - with a little practice you'll be able to feel exactly where it is and how to shift your ankles. This little shift will help you get past the sticking point and get a stronger, more complete contraction in the calf muscles.
6. Pushdowns
![]() Weigh Yourself Down
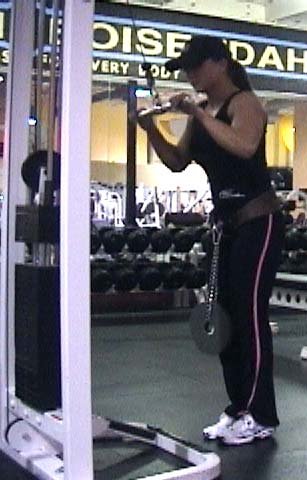
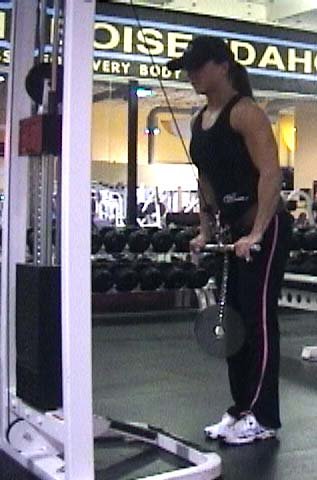
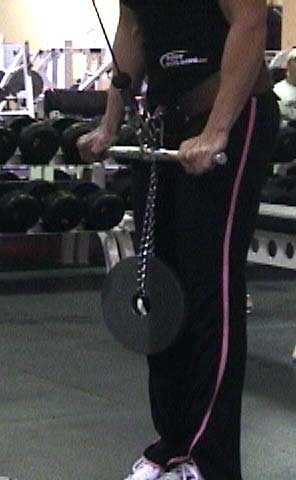
Weigh Yourself Down
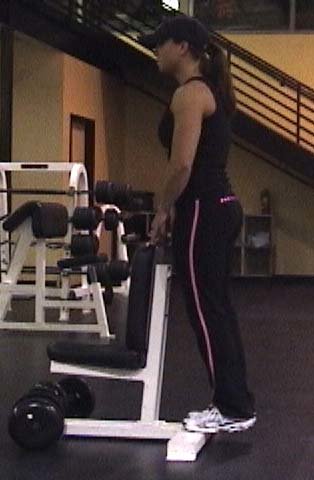
- If you're strong in the pushdown exercise, you may notice that you get to a point where your bodyweight is not enough to allow you to push the bar down without forcing you to lean forward into the movement, which can place stress on your lower back.
The Solution:
- Wear a
- with a 45-lb weight plate or two hanging from it. This instantly increases your bodyweight, balancing out the resistance, allowing you to use far more weight on the pushdown while maintaining the ideal body position. No more lower back stress!
 Click Image To Enlarge.
 Pushdowns.

7. Squats & Deadlifts
![]() Wear Solid Soles Or Nothing At All
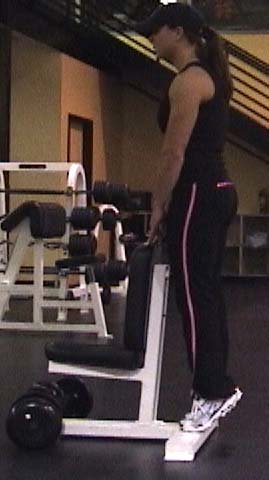
Wear Solid Soles Or Nothing At All
- When you do a
- or
- , all the power generated by your body to lift that weight goes through your feet. Here's the problem: if you're wearing soft-soled running shoes (as most people do when training) that are designed to ABSORB impact and resistance, you're actually losing some of the force that should be going towards lifting that weight.
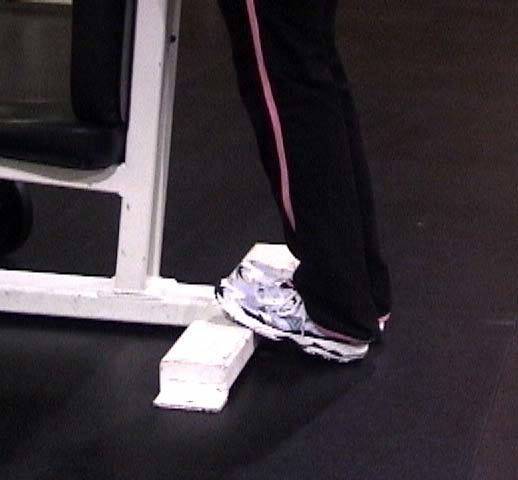
Think about it - when you lift the weight and push down hard, your feet squish down into the shoes. That pushing force is then lost (in fact, the down force from the weight may even reduce the energy-absorbing effects of your running shoes over time as the soles get more and more compressed from the lifting).
If you wear solid-soled or thin-soled shoes (like court shoes) or even work boots (clean ones!), you're not going to lose nearly as much of that pushing force and you'll be able to move more weight.
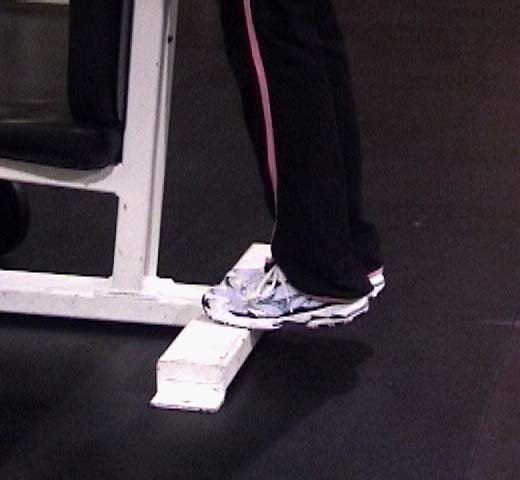
If you've ever had trouble getting a deadlift off the ground or coming out of the bottom of a squat, try it with solid-soles or barefoot next time and see if you feel the difference.
If you've gone into a gym and seen somebody doing squats or deadlifts in bare feet or sock feet, this is the reason why. With no shoes at all, they're minimizing any force that could be lost in their footwear.
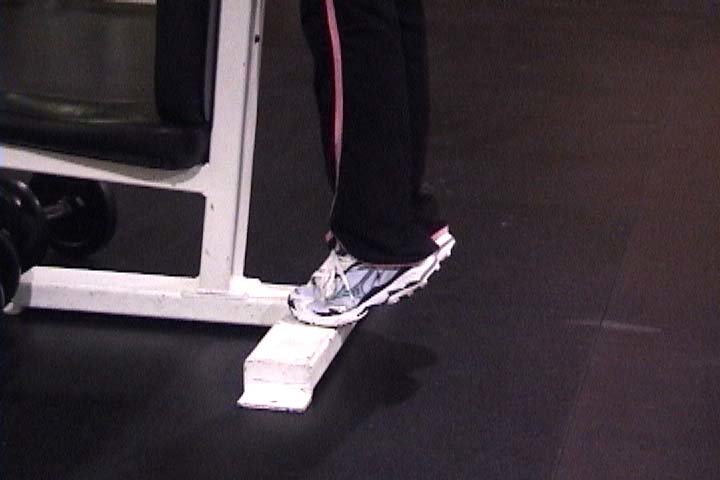
If you decide to try squatting or deadlifting barefoot or sock footed, just be very careful not to drop anything on your feet and put your shoes back on in between sets so you have protection from other people dropping things on them!
8. Crunches
![]() Feet On The Wall
Feet On The Wall
- A good way to get more resistance when doing a regular crunch is do them with your feet placed up on a wall about two feet up (feet flat on it) and your knees bent about 90 degrees.
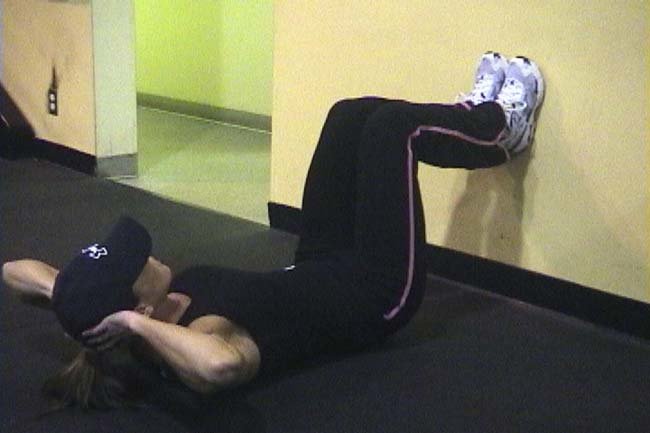
 Click Image To Enlarge.
 Crunches.
As you crunch up, push hard against the wall. This will activate the abdominals from the other direction, allowing you to work against the resistance provided by your feet pushing back. This technique is very useful when traveling providing a more effective ab workout.
9. Wrist Curls
![]() Concentration Wrist Curls
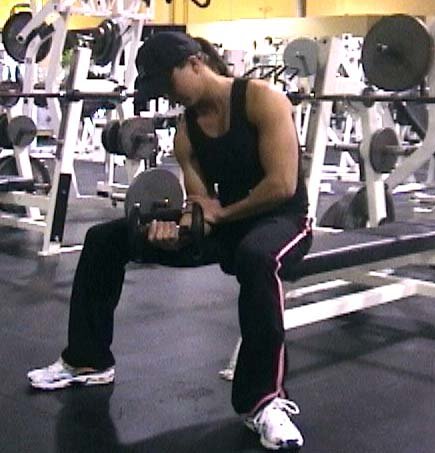
Concentration Wrist Curls
- This is a variation on the dumbbell wrist curl. These are done sitting on the end of a bench. Anchor your elbow in the upper/inner part of your thigh, just to the right of your crotch with your legs wide.
The tip of your elbow should be just below your hip bone. Let your forearm dangle down at about 45 degrees with your hand pointing diagonally to your other knee. Bend over at the waist.
Stabilize your forearm by gripping your right bicep with your left hand just in the crook of the elbow. Do a wrist curl from there. This will hit the belly of the muscle.
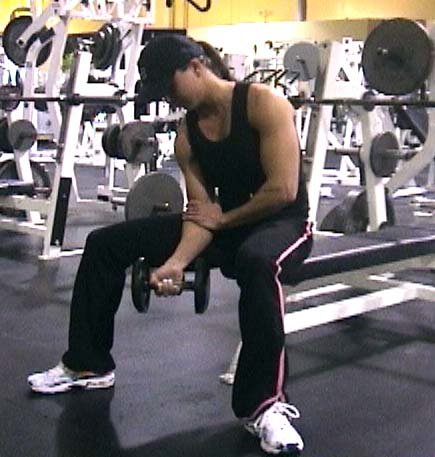
 Click Image To Enlarge.
 Concentration Wrist Curls.
When you fail with this technique, switch to the regular supported style (with your forearm resting fully on your thigh). Alternate arms back and forth with no rest for three to five sets. Experiment with position a little to find the groove of the exercise.
10. Leg Curls
![]() Hitting The Inner & Outer Hams
Hitting The Inner & Outer Hams
- Turning your feet in or out as you do the leg curl affects different areas of the hamstrings. Turning your toes out as you curl up will hit the outer area (semitendinosus and semimembranosus) while angling your toes in as you curl up will hit the inner area (biceps femoris and adductors).
You can tell which you need to work on by noticing which way your toes tend to point as you go to failure on leg curls. If your toes tend to point in, your inner hamstrings are stronger and you should work more on your outer hamstrings. If your toes tend to point out, your outer hamstrings are stronger you need to work on your inner hamstrings.
This will ensure hamstring balance and help prevent imbalance injuries, especially if you're involved in sports that require sprinting and fast, powerful movements.

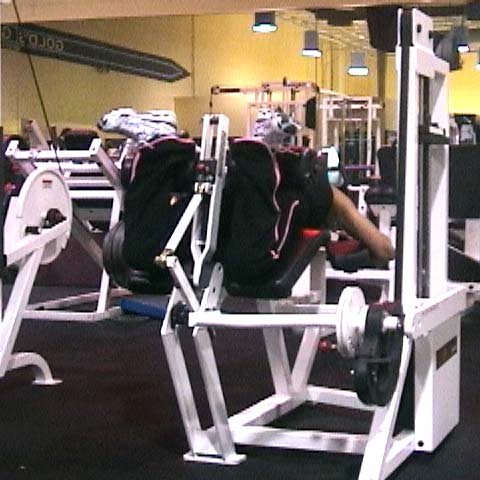 Click Image To Enlarge.
 Turning Out.
The turning of your feet as explained previously can be done a few ways. It can be done at the start of the rep and held, it can be done during the positive phase of the rep or during the negative phase of the rep, or both. This is kind of like supinating your feet (like your supinating forearms in dumbbell curls) to get an extra contraction.
To hit the inner hamstrings, start with your toes splayed out wide (your toes will be flexed, not pointed). As you curl up, internally rotate at the hip joint so your toes point inward at the top.
Do the opposite motion (start pointing in and finish pointing out) to hit the outer hamstrings hard at the top. The movement requires a little practice to get comfortable with so start with a light weight the first time you use them.
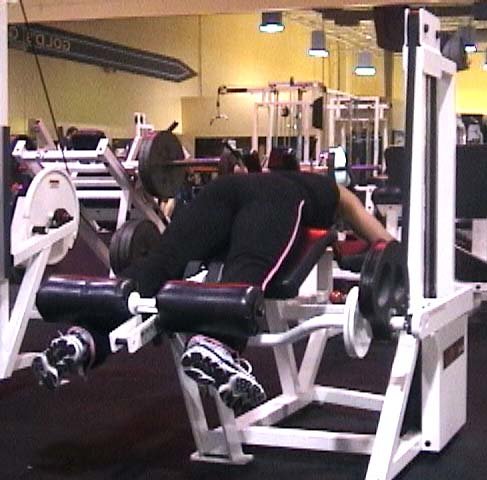
 Click Image To Enlarge.
 Turning In.
These rotational movements can be done all focused either on one type of rotation only (e.g. do one set with reps rotating inward or outward) or the movements can also alternated with each rep.
For example, do one rep for inner hamstrings starting with toes wide then turn them in, lower the weight, toes in, then do a rep for outer hamstrings (your toes are already in the toes-in start position), lower the weight with toes wide, repeat.
Want more great tips for exercises you already know? Have a read through the following articles:
- Exercise Of The Week: Pulldowns To The Front.
- Squats And Speed Development?
- Deadlifts: The King Of Mass-Builders?
- Killer Biceps!