Ladies: Strengthen The Weak Point That's Limiting Your Upper Body!

Think your struggles with handstands or push-ups are all about big muscles? Think again. The muscles around one small, vulnerable joint could be holding you back. Here's your plan to fortify them!
They say you are only as strong as your weakest link. This was certainly my experience the first time I ever tried kicking into a handstand. Even though my muscles were strong enough to hold me in place, I couldn't believe how hard it was on my wrists.
As a personal trainer, I've also seen this in many of my clients, and women in particular. Certain exercises like overhead presses, handstands, and even push-ups would cause pain or discomfort in their wrists. This leads them to give up on worthy goals like handstand push-ups, elbow levers, and just solid introductory bodyweight training before they've given themselves a chance to succeed.
Putting all of your body weight on the smaller muscles of your wrists and hands can be intense, especially if you are trying to lose weight. There are all sorts of wrist wraps available on the market, but those only mask the issue rather than attempting to fix it. Thankfully, by using the techniques outlined in my progressive calisthenics training, I've eliminated any pain in my wrists associated with these movements and helped many of my clients overcome their issues as well.
The muscles of your body—including the wrists—repair easier than your joints due to the abundance of circulation they receive. Your joints take more time to adjust, which is why it is important to have a solid foundation in certain isometric bodyweight exercises before moving on to more advanced movements.

How to Use These Exercises
The following exercises are listed from least to most difficult and can be used in a progressive manner at different stages of your training. Find the one that is appropriate for your level, and build to a 60-second hold before moving forward. Then, keep them in your practice or warm-up moving forward so you don't lose that strength!
Before you begin, it can help to warm up your hands by opening and closing them several times, extending your fingers fully, then returning to closed fists. I also recommend wrist rolls, in which you clasp your palms together with your fingers interlaced, then roll your wrists in circles and from side-to-side.
You may recognize some of these exercises from traditional bodyweight training or other disciplines like yoga. Practicing these movements not only made me better at skills like hand balancing, but also helped increase my overhead-pressing strength without even lifting any external weights.
Remember, even though we are emphasizing the muscles of the upper body, there is no true "isolation" exercise—especially when you're doing calisthenics. The more you learn to tense your legs, abs, and glutes while you practice these, the less pressure will be applied to your wrists.
Downward Dog
This is a great beginner step if you are unable to support your weight on your hands in other positions, as it distributes more of your weight into your legs. It's also simply a great move that can do wonders for the shoulders, back, and legs. Basically, I'm saying you need more dog in your life!
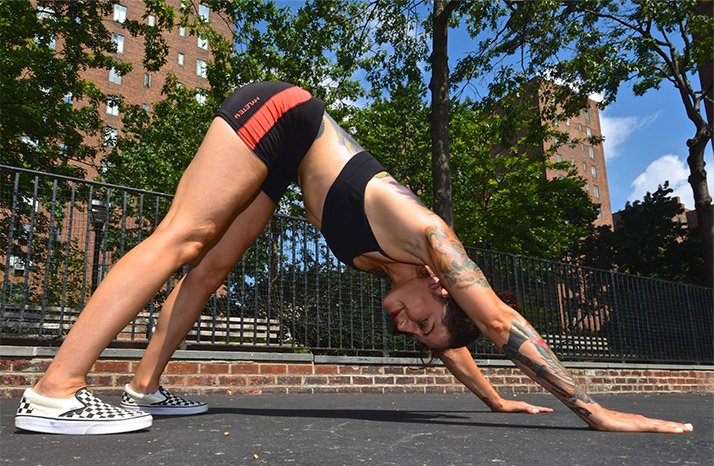
Downward Dog
Begin on all fours in a tabletop position with your hands on the ground around shoulder-width apart and your knees hip-distance. Curl your toes under, and begin to extend your legs as you push back through your heels. Your body should be bent in half at the waist with your hips reaching upwards and your arms and legs both extended. If you are particularly tight in your hamstrings or calves, you may need to bend your knees and lift your heels.
When you feel solid in your downward dog with your arms and legs both fully extended, you can advance this exercise by picking up a leg and extending it upward as you hold the pose. Don't forget to alternate sides!
Push-Up-Position Plank
Traditionally, the plank is performed on your forearms, but for the purposes of strengthening your wrists, I prefer to practice on the hands with the arms fully extended as you would in the top position of a push-up.
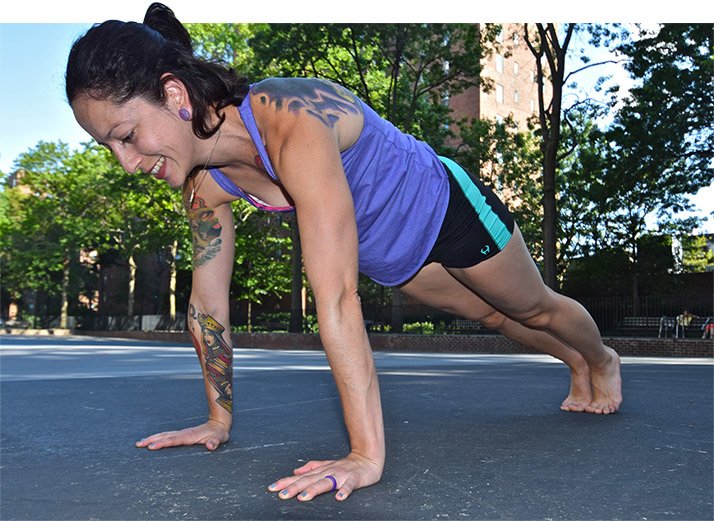
Push-Up-Position Plank
When you place your hands on the ground, focus on spreading your fingers and evenly distributing the weight beneath your palms. Turn your inner elbows as far forward as you can in order to fully extend your arms. Your shoulders should align over your elbows and your wrists. Do your best to spread through your shoulder blades as you hollow out your abs and actively press away from the ground. Your abs and glutes should be tense, to assist your upper body in supporting your weight. Squeeze your kneecaps with the strength of your quads and press back through your heels to keep your legs extended and active.
You can intensify this movement by lifting one foot off the ground, bending your knee, and bringing it in toward your chest. It can help to lean your weight into your fingertips and round your upper back to get your leg in close to your body. Extend your leg back, and place it next to the opposite leg before performing a repetition on the other side.
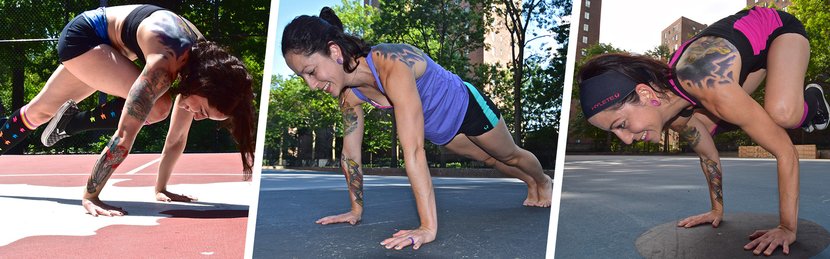
Crow Pose
If learning how to hold a handstand is a goal of yours, then this is a great place to start. It's also a great entry into the world of hand balancing.
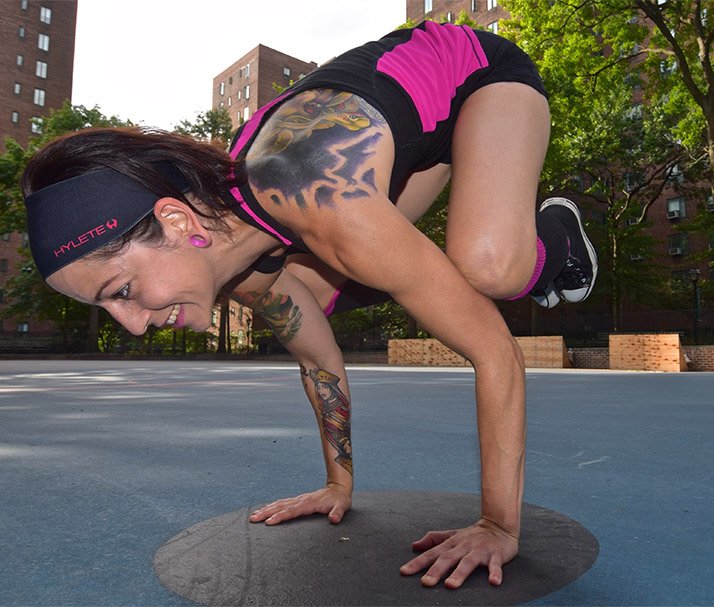
Crow Pose
Begin in a deep squat position with your arms directly in front of your legs and your hands flat on the ground. Lift your hips, and lean forward as you bend your elbows and rest your knees on the backs of your arms. Once you lean forward far enough, your feet should come off the ground as you balance on your triceps. It can help to point your toes and actively press away from the ground to help you stay balanced.
Handstand
Learning to balance in a handstand was one of my first goals that inspired me to begin my calisthenics journey—and overcoming my wrists was one of the biggest hurdles holding me back initially. Training the earlier progressions over several years helped me improve to where I can now hold a handstand for up to 30 seconds and even press up from a crow pose. The handstand can be an elusive skill, but with patience and consistency, you can achieve this awesome move.
The best way to begin is to get comfortable holding a handstand against a wall. Finding the balance in a handstand can take years of practice, which is why if you are trying to strengthen your wrists first, you should use a wall for support; it will allow you to stay in position for longer periods of time.
Begin by facing a wall with both hands on the ground, your front knee bent and the other leg extended behind you. Hop off your bent leg and reach your extended leg toward the wall. It may take a few hops before you finally hit the wall. Make sure to keep your arms straight with your elbows fully extended. Remember, "when the elbows bend, the power ends." Try to relax and breathe once you're in position while actively pressing away from the ground and tensing your body.
Fingertip Plank
Planking on your fingertips is a great way to strengthen the muscles of your forearms, hands, and wrists. Those muscles play a huge part in supporting the fingers during this exercise, which is what makes it such an integral exercise for strengthening your grip, too.
When you are starting out, it's not uncommon to feel pressure in your fingers, so take plenty of breaks as needed. It might help to warm up your hands by opening and closing them, extending your fingers fully, then returning to a closed fist several times.
Begin on all fours with your hands on the ground around shoulder-width apart. Spread your fingers and lift your palms away from the ground so you are on the pads of each finger. Extend one leg back behind you and then the other until your body is in a plank position. Actively press away from the ground and tense your abs, glutes and legs as you hold the position. You can also practice these on a mat or on the grass to put a little more padding between your digits and the ground.
Whether your goal is to further explore the world of hand balancing or simply maintain the health of your wrists while you train, applying the techniques learned in these exercises can benefit both. Shore up your weakest link, and you'll be stronger, period!