
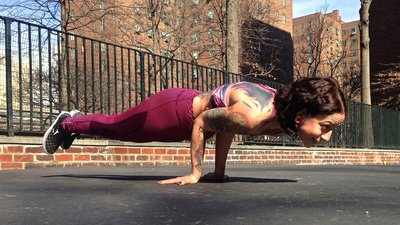
One of the most exciting aspects of calisthenics is learning unique skills that take weeks or even months to build up to. Then, when you can finally do a clean rep or two, you discover that you did a lot more than just add a cool parlor trick to your resume. You're also just straight-up stronger! Maybe your push-ups, pull-ups, or handstand push-ups also mysteriously took a big step forward, or you can just rock through your normal workout a little easier than before.
The elbow lever is this kind of move. The first time I successfully pulled one off, it made me feel like an athlete and reminded me of what made working out fun in the first place. Skills training can keep you enthusiastic about working out and training for life. Not only can you get the results you desire physically, you can also have fun doing it!
Train the elbow lever seriously, and you'll discover that it's also a great exercise for strengthening your spinal erectors, pecs, abs, quads, glutes, and wrists. Curious? You should be!
Did You Say Wrist Strength?
A common weakness for many of my female clients has been their wrists. The elbow lever is great for strengthening the extensor muscles of your arms, and it will help you build strength to support your wrists in moves like push-ups, handstands, and even front-squat variations.
Furthermore, for spinal extension, which is the type of exercise the elbow lever is, your choices at the gym are often limited to waiting for the Roman chair or flopping around on the ground doing back extensions. You can practice lever progressions at home, work, or pretty much anyplace else you want, and they're also perfect for active-recovery days when you're resting from heavy training but are still itching to do something physical.
Perhaps most importantly, mastering a skill like this demands that you work out more! Focusing on creativity in your training will shift your focus from just trying to build muscle or lose weight to improving your movement arsenal. You will be more enthusiastic during your workouts, but as a side effect, you will most definitely be making strength gains.
Here's how to take your training to the next level with the elbow lever. It took me over a year to finally nail this move, so be patient with your progress, milk each step, and enjoy the ride. Remember, you're building strength as you get closer to the movement, not just when you nail it!
Warm-Up Essential 1: Eagle Arms
This is a stretch from yoga that can help you warm up your shoulders for the intense mobility required to perform an elbow lever. I recommend doing it regularly, but especially before you start your lever practice.
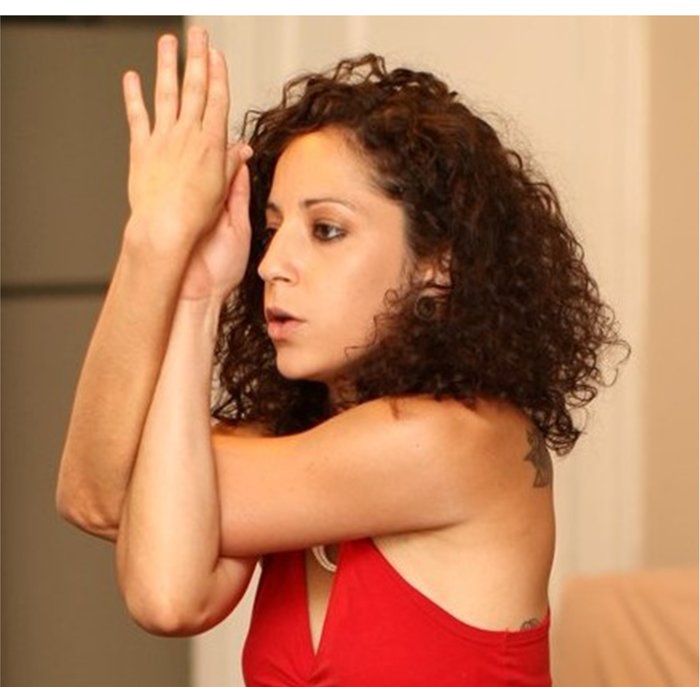
Eagle Arms Stretch
To do this stretch, cross your arms so your top arm's elbow is in the elbow pit of your bottom arm. Then, cross your wrists so you can bring your palms together. You should feel a deep stretch in your upper back, delts, biceps, and wrists. Hold for 30 seconds on both sides.
Remember to switch the crossing of your arms so you stretch both sides of your body evenly.
Warm-Up Essential 2: Bridge
The ability to hold a lever takes tremendous back and glute strength as well as serious wrist strength and flexibility. Bridge training can help you develop all of those while also improving your posture and opening up your thoracic spine like nothing else.
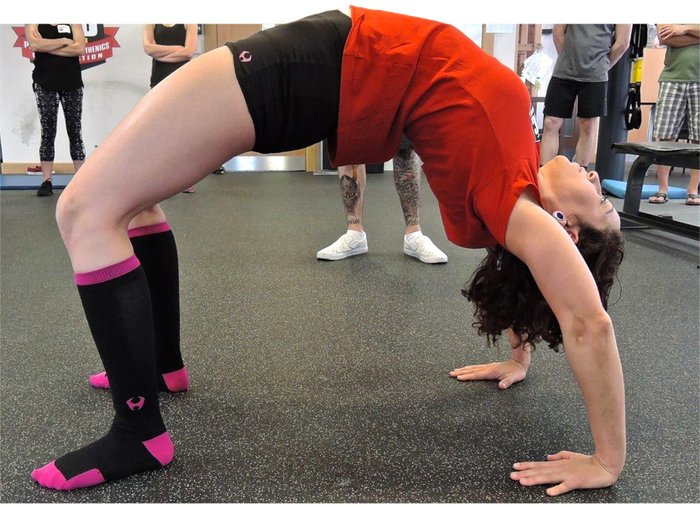
Bridge or "Wheel Pose" in Yoga
I usually warm up with a few bridges, focusing on glute activation, before I work on levers. This will help you learn to fire up your posterior chain during a lever hold. Build up to three 20-second holds.
Progression 1: Elevated Lever
It can help when you're learning the elbow lever to practice on an elevated surface. This will allow some room for your legs to hang while you work on getting strong enough to extend your back and lift your legs completely horizontal.
Elevated Elbow Lever
Find a box, bench, or other stable object to practice on, and stand in front of it. Bring your elbows inward toward your midline, and place your palms flat on the bench/box with your fingers pointing towards you. Ideally, your elbows should be bent and positioned inside your hip bones. Slowly begin to shift your weight onto your arms as you bend your knees and lift your feet off the floor. Keep opening the angle at your elbows as you squeeze your glutes and extend your chest upward.
When starting out, keep your knees bent in a tucked position. As you build strength in your abs, shoulders, back, arms, and wrists, your next step should be to extend your legs into a straddle position and eventually work toward bringing them together.
Progression 2: Wall Lever
Once you feel confident practicing your elbow lever on an elevated surface, the next step is to bring it to the ground—but still with some help. I recommend using a wall for support to give you an idea of the muscle tension required to get into the full elbow lever.

Wall Lever
Begin in a plank position, facing away from a wall, with your legs fully extended and your heels pressed up against the wall. Position your arms in the lever position, with your elbows inside of your hip bones, and begin to shift your weight onto your hands as you walk your feet a few inches up the wall. Focus on pushing your feet into the wall to help you engage your quads and glutes and extend your chest upward.
Tuck Lever, Straddle Lever, And The Full Lever
When you're ready to try this move away from the wall, follow all the same steps as the above variations. It will probably help to keep your knees bent in order to "shorten" the length of your body and make the move slightly more manageable.
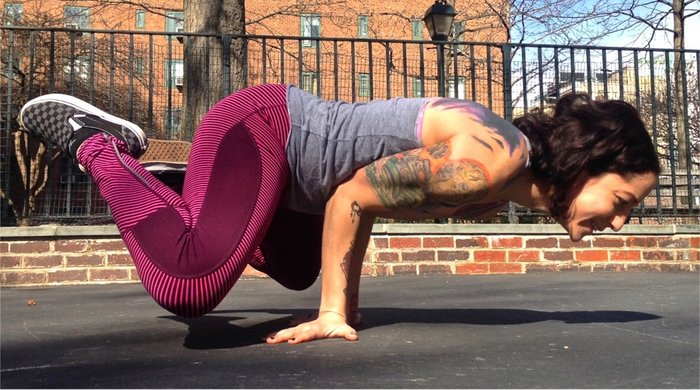
Tuck Lever
As you get stronger, work toward slowly extending your legs out into a straddle position, again to make the leverage more favorable. With practice, you will be able to fully extend your legs and bring them together. Remember to move your legs slowly to stay balanced as you transition from tuck, to straddle, to the full elbow lever. This is a precise move that's all about control. And yes, it may take a while, so be patient!
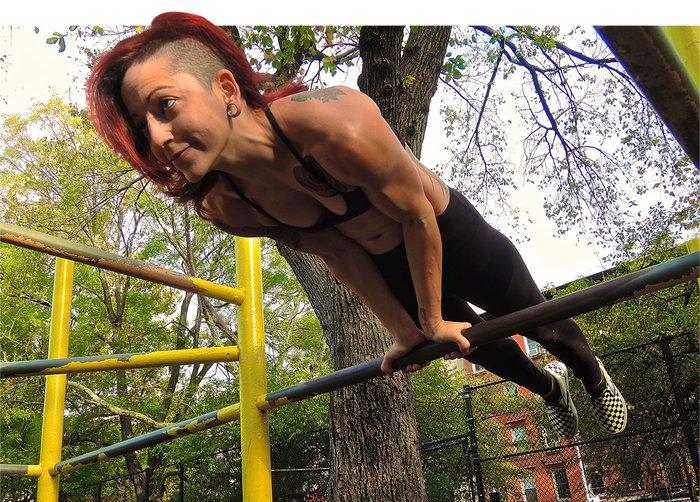
Beyond The Elbow Lever
The variations of this move don't stop once you get your legs together. Once you can hold an elbow lever for a few seconds, you can try a staggered hand variation that will help you work up toward the mighty one-arm elbow lever. In this exercise, you balance on one arm as you extend your other arm in front of you.
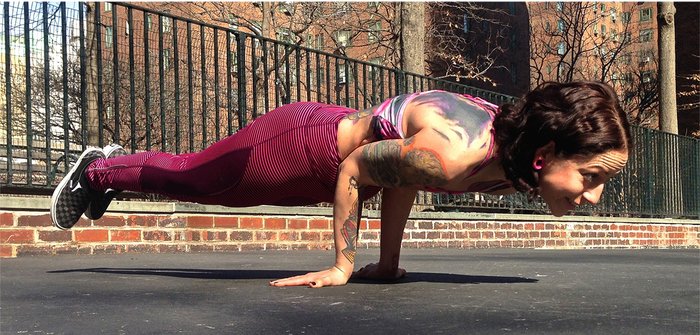
Full Elbow Lever
For this variation, position one elbow in the center of your hip bones, and fully extend your other arm in front of you. The idea is to eventually lift the hand of your extended arm while only balancing on one arm. You can progress it gradually by lifting all your fingers individually until you can lift your entire hand.
When you can do that, you've developed not only balance, but also crazy full-body strength and muscle control. Now, that's the full package!