
Ever wonder what it takes to be successful tennis player? I can tell you that it takes a lot of hard work and determination. The training can get intense and if done incorrectly, could ruin your chances of ever making a career out of the sport.
This article will give you some insight on everything you need to know about training for tennis and also some extra information on what muscle groups are involved in certain movements.
Muscles Used In Tennis Drives, Volleys, & Serves:
Push-Off: Soleus, gastrocnemius, quadriceps, gluteals
Trunk Rotation: Obliques, spinal erectors
Forehand Swing: Anterior deltoid, pectorals, shoulder internal rotators, elbow flexors (biceps), serratus anterior
Muscles Used In The One-Handed Backhand Volley And Drive:
Push-Off: Soleus, gastrocnemius, quadriceps, gluteals
Trunk Rotation: Obliques, spinal erectors
Backhand Swing: Rhomboids and middle trapezius, posterior deltoid, middle deltoid, shoulder external rotators, triceps, serratus anterior
Muscles Used in the Two-Handed Backhand Drive:
Push-Off: Soleus, gastrocnemius, quadriceps, gluteals
Trunk Rotation: Obliques, spinal erectors
Backhand Swing Nondominant Side: Pectorals, anterior deltoid, shoulder internal rotators
Backhand Swing Dominant Side: Rhomboids and middle trapezius, posterior deltoid, middle deltoid, shoulder external rotators, triceps, serratus anterior
Muscles Used In The Serve And Overhead:
Trunk Rotation: Obliques, spinal erectors
Knee And Hip Extension Before Impact: Quadriceps, gluteals
Arm Swing: Pectorals, shoulder interior rotators, latissimus dorsi, triceps
Arm Extension: Triceps
Wrist Flexion: Wrist flexors
Physiological Aspect:
- For a successful match, a tennis player needs a combination of strength, power and muscular endurance.
- Muscle hypertrophy is not needed as much as the other aspects because technique is a key in the game of tennis, not just power.
Injury Prevention
Most Common Sites For Injury:
- Back (overuse from transferring forces)
- Shoulder (rotator cuff tears)
- Knee (overuse and stress on the patella)
- Ankle (ligaments in the ankle)
- Elbow (degenerative changes in tendon base and splintering of tendon fibers)
- Leg (muscle tears)
- Wrist (overuse of ligaments)
Keys To Preventing Injuries:
- Warm-up/Cool-down
- Flexibility
- Strength Training
- Aerobic Training
- Anaerobic Training
- Sport Biomechanics
If Injuries Occur Use the RICE Method to Treat:
- Rest
- Ice
- Compress
- Elevate
Warm-Up
Do a light 5-minute warm-up to get the blood circulating and tissues of the body ready for the workout. Do this each day before the workout begins.
- Slow jog or low-intensity stationary cycling
8-Week Workout Program
3 Day Split (Week 1-4)
- Use light weights at 40% of your 1RM
- Rest for less than 30 seconds between sets

BodyFit
$6.99/month- 2,500+ expert-created single workouts
- 3,500+ how-to exercise videos
- Detailed workout instruction
- Step-by-step workout tips
- Training at gym or at home
- Access to Workout Plans
- Access to Bodyfit App
- Store Discounts
Already have a Bodybuilding.com account with BodyFit? Sign In
What comes with BodyFit?
- Instructional Videos
Don't risk doing a workout improperly! Avoid injury and keep your form in check with in-depth instructional videos.
- How-to Images
View our enormous library of workout photos and see exactly how each exercise should be done before you give it a shot.
- Step-by-Step Instructions
Quickly read through our step-by-step directions to ensure you're doing each workout correctly the first time, every time.
4 Day Split (Week 5-8)
BodyFit
$6.99/month- 2,500+ expert-created single workouts
- 3,500+ how-to exercise videos
- Detailed workout instruction
- Step-by-step workout tips
- Training at gym or at home
- Access to Workout Plans
- Access to Bodyfit App
- Store Discounts
Already have a Bodybuilding.com account with BodyFit? Sign In
What comes with BodyFit?
- Instructional Videos
Don't risk doing a workout improperly! Avoid injury and keep your form in check with in-depth instructional videos.
- How-to Images
View our enormous library of workout photos and see exactly how each exercise should be done before you give it a shot.
- Step-by-Step Instructions
Quickly read through our step-by-step directions to ensure you're doing each workout correctly the first time, every time.
- Use moderate to heavy weights at 70% of your 1RM
- Rest for 1-2 minutes between sets
- For rotator cuff use only light weights (2-5 pounds)
- For lateral raises and front raises use only light weights (10-20 pounds)
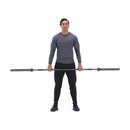
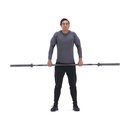
Exercise Descriptions
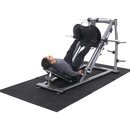
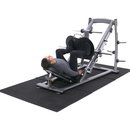
Leg Press:
Straighten your knees and hips by pressing down into the platform until they are almost completely straight. Do not lock your knees. Slowly return to the starting position.
Leg Extension:
Extend your legs upward against the resistance, straightening your knees fully. Do not hyperextend your knees. Slowly lower the weight to the starting position.
Leg Curl:
Slowly curl your feet toward your buttocks. Slowly return the weights to the starting position. Your knees should not hyperextend in the starting position.
Hip Abduction:
Slowly push your legs outward on the machine through as large a range of motion as possible. Slowly return the weights to the starting position.
Hip Adduction:
Slowly push your legs inward on the machine through as large a range of motion as possible. Slowly return the weights to the starting position.
Standing Calf Raise:
Keeping your knees straight and trunk upright, raise your heels off the ground until you are standing on the balls of your feet. Slowly return to the starting position. Move through as large a range of motion as possible.
Begin this exercise standing flat on the floor, and progress to performing it with your toes on a step or on the platform of an exercise machine. This position allows the heels to drop below the balls of the feet when you start and allows you to exercise through a larger range of motion.
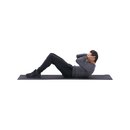
Abdominal Crunch:
Curl the upper body from the floor, including the head and the shoulders, until you can feel the abdominal muscles contracting. The upper body should be off the ground by about three inches at the shoulder blades. Lower until the shoulder blades touch the ground and repeat.
Crossover Crunch:
Curl the upper body so the elbow opposite the elevated knee moves toward it diagonally. Repeat this movement on the opposite side.
Russian Twist:
Rotate side to side, turning the shoulders until the arms are at a 90- degree angle with the body. Make a full twist to the opposite side. Over and back makes one repetition.
Back Hyperextensions:
From a lowered starting position, raise the upper body until it is in a line with the rest of the body or until the back is tight. Lower the upper body to a 30-degree angle or just before the lower back curves.
External Shoulder Rotation:
With the right hand near the abdomen, slowly raise the hand until the forearm is just short of vertical to the body. Slowly lower to the starting position and repeat.
Prone Horizontal Abduction:
Raise the arm out to the side at a 90-degree angle until it is almost parallel to the floor. Lower it to the starting position and repeat.
90-90 External Shoulder Rotation:
While maintaining a right angle at the elbow, externally rotate the forearm until it points to the ceiling (90-degree abduction). Slowly lower it and return to the starting position.
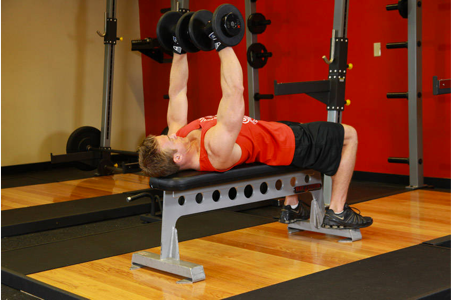
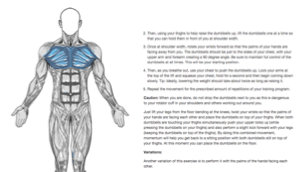
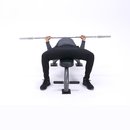
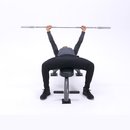
Chest Press:
While keeping the wrists directly over the elbows and not locking the elbows, extend the hands toward the ceiling. As you extend your hands upward, round your shoulders pushing your hands as far away from you as you can.
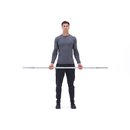
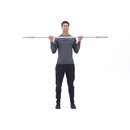
Lat Pulldown:
Using a wide pronated grip, grab the bar with both hands. Pull the bar down to you chest and pinch your shoulder blades together on the movement down. Slowly raise the bar back up to the starting position with control and repeat.
Seated Row:
Using a close grip, grab the bar with both hands. While keeping the upper body erect and not leaning backward, pull the bar toward the chest and upper abdomen area. Keep the elbows close to your sides. Slowly return to the starting position and repeat.
Bicep Curl:
Keeping your shoulder at your side, bend your elbow and bring the weight toward your shoulder. If you have chosen the weight correctly, you should not be arching your back or leaning backward during the exercise. Slowly return the weight to the starting position, making sure you don't hyperextend or lock your elbow.
Triceps Extension:
Straighten your elbow by raising your hand and weight upward, making sure the elbow does not lock. Slowly lower the weight to the starting position and repeat.
Shoulder Shrugs:
Keeping your arms at your sides, raise your shoulder upward toward your ears. Return to the starting position by slowly lowering your shoulders and repeat.
Front Raises:
Grip the dumbbells with a pronated grip and hold them in front of your body. Slowly raise the weights straight up in front of your face keeping your elbows almost locked.
Lateral Raises:
Grip the dumbbells so that they hang by your sides with the palms of your hand facing your sides. Slowly raise the weights to your sides keeping your elbows almost locked out. Once your arms are parallel with the ground, slowly and in a controlled manner lower the weights back down to the starting position.
Two-Hand Side-To-Side-Throw:
To begin start with a medicine ball in your hands and your arms cocked backward. Then using both arms, throw the ball to the rebounder or partner, keeping the arms extended. When the rebounder or partner returns the ball, catch the ball over the opposite shoulder and immediately repeat the throw.
Single-Arm Throw:
Stand in a upright position with feet shoulder-width apart and face the rebounder or partner. Raise the medicine ball in one hand to a position of 90-degrees shoulder abduction and 90-degrees elbow flexion with the arm rotated so the forearm points to the ceiling. Using one arm, throw the ball to the rebounder or partner. When the rebounder or partner returns the ball, catch the ball in the starting position, allow some shoulder external rotation, and immediately repeat the throw.
Single-Arm Alternate-Leg Bound:
Push off with the left foot as it contacts the ground. During push-off, bring the right leg forward by flexing the thigh to a position parallel with the ground and knee at 90-degrees. During this flight phase of the drill, reach forward with the left arm. Land on the right leg and immediately repeat the sequence on the opposite side upon landing.
Lateral Barrier Hop:
Jump over the barrier with both legs, using primarily hip and knee flexion to clear the barrier. Keep the knees and feet together. Land on the opposite side of the barrier and immediately repeat the jump to the starting side.
Backward Skip:
Jump backward with one leg and flex the hip and knee of the non- skipping leg to approximately 90-degrees. Both arms should be used to assist with the movement. Land in the starting position on the same leg. Immediately repeat the skip with the opposite leg.