
Kinesiology
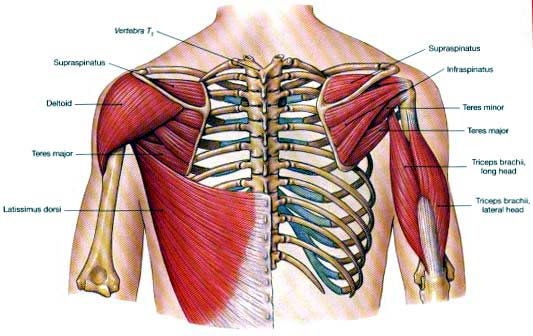
The latissimus dorsi has two main actions on the arm. It functions in adduction (pulling the arms to the sides of the body from an out-to-the-side position) and extension (pulling the arms down from a horizontal position straight out in front of the body. As we will see, knowing these two primary actions will be a great tool for understanding the proper biomechanics for latissimus dorsi exercises.
As noted above, the lattisimus dorsi muscle has a strong action in adduction of the humerus. Whenever we have our hands above our head, as with seated pulldowns or while doing pull-ups, due to the upward rotation of the scapula that accompanies glenohumeral abduction, the latissimus dorsi effectively downwardly rotates the scapula by pulling the entire shoulder girdle downward in active glenohumeral adduction. Since it is one of the most important extensor muscles of the humerus, it contracts powerfully in chinning and supinated pull-downs. Therefore, any exercise in which the arms are pulled down bring the latissimus dorsi into a full contraction. Basic rowing and pullover exercises with dumbbells or barbells are also good for latissimus dorsi development.
Any discussion of the latissimus dorsi must include a mention of the teres major muscle. The teres major is commonly referred to as the "lats' little helper" because the two have the exact same action on the arm. It is impossible to train one without the other. The origin of the teres major is on the lower edge of the scapulae (shoulder blades) above the latissimus dorsi. The insertion is on the head of the humerus, in virtually the same spot as the insertion of the latissimus dorsi.
The Biomechanics Of The Latissimus Dorsi
|
Muscle
|
Origin
|
Insertion
|
Action
|
Innervation
|
| Latissimus dorsi | Posterior crest of illium, back of sacrum and spinious process of lumbar and lower T6-T12; slips from lower 3 ribs | Medial side of intertubercular groove of humerus | Addition, extension and internal rotation of glenohumeral joint also horizontal abduction of glenohumeral joint | Thoracodorsal nerve (C6-8) |
| Teres major | Posteriorly on inferior 3rd of lateral border of scapula and slightly superior to inferior angle | Medial lip of intertubercular groove of the humerus | Extension, internal rotation and adduction of glenohumeral joint | Lower subscapular nerve (C5, C6 |
Recommended Exercises
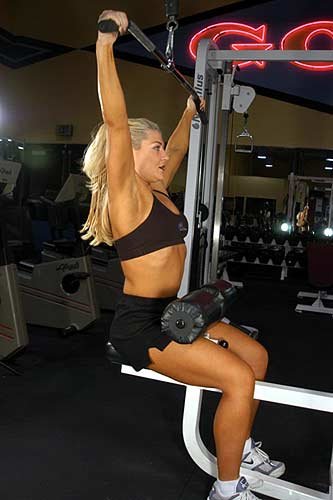
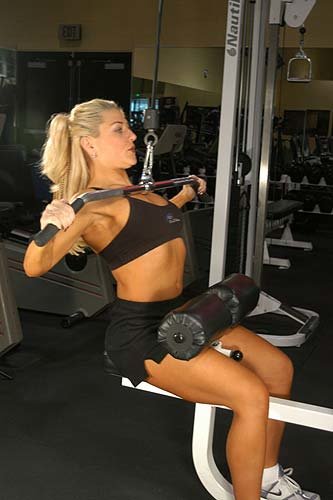
Overhead Pulldown
|
|
Proper Position:
- Grasp the bar using a pronated grip approximately 6 inches wider than shoulder width.
- Grasp the bar with the arms slightly bent with the elbows pointed away from the body.
- Make sure that the knees are placed firmly under the support pads and that your feet are planted firmly on the ground.
- Lean back slightly (approximately 15 degrees) to allow the bar to travel in a correct downward path.
- Maintain a natural arch in the lower back. This is the starting position.
Proper Form:
- From the starting position, pull the shoulder blades down and together and begin to contract the latissimus dorsi muscle by initiating contraction by bending the elbows.
- Pull the arms down and out until the bar touches your clavicle.
- Keep the scapulae retracted and depressed.
- Contract the latissimus dorsi while relaxing the hands and arms.
- In a controlled manner, return the bar back to its starting position and repeat.
Essential Tips:
- Concentrate on keeping the hands and arms relaxed while contracting the latissimus dorsi.
- Maintain a natural arch in the spine at all times.
- Keep the head and neck in a neutral position throughout the exercise.
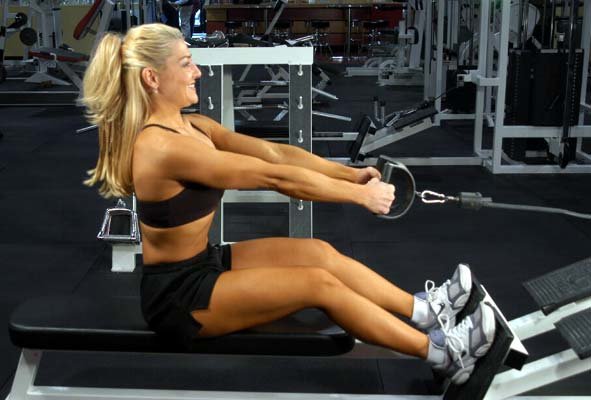
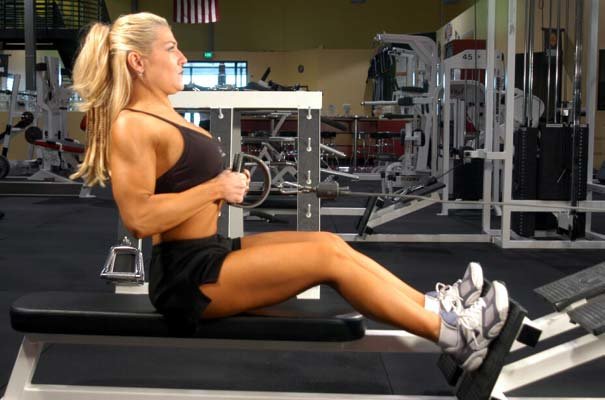
Seated Cable Row
|
|
Proper Position:
- Plant your feet firmly against the foot platform.
- Grasp the pulley handles, and with your legs push yourself while simultaneously pulling with your back until you are in an upright seated position.
- Sit up in a ready position with your hips and knees slightly bent and a natural arch in your lower back.
- Keep the elbows slightly bent pointed down. This is the starting position.
Proper Form:
- From the starting position, retract the scapula by pulling the shoulder blades down and squeezing together.
- Contract the latissimus dorsi by pulling the arms back until the elbows are about straight down from the shoulders.
- Continue to contract the latissimus dorsi as well as the rhomboids and middle trapezius.
- In a controlled fashion, return to the starting position.
Essential Tips:
- Avoid rotating the shoulders during execution.
- Keep the elbows pointed down throughout the exercise.
- Maintain a natural arch in the lower back.
- Keep the head and neck in a neutral position.
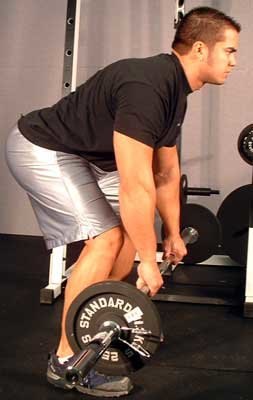
Bent-Over Row
|
|
Proper Positioning:
- Plant your feet firmly on the ground in a stance slightly wider than shoulder width apart with the knees slightly bent.
- Bend your upper body forward slightly above parallel to the floor.
- Grasp the bar with a pronated grip slightly wider than shoulder width.
- Allow the bar to hang with the elbows fully extended. This is the starting position.
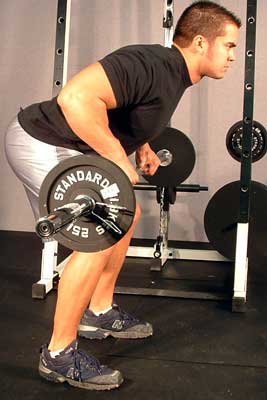
Proper Form:
- From the starting position, retract the scapula by pulling the bar up toward your lower chest.
- Continue to contract the latissimus dorsi until the elbows are pointed directly up.
- Continue to contract the latissimus dorsi as well as the middle trapezius and rhomboids, while trying to relax the hands and arms as much as possible.
- In a controlled fashion, return to the starting position.
Essential Tips:
- Avoid jerking the torso for assistance.
- Maintain a rigid upper body, with the back flat.
- Keep the head and the neck in a neutral position (focus the eyes a short distance ahead of the feet).
- Keep the torso and knees in the same position throughout the exercise.
View Nine More Lat Exercises.
Conclusion
In addition to proper biomechanics, it is essential to incorporate proper stretching techniques in your client training. The latissimus dorsi is stretched with the teres major when the shoulder is externally rotated while in a 90 degree abducted position. This can be accentuated by abducting the shoulder fully while maintaining external rotation and then laterally flexing and rotating the trunk to the opposite direction.
By having a stronger comprehension of the proper biomechanics of the latissimus dorsi muscle, as well as correct methods in which to stretch this muscle, you can successfully design a program in which you can optimize your latissimus dorsi muscle potential as well as all of your future clients. Preparation, persistence and hard work will help you reach your potential. Until next month, train hard and continue to live the fitness lifestyle.
Please direct all questions or comments to patrick@issaonline.com.
Thanks,
Patrick Gamboa BS