

Tape, in one form or another, has been used in both athletic performance and rehabilitation for many years, but the popularity of Kinesio taping has boomed recently. It even seems to be used by athletes as a badge of honor, and it's not uncommon to see neat tape creations across an athlete's body at various competitive events.
Although literature suggests tape was formally introduced by forward-thinking chiropractor Kenzo Kase in the 1970s, it wasn't until high-profile athletes like beach volleyball competitor Kerri Walsh used it at the 2008 Beijing Olympics that interest in exercise tape really took off. Since then, it's gathered steam with everyone from world-class competitors to weekend warriors.
There's nothing wrong with using tape, but it's important to understand the difference between what's best for the job versus what looks aesthetically pleasing. Get under the glue with this complete guide to athletic tape, and learn how to tape your body for specific outcomes.
How Tape Works
The scientific community isn't entirely in agreement about how tape works. Originally, people used rigid tapes to limit movement, but research suggests this is only effective early in exercise and that, as time passes, rigid tape doesn't hold as well.
It has also been suggested that tape helps with proprioception, or your body's ability to know where it is in space. This is important for every athlete because it's what tells you where your arm is when you throw, or where your leg is when you kick. The idea is that tape will help you feel what parts of your body an injury is affecting. While there's likely some truth to this, it's just one part of the puzzle.
It has been suggested that tape helps with proprioception, or your body's ability to know where it is in space.
Tape is also thought to reduce pain, and while there's likely a degree of the placebo effect involved, it's been a trusty friend to athletes for many years by lending support, providing relief, and helping them recover from injury.
Types of Tape
Not all athletic rehabilitation tape works the same way. They can be broken down into the following categories:
Rigid tape
Rigid tape is as stiff as its name suggests. It holds or reduce joint movement. The fabric has little give, and typically uses a zinc-oxide-based glue, which is strong and adheres to the skin well.
Try: Strappal or Endura
Under tape
Under tape sits directly under the rigid tape and is kinder to the skin.
Try: Hyperfix or Endura Fix
Elastic tape
Much like the material it's named after, elastic tape has a high "twistability" that offers added flexibility when applying it to your skin, muscles, and soft tissues.
Elastic tape is normally made of cotton, so it lets your skin breathe to a certain degree and transmits moisture through the material.
Try: Tensoplast and Elastikon
Felt tape
Felt tape acts as a barrier to your skin. It doesn't contain any glue, which generally makes it more comfortable.
Try: Mueller
Cohesive bandages
Much like felt tape, cohesive bandages don't have any glue in their weave, which allows them to stick to each other when they're wrapped around a joint or muscle.
Try: Coban
Kinesio-type tape
Kinesio-type tape is most commonly seen in sports because it adjusts to the skin and glides as you move.
Before You Tape Up
Before you blindly jump on the bandwagon and mummify your muscles, run through this checklist of taping do's and don'ts:
- Avoid those areas where your skin is hypersensitive.
- Avoid areas with any active eczema, psoriasis, or dermatitis.
- Don't place tape over fresh scars.
- Talk to your doctor if you have circulatory problems or are undergoing treatment for a medical condition.
- Don't tape sunburned skin.
- Remove moisturizers before you tape up.
- Don't shave the body part; hair follicles have receptors, which give your brain feedback.
- Avoid taping wrinkled skin like that on your hands and feet.
- If you feel pins and needles or numbness, remove the tape.
- Rather than peeling it off, cut the tape to take it off.
Taping Your Body
If you've decided to start taping, here's how to tackle certain body parts and specific goals!
{{caption}}
Stop Your Ankle From Rolling
The idea here is to prevent your foot from to traveling inward—a position it naturally sprains in.
- Use a glue-based adhesive tape.
- Cut or tear two pieces of fixed tape approximately 12 inches (30 cm) in length, or 6 inches (15 cm) if using Kinesio tape. The length applies to stretched tape.
- Apply the tape to the inside of your foot just above the anterior and medial malleolus. Thread the tape under the sole, avoid crinkling it, and pull up onto the anterior aspect (front) of the tibia. You want to end about 4 inches (10 cm) below the knee.
- Keep your foot in a neutral position when you apply the tape, and reinforce it with the second piece. You may need to cut two small anchor strips of about 2 inches (5 cm) in length to hold each end down. Place these horizontally across the start and finish points.
- Check for numbness or tingling, and adjust or rewrap if necessary.
Stabilize Your Knee
The tape should promote joint awareness and give a feeling of support, especially when flexing the knee during an exercise like a squat. This method is often combined with the ankle taping above.
- Use a glue-based adhesive tape.
- Cut or tear two lengths of fixed tape approximately 12 inches (30 cm) each, or 6 inches (15 cm) if using Kinesio tape. Fully extend the knee and apply each strip to the medial (inside) and lateral (outside) of the knee joint. You may need to use anchor strips on either side of the strips to hold the tape.
- Check for numbness or tingling, and adjust or rewrap if necessary.
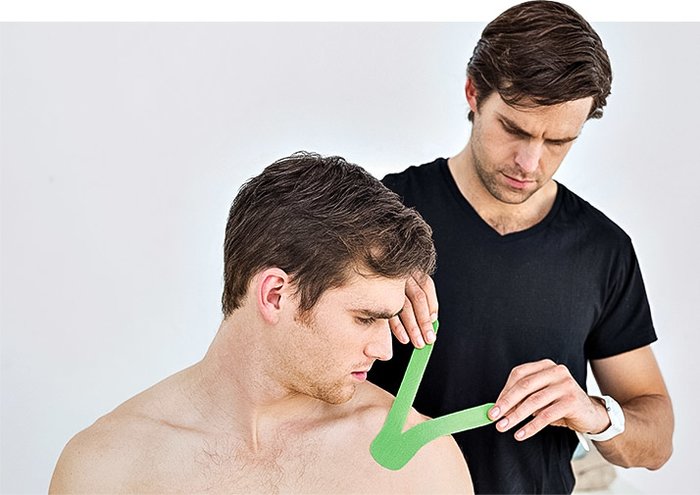
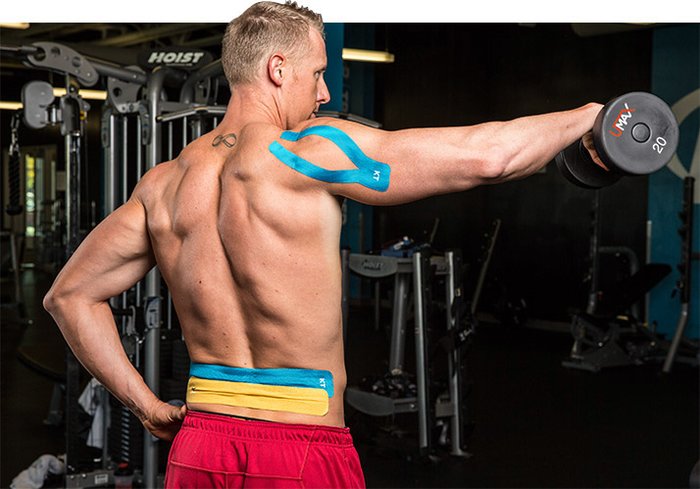
Solidify Your Shoulders
- Use a glue-based adhesive tape.
- Cut or tear three lengths of fixed tape approximately 6 inches (15 cm) each, or 3 inches (7.5 cm) if using Kinesio tape.
- Grab a partner, because you'll probably need someone else to apply this tape.
- Place your arm in neutral, and use your other arm to lift up your shoulder about half an inch (1 cm) by raising your flexed elbow. Get your partner to apply three vertical strips of tape traveling anteriorly (forward), medially (centrally), and posteriorly (backward) on your deltoid (shoulder) down your arm.
- Once taped, it should feel like your shoulder is raised a little. You should also feel like you have more awareness regarding your shoulder position.
- Check for numbness or tingling, and adjust or rewrap if necessary.
Open Your Elbows
- Use a glue-based adhesive tape.
- Cut or tear two lengths of fixed tape, one about 4 inches (10 cm) long and the other about 6 inches (15 cm). Cut them half as long if using Kinesio tape.
- Apply the tape so the two pieces join together over the painful area. Pull and apply the longer piece onto the forearm either medially (though the middle) or laterally (on the outside). You will have to play around with this to find that sweet spot where you have offloaded the discomfort and it feels better.
- Check for numbness or tingling, and adjust or rewrap if necessary.
Shore Up a Wounded Muscle
- Use an elastic, glue-based adhesive tape or cohesive bandage.
- Wrap the tape or bandage around the affected joint. Always wrap lighter rather than tighter at first, which should help reduce the swelling.
- Always check to ensure sensation is normal. You don't want to occlude the muscle joint, which can happen easily with a circumduction technique if you wrap too hard.
- Check for numbness or tingling, and adjust or rewrap if necessary.
Tape Is Not a Cure-All
- Be sensible when using tape. It's not a cure for everything. Instead, just think of taping as part of your overall routine, and make sure you pick a tape that's right for the job. There are various tapes on the market, and some are more effective than others depending on their use.
- The length of time you leave tape on varies with each product, so read the product guidelines and use common sense. If the tape causes numbness, tingling, or irritation, take it off.
- Always keep some form of timeline in mind when using tape. Kinesio tape, for example, has been left on for three days in some case studies. Any more than that and it'll start to look like you're wrapped in an old rag, which probably isn't your objective!