
For my money, the conventional deadlift is the best size and strength movement on the planet. Deadlifting's popularity has increased in recent years, and to coaches like me, that's great news. It means a lot of people are getting stronger, even if they go home from the gym with bruised shins and burning forearms.
At some point, however, every deadlift aficionado runs into a problem: Their numbers stall! A steady climb is replaced by a brutal plateau. When this happens, you have two choices: you can repeatedly hit your head against your strength ceiling, or you can identify the weak link in the chain that's stopping your ascent.
Luckily, the deadlift is a simple lift with simple problems. The solutions are also usually simple. They come in three varieties: off the ground, mid-pull, and at lockout. Here are technique-based and assistance-work-based solutions to each problem, along with guidelines about how to put them in your program.
Weakness: Off The Ground Technique Solutions
Many deadlifts die before the plates even break the floor. Grind and toil as a lifter may, that bar isn't going anywhere, and it's not because there's too much weight on the bar (except when there is).
Why does this happen? Some lifters lack the dynamic strength to get the bar moving quickly, which can be helped with assistance work. Others have a more systemic problem: Their setup is poor.

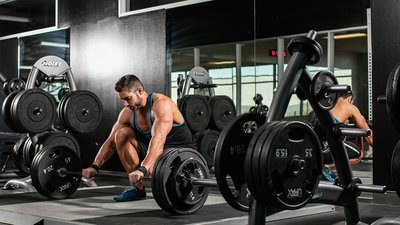
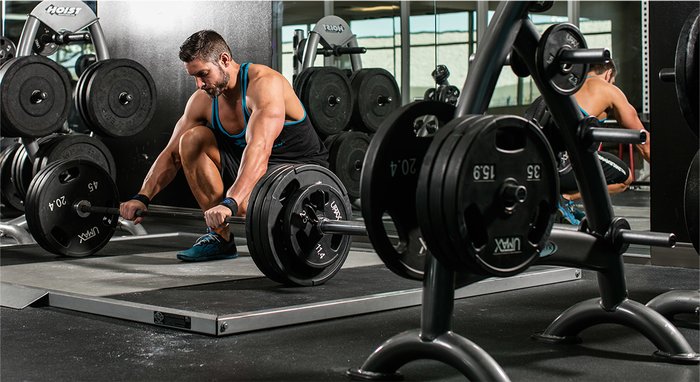
Before trying any novel solutions or extra assistance work, have someone who knows their stuff watch your form to make sure it matches up with these standards:
- You're standing tall 1-3 inches from the bar, depending on arm length, torso length, and leg length.
- You "pull" yourself down to the bar until your shins are touching it and your back is flat.
- The bar is directly under your shoulder blades at the start of the lift.
- Your hips stay lower than your shoulders throughout the lift.
- You maintain your weight in the middle of your feet throughout the lift.
Everyone has different levers based on individual body proportions. Those setup principles, however, apply to every lifter. Play with the distance you stand from the bar until you find optimal tension and hip height in the bottom position. Some folks are more upright, whereas others have their shoulders only slightly higher than their hips.
If you've nailed these benchmarks and still struggle off the floor, you might benefit from extra assistance work.
Weakness: Off The Ground Assistance-Lift Solutions
Two simple solutions will improve your pull from the ground: pulling from a deficit, and training for more tension. Both are achieved by increasing your range of motion.
Deficit deadlifts improve your pull from the floor by extending the range of motion so that you build strength beyond the normal deadlifting range. The normal range of motion essentially becomes a partial range, and you're always stronger through smaller ranges of motion. You can create a deficit by standing on plates or boxes 1-3 inches tall. For most people, 2 inches is the sweet spot.
Our second ground-conqueror is the snatch-grip deadlift. Like deficit deadlifts, the overall range that the bar must travel during a snatch-grip deadlift is greater than off the ground. The widened grip also asks the lats to be superheroes, training them to create more tension when the hands are returned to the conventional deadlift grip.
Both variations work great in any of these three approaches—but not all three at once:
- As a high-frequency lift: Choose a load around 50 percent of your one-rep deadlift max. Do 3-5 sets of 3-5 reps every day that you lift. You'll learn to own the range of motion while practicing form and building a good deadlift pattern. It's important, however, to get tight as hell and move the bar as fast as possible!
- As a main lift: Yes, you can train the deficit dead and snatch-grip dead heavily—like, 80-90 percent of one-rep-max range. Perform 3-6 sets of 1-5 reps. If you're on the high end of reps per set, do fewer sets, and vice versa for sets with lower reps.
- As an assistance lift: This is probably the most popular approach. Place them directly after your main deadlift movement in your programming. Train them lighter than you would if you were using them as a main movement, doing 3-4 sets of 4-6 reps using loads between 70-80 percent of your one-rep max.
Mid-Lift Weakness: Technique Solution
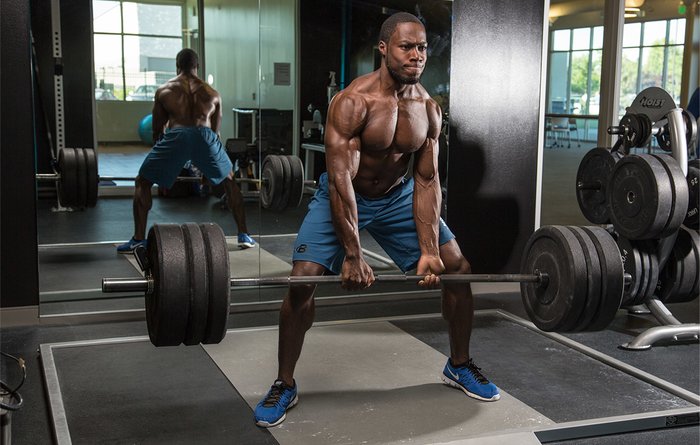
There are plenty of lifters who rocket the weight off of the floor, but once the bar approaches the knees... Son of a bee sting! As the bar leaves the floor, lat and core tension fails, the spine rounds, and the bar dangles in a holding pattern just below the knee.
If this is the case, the form cue to fix it is simple enough. Focus on staying long through the spine and pulling the bar back into your body to keep the lats tight and engaged. Seriously, get tight. No, tighter!
Some lifters, however, maintain great form and still fail to break knee level. These ladies and gents have a strength issue that can benefit from heavy work in the middle range.
Mid-Lift Weakness: Assistance-Lift Solution
Two things save deadlifts through the middle range: learning to accelerate the bar and building brute strength.
To learn bar acceleration, employ the reverse-band deadlift. Snag some 1-inch training bands, hook them around the top of a squat rack, and loop them around the bar. Be sure to put weight on the bar first, though, or the bar will rocket skyward.
The bands make it easier to pull the bar from the floor, but as the lift continues, their aid decreases. If you're not accelerating the bar through the entire lift, the lift will die as the bands slacken. You'll be able to use significantly more weight for reverse-band deadlifts than unaided deads. The key is to keep the bar moving fast through the entire lift.
Reverse-band deadlifts work best as a main lift. Perform 3-6 sets of 1-5 reps, and leave 2-3 reps in the tank at the end of each set.
To build brute mid-range strength, we'll call upon rack pulls. Rack pulls are simply deadlifts with the bar elevated on the pins in a power rack. Set them up so that the bar begins at upper-shin level, just below the knee.
While rack pulls are great, cheating on them is easy. Folks often sink their hips to create an advantageous position, rather than setting the hips at the point they would be if the bar were at the same point during a full-range pull. So, as you set up, position your hips where they would be if you started by pulling the bar from the ground. This builds specific joint-angle strength that carries over to full-range deadlifting.
Rack pulls are a great main lift and first-level assistance lift. Use them as a main lift by doing 3-5 sets of 3-6 reps. Employ them as a first-level assistance lift in the exact same way. Be sure to leave 2-3 reps in the tank at the end of each set.
Lockout Weakness: Assistance-Lift Solutions
There are the reps that fly off of the floor and cruise through the middle range only to falter before the hips are locked and the weight is owned. If a lifter has made it through the first two possible failure stages but falters at lockout, the issue is strength. Poor form would have taken the lift much earlier.
Mastering deadlift lockouts is a simple matter of preparing your body to handle a novel amount of weight. The nervous system must be introduced to heavy weight before you can expect it to successfully conquer that weight.

To acclimate your nervous system to heavy deadlifts, do high rack pulls. These rack pulls are done with the bar set slightly above the knee. It's important to stick with the same rack-pull rule mentioned earlier: Make sure to set the hips as if you were finishing a full-range deadlift, not dropping them into a squat just so you can move more weight.
High rack pulls work best as a first-level assistance exercise performed after conventional deadlifts or lower rack pulls. Perform 3-5 sets of 3-5 reps, leaving a couple in the tank.
Get Your Reps In First!
If you're new to it or returning after a hiatus, don't worry too much about picking the right assistance lifts. Just deadlift! Deadlift a few times per week with varying loads to build strength and skill. Do this for a few months, until you're able to put appreciable weight on the bar and your form is dialed in.
Once you've acquired good form and moved some weight, problems will begin to show themselves. It's then that you'll use your newfound detective skills to select the right solution. When it does, attack it head-on, and breathe new life into your dead!